Category: ice

  • Testing Out The Ghost Ice Clear Ice Tray Insert

    Tony Gonzales is a bartender and fellow ice nerd who had clear ice cube trays made. The brand is called Ghost Ice

    Well, not really trays, they're inserts that fit into insulated coolers to take advantage of the directional freezing. If you're familiar with the method of poking holes in the bottom of silicone ice cube trays and placing them on the bottom of the cooler, it's the same thing except these trays rest on the top. 

    This is a better system because you can adjust the size of the cubes you make in it. You place the tray on top of your cooler and fill it with water. Fill it so that the ice cubes are only two inches high, or all the way up to three. 


    IMG_9343
    IMG_9343


    Gonzalez originally built the trays to fit the Coleman Party Stacker cooler – a longer cooler meant for holding a lot of beer cans. Some bars have been using this cooler in their bars (if they have walk-in freezers) to make ice via directional freezing and cutting it up with a band saw like pro ice companies do. With the Ghost Ice trays, the insert makes 48 big cubes in about 48 hours. 

    However, due to popular demand, Gonzalez cut some trays down for the Ghost Ice For Home model so that they fit into the Igloo Island Breeze that everyone (me first in 2009) uses to make ice blocks at home. These make 20 cubes in about 2 days. 

    He sent me a tray to try. I put it in my freezer which at its highest setting is about -9C/15F. I let it freeze for 48 hours and it was just right – the ice had frozen in the trays and just barely underneath the tray. It made a groovy pattern in the ice below it when I pulled out the tray. 


    IMG_9372
    IMG_9372
    IMG_9372


    The ice popped out super easily, better than any other tray I've tried. I should also mention that the silicone these trays is made from is super thick and seems like it will last years. 

    The thing is that if you use this size cooler to make ice anyway, this insert actually maximizes your ice harvest compared with freezing a block of ice and cutting it up yourself. These trays go down pretty far into the cooler so that you're not wasting a lot of clear ice beneath them, plus when you carve up an ice block you lose a lot of the ice to chips and shards. With the Ghost Ice insert you can use every bit of the ice that comes out of this tray. I wasn't expecting that; a nice bonus. 

    IMG_9391
    IMG_9391


    Oh and just because I know a lot of y'all are perfectionists and may not like the slightly 'pointed' tips on these cubes, I wanted to let you know you can always flatten ice even. I used a thaw plate (remember the Thaw Master from 80s TV commercials anyone?), but you can use a cookie sheet or any conductive metal. 


    IMG_9410
    IMG_9410

    The price on these is quite steep – $300 for the large size and $150 for the small, but this is a one-person company and a custom-made product. For a bar with a walk-in freezer or other large freezer space, and a relatively small volume for cocktails to serve each night, it's a great deal over a short time – if you're paying .50 a cube for two-inch cubes from a specialty ice provider (which is low), that's only 12.5 times (25 days) you have to make ice cubes in the Ghost Tray system (plus the cost of the coolers which is low) to make your money back. 

    As a home ice nerd like me, well let's not pretend the small model isn't a big splurge. The cubes are awesome though. 

    Check out the videos on the Ghost Ice website and Instagram page for more info and demos.  


    IMG_9410


    The index of all the clear ice experiments on Alcademics is here


  • An Attempt at Recreating the Canned Water Method for Clear Ice

    A couple weeks back I reported on the work of Richard Newell, who sealed boiling water in mason jars in a canning system and found that it made great ice with few bubbles in a directional freezing system

    I don't have a canning system but I thought I'd give it a try with what I had around the house. It turns out I had a big jug, so I used that as my mason jar. 

    I boiled water for quite a while inside the jar inside a pot, and then went to screw on the cap of the jug – only to find that I didn't have a cap that fits the jug :( 

    IMG-8994

    So instead I transferred it to glass bottles for which I have plastic corks. As you can see, I filled these up all the way to the top before capping them. 

    IMG-8997


    I put the glass bottles in the freezer to cool down before transferring them to my cooler for directional freezing. As you can see, after chilling there is a lot more space in the bottle. 

    IMG-9003


    We know that hot water holds less air than cold water, so was this extra headspace the water reabsorbing air (meaning my corks weren't airtight) or that it pulled a vacuum as the water cooled? I'm not sure. 

    I poured the bottles into the cooler and froze it. Unfortunately, it did not appear that using boiled water "sealed" in bottles made for clearer ice than usual via directional freezing. It looks to be about 25% cloudy ice, which is normal.

    I might have to try actual mason jars and seal them as Newell did initially to know if sealing up boiled water improves clarity in ice. 

    IMG-9009


    The index of ice experiments page on Alcademics is here.

  • An Attempt at Clear Spheres with an Upside-Down Thermos

    Alcademics reader Andy L commented on the post about how to Make Clear Ice Balls Using a Thermos with an idea: 

    Fill the ice ball with water and set the thermos upside-down on top of it like a dunce cap. This way the ice ball mold would still be insulated on the top half: Would directional freezing allow it to freeze from the bottom-up? 

    Alas it seems not. I attempted to do this two ways:

    1. The ice ball on bottom, empty thermos upside-down on top. 
    2. The ice ball on bottom, partially-filled thermos upside-down on top. 

    The theory with the second set-up is that the water inside the thermos would provide additional insulation in case the air in the thermos wasn't doing it. 

    The set-up:

    IMG_8861


    The reveal. You can see that in the partially water-filled one on the left that the water remaining inside the thermos is frozen. On the right you can see where the water was pushed out the top hole as it froze. 

    IMG_8861

    The results: 

    IMG_8861


    In both set-ups, the cloudy part of the ice was a tornado-shaped column right up the center facing the hole (the sphere on the right is rotated sideways in the picture). So the center was the last part to freeze.

    Most likely when the first water froze it floated to the top and plugged the hole.

    Alas, it would have been great. We'll add this to the list of "experiments that didn't work" on the Index of Ice Experiments page.  


  • Canning Water to Degas it for Clearer Ice

    Today's post comes from the work of reader Richard Newell. We'll call it the "canned water" technique for improving ice clarity. 

    We know that the cloudiness in ice comes mostly from trapped air and impurities, which usually are pushed to the center of an ice cube when it freezes. The technique of directional freezing just relocates the air to one end of an ice cube/block rather than eliminates it. [see all the ice posts on Alcademics here]

    Many people have attempted degassing the water to remove the air in various ways – mostly by boiling it, but others have tried putting it under a vacuum. As far as I know, nobody has been successful at fully degassing water so that the ice made with it comes out perfectly clear. 

    Today's post unfortunately isn't a fully-degassed ice system either, but it does seem to point to a fairly large visible improvement by using water that has been "canned" – using a canning technique but canning water alone appears to improve the clarity of ice made with that water. Newell used an Instant Pot to do the canning, making it super easy. Traditionally-canned water also works. 

    Let's start with Newell's conclusions:

    • Vacuum is a good (if not essential) method of home degassing of water [in an Instant Pot]
    • "Canning" is a convenient way to "pull a vacuum" on water with simple equipment
    • A pressure cooker is not required to get good results
    • Distilled water makes little or no difference (assuming your starting water is not too bad)
    • Boiling (without a vacuum) does not do an adequate job of degassing [without sealing].
    • All of my results also depend upon top-down freezing.

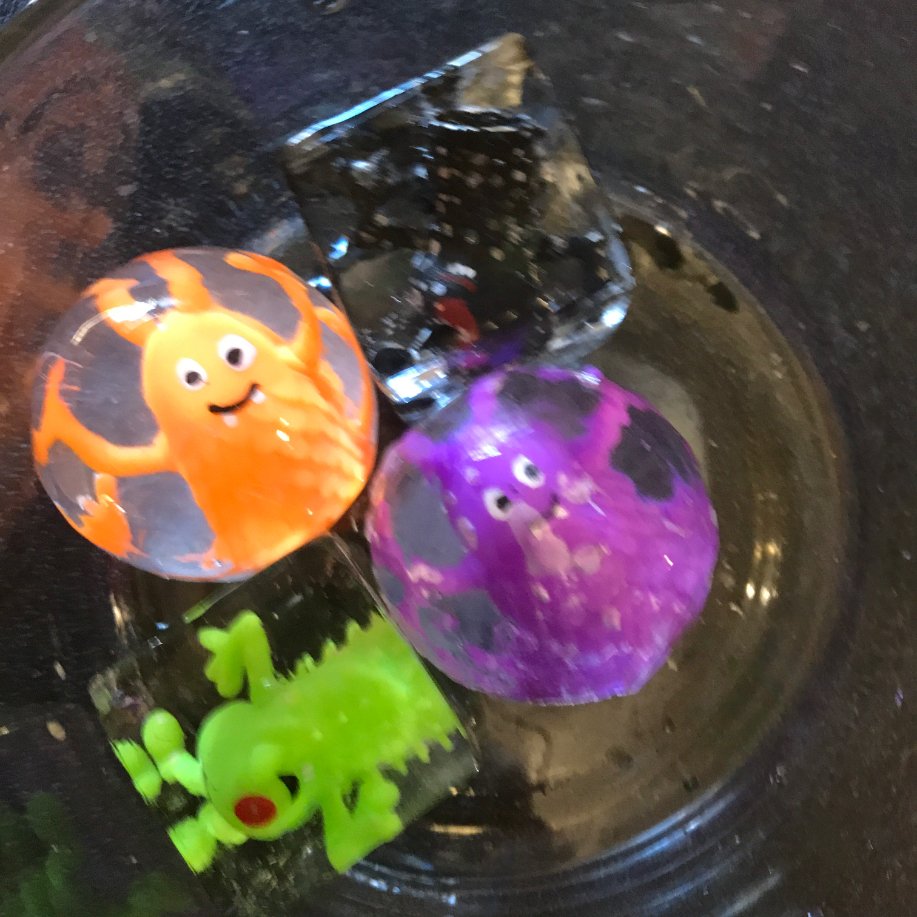
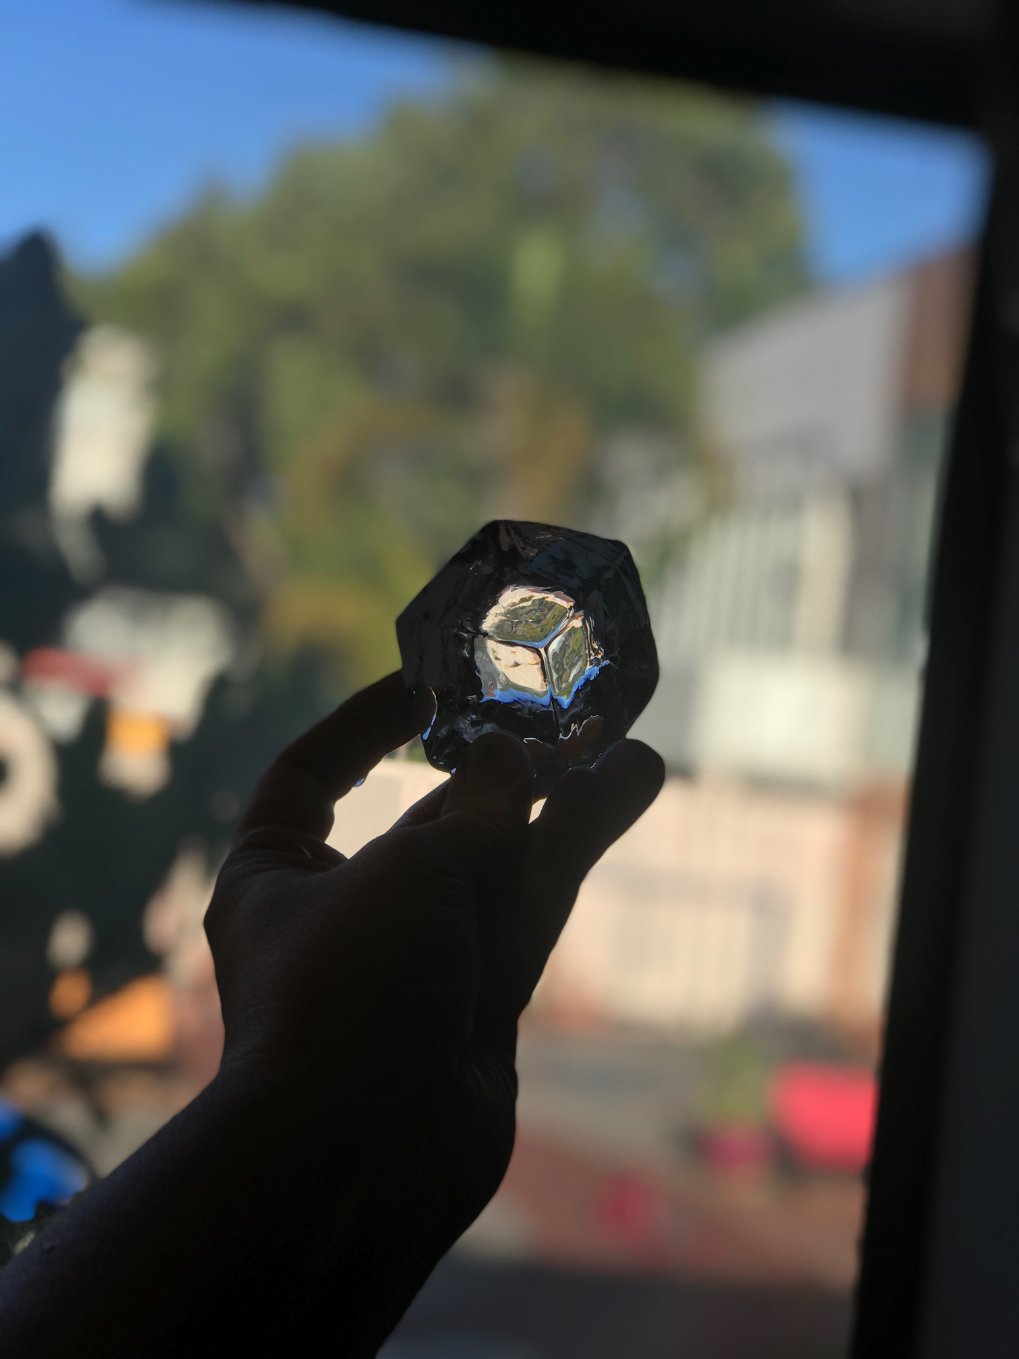
    The below image is of "canned water" that was cooled and then set into aluminum thermoses to freeze with directional freezing. Note that there's just a tiny amount of cloudy water at the bottom. 

    Unnamed

    This is compared with non-degassed water in the same thermoses:

    Non-degassed


    We went back and forth in email so this is an edited version of a series of emails and later experiments. Newell says:

    I have had success in removing the gas in the water using a combination of boiling and vacuum with various set-ups, some more complicated and labor intensive than others. Then, I discovered this simple and nearly foolproof technique: Use traditional canning techniques and "can" the water in a pressure cooker. Especially with an instant pot type cooker this is dirt simple and doesn't require much labor or monitoring.

    Then, I use the top-down freezing technique to make blocks of ice that I then mold into spheres. [The image above is "canned water" frozen inside insulated thermos, so directional freezing from top-down.]

    I use filtered water, mainly since the local tap water tastes so bad. I fill some mason jars with the water with a 1 to 1.5 inch head-space, put on the lids and rings "finger tight" only and set them in a water bath in the cooker.

    I put them in the electric pressure cooker for at least the 8 minute automatic cycle, and walk away until it completes. When it is done, I release any remaining pressure, remove the jars, and fully tighten the bands.

    As you can see, there are no bubbles, and the top-down freezing left almost no minerals in the top section of the ice. The bottom-most part, is of course, cloudy. After a lot of experiments, too numerous to detail, this method is the most simple and foolproof I have found.

    I confirmed that Newell was using glass jars, not fully filled with water and not submerged completely in water, and that there is air headspace in the jar when he does it. This is important because my assumption would have been that any headspace in the jar would contain air that would reabsorb into the water. 

    The head-space fills with steam during the pressure-cooking, and when the jars cool the steam condenses and creates a vacuum, sealing the lid. So, the head-space is essential to pull the vacuum used to seal the jars during cooling. The lid acts as a one-way valve: during heating the lid lets steam escape (which is why you don't tighten the bands completely before cooking; the jars might explode), and then during cooling the lid gets sucked down to the jar and seals. The drop in pressure actually causes some more of the hot water in the jar to boil as the headspace cools.

    Thus, there really is not that much air in the jar to reabsorb… the head-space is filled mostly with water vapor. I think the vacuum may help remove any remaining dissolved air in the water. I typically leave the jars sealed overnight, and freeze the water from them the next day, though I don't know for sure that this delay is necessary. But, it easily fits into my work flow and has become my habit.

    I asked why tighten the bands (the lids) at all, and just pour it into the molds at this point? 

    That might work, but I haven't tried it. I always let the jars seal and pull an internal vacuum, as I described above. The jars usually seal themselves without tightening the bands, but just to make sure, I usually still tighten them during cooling.

    Back when I was experimenting with simple boiling, I tried going direct from the stove-top to the tumbler, but it didn't really help. I suspect that the water, even when boiled for a long time, was never degassed enough. I believe that reduced pressure is an essential step, as the only experiments I have done that succeeded have all used a partial vacuum as part of the process.

    I tried boiling followed by a vacuum, and this did work well. One way I did this was with a vacuum sealer (like a Food Saver brand bag sealer) that has a vacuum pump. You can buy an attachment for most of these type devices that fits over a mason jar to pull a vacuum in it without having to heat/boil it (to seal a jar of nuts, coffee, or flour, for example). But, this was a big nuisance and a bit dangerous to use with hot water. I also experimented with valves and other complications.

    Then, I hit upon the pressure canning scheme, which boils the water (actually, at a higher temperature, due to the pressure), and pulls a vacuum inside the sealed jars during cooling, and is dirt simple.

    Then Newell did some additional experiments: 

    • Using distilled water in the same set-up
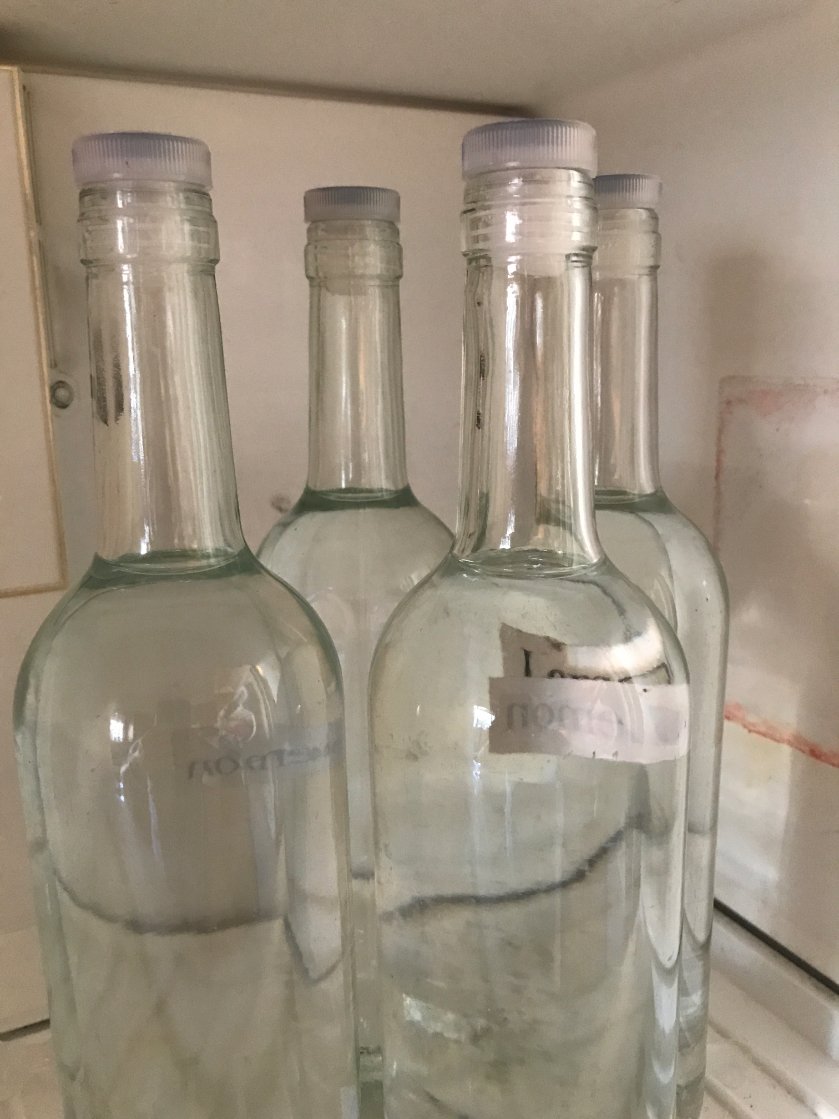
    • Rather than canning under pressure in an Instant Pot, doing the traditional canning technique that would be used to sterilize Mason jars 

    I "canned" some water using low pressure (i.e., atmospheric-only, or "no extra pressure") where the boiling point of water is about 212 F. (Note, I am near sea level). This gave essentially the same results as "high pressure" canning using a conventional pressure cooker, or equivalently, an electric pressure cooker like an Instant Pot, that adds about 15 psi and hence water has a higher boiling point (about 250 F.).

    Note that I have a grate at the bottom of the pot to lift the jars a bit off of the bottom of the pan. As anyone who has done much canning knows, if you put the jars directly on the bottom of the pan over the heat, the violence of the boiling can break the jars.

    I boiled this for roughly 20 minutes, to make sure the water in the jars reached the full boiling point. Then, I removed the jars and fully tightened the bands, and let them cool. 

    The results after top-down freezing look essentially identical to when I used the high pressure cooker (see below). Nice and clear with no bubbles except the artifacts at the bottom. 

    Traditional Canning Set-up and Resulting Ice:

    Non-pressure de-gassed iceNon-pressure de-gassed ice

    One more experiment, using the "canned water" technique with distilled water. 

    Finally, I also ran an experiment with distilled water. I took a quart of my usual filtered water and distilled a pint of "extra pure" water from it. This I ran through my usual pressure-canning de-gassing process, and then froze it. Here is the result (below). The distilling made no noticeable difference. Still clear in the middle (due to the de-gassing), but still having the same artifacts at the bottom after top-down freezing.

    So, you don't need a pressure cooker to de-gas the water. A simple pot and a mason jar will do the trick. Distilling is a waste of effort.

    Distilled de-gassed ice

    Another conclusion 

    My belief is that as long as the jars seal and form an internal vacuum during cooling, the results will be satisfactory.

    In conclusion, it appears in this set-up is effective at reducing cloudiness in ice.


    Analysis

    If the pressure in the canning step in the Instant Pot is not crucial, then perhaps the main factor is that after boiling, the mason jars are sealed. Many of us ice nerds have tried boiling the water and then freezing it (with some improvement in clarity but in my estimation not worth the added effort)

    So it appears that the sealed water doesn't reabsorb nearly as much air when kept under a vacuum as it would when cooling from boiling unsealed. I had always figured that water would naturally reabsorb most of the air when it was cooled to come to equilibrium (after being sealed or not), but maybe not!

    This makes me want to do a bunch of experiments (or, you know, inspire you to do some experiments and share your results):

    1. Repeat this "canned water" method just to verify it works for others
      1. The ideal set-up would be a double-walled aluminum or other deformable container that could be canned and then put into the freezer while still sealed. 
      2. Or I suppose we could just sacrifice a mason jar – can the water and then make an insulated sleeve for the mason jar to encourage directional freezing.
    2. Repeat this "canned water" method but put the water in an Igloo cooler set-up like we do for traditional directional freezing to see if it improves ice clarity.
      1. This should be compared with boiled, uncanned water.
      2. It's possible that the large surface area of the cooler would allow for more reabsorption of air into the water as it freezes.
        1. If this experiment fails, it would be interesting to try putting some sort of lid or just a layer of plastic wrap on top of the water to see if it improves clarity. Actually it would be interesting to do this with just regular water/boiled water! 
    3. Buy some commercial canned water like this or this,  though I wouldn't really expect them to have been canned at high temperatures. 
      1. And see what happens when your stick it in the freezer. Likely the can would burst as water expands when it turns into ice, but then cut open the can to see the cloudiness of the ice inside. 
      2. Or get it super cold first, then open the can and transfer it to a directional freezing system.


    So… long post and lots of homework, but it's been a while since anyone seems to have come up with an improved technique so let's get to work. Thanks much to Richard Newell for doing the work and sharing it with us. 


    The index of ice experiments page on Alcademics is here.


  • Cherries Frozen Into Ice Balls

    This came out great!

    Using this technique with the Thermos Funtainer and ice ball molds I put some cherries inside ice ball molds atop the Thermos and froze them. 

    Nothing complicated, these looked awesome.

    IMG-8755
    IMG-8755
    IMG-8755

    For all the clear ice projects on Alcademics, check out the Index of Ice Experiments page

  • Ice Blocks with Objects: Sharks and Sunglasses

    While sheltering-in-place at home, I've taken to doing some (more) silly ice projects. For these I used the basic Igloo cooler method and placing objects near the top of the water line so that they'd freeze into the clear part of the ice after freezing. 

    For the sunglasses, I rested a stick over the top of the cooler and tapes the sides to it so that the lenses were in the water. 

    For the shark, as you can see I stood it upright in the cooler (originally taped to the same stick) and let the clear ice freeze downward.

    In both cases I removed the block from the cooler before it was fully frozen (2-3 days) so that there would be only clear ice.


    Sunglasses In Ice Block  - 23
    Sunglasses In Ice Block  - 23
    Sunglasses In Ice Block  - 23
    Sunglasses In Ice Block  - 23


    Shark In Ice Block  - 55
    Shark In Ice Block  - 55
    Shark In Ice Block  - 55
    Shark In Ice Block  - 55
    Shark In Ice Block  - 55
    Shark In Ice Block  - 55


  • Make Clear Ice Balls Using a Thermos

    Most readers of Alcademics are probably familiar with this by now, but I realized that in my many (many, many) ice posts here on Alcademics I don't have a straightforward post listing how I most often make large perfectly clear ice spheres at home. So I made this post to insert into my ice project index. 

    6a00e553b3da2088340240a501d5c8200bThis method scales up so if you want to make 10 large clear ice balls at a time you can do so without taking up a lot of room or buying more expensive versions of this set-up. 

    The process is based on Directional Freezing (pushing the cloudy part of freezing water in one direction, in this case out the hole in the bottom of the ice ball mold). The particular thermos to use was the suggestion of a reader on Alcademics. You nerds are the best! 

    Equipment:

    Ice balls molds – You'll want the large, 2.5 inch ice ball molds that are circular. 

    Thermos – The most compact shape that fits these large ice sphere molds perfectly is these Thermos Funtainers. (You can use an insulated coffee mug or other thermos-style container if you want.)

    Process:

    1. Fill the thermos with water to the top. The water doesn't need to be distilled or boiled or any of that. 
    2. Fill the ice ball mold with water.
    3. Hold your thumb over the hole in the ice ball mold and place it upside-down on the thermos. The water will stay in the mold part as well as the thermos.
    4. Put it in the freezer. The ice ball mold part will freeze first because it is not insulated. As it freezes, clear ice forms first and it will push the cloudy part of the ice down out the hole in the bottom (because it's partially insulated sitting on top) and into the thermos. The thermos should only just be starting to freeze when the ice ball on top is done freezing. 
    5. Wait about 24 hours. Try not to let it go for more than a day and half or so, as you don't want the water in the thermos to completely freeze, as it expands and will deform your thermos, or even shatter if it's a glass-insulated thermos. 
    6. The ice ball mold should easily pop off the thermos and be perfectly clear or pretty darn close.

    Ice balls in thermos01
    Ice balls in thermos01Ice balls in thermos01Ice balls in thermos01

    Ice balls in thermos11
    Ice balls in thermos11
    Ice balls in thermos11
    Ice balls in thermos11Ice balls in thermos27
    Ice balls in thermos27

    Tips:

    • If your freezer is set on super duper ridiculously cold it may freeze too fast for this to work (it won't push the cloudy part out the bottom but instead into the center of the sphere). You probably don't need your freezer quite that cold!
    • If you're getting more of an egg shape from your ice sphere, try leaving a little space in the mold and/or thermos. 
    • You can also "polish" your egg-shaped ice sphere into a better sphere just using a clean dish cloth, or even just rubbing it in your hands.
    • If you're opening and closing your freezer and generally jostling the set-up, it tends to be cloudier. 

    Alternatives:

    Be sure to check out the many many other things you can do with ice at the Index of Ice Experiments on Alcademics


  • Clear Ice in Cook’s Illustrated

    Hopefully if you're a regular reader of Alcademics you know all about how to make crystal clear ice in a variety of ways, so you're not going to learn anything from this post!

    I just wanted to denote and share for posterity a mention of my clear ice process was in Cook's Illustrated in the January/February 2020 issue.

    The section is online at this link.  

    Cook-s-illustrated-Cover-2020-January-1-Issue IMG-7511


    Interestingly, they also reposted the Clarified Milk Punch article that I wrote with Cook's Illustrated editor-in-chief Dan Souza. The story originally went up in 2016 on Cook's Science (RIP). However, they also recently produced a video about the process that you can view below.


  • More Eyeball Ice Balls and Ice Fangs for Halloween

    I made more fun ice for Halloween. Recently I put some bouncy eyeballs into ice balls and froze a Halloween mask into an ice block.

    This time I put some big glass eyes into ice balls and put vampire fangs into other ice balls. The glass eyes were an idea from bartender Ramon Pinon – they are available on Amazon at this link. I got these super large ones that fit into the ice ball mold that I use atop the Thermos Funtainer similarly to how I made these bugs and spider ice balls last year

    IMG_6623
    IMG_6623
    IMG_6623


    For the vampire fangs, I found colored ones at CVS and put them into the IceOlogy ice ball trays. The trick here is to put them in sideways so that air pockets don't form underneath them. 


    IMG-6715
    IMG-6715
    IMG-6715


    Anyway, good times, enjoy. 


  • Creepy Halloween Mask Frozen In Ice Blocks

    I'm up to my silliness again. I had the idea that I could freeze masks into ice blocks for decoration, so in advance of Halloween Superstores opening around town, I bought some masks on Amazon. 

    I bought this terribly ugly Frankenstein mask, but as it's made of foam it just floats on top of the water rather than freezes inside the block. 

    I also bought a set of cheap plastic "drama party kids face masks" and tried those. They sink inside the cooler (by the way, I make them similar to how I did this dinosaur head ice block using Directional Freezing in an Igloo cooler) so I was going to suspend it in the Igloo cooler from the elastic string on the mask, but instead I just left a tiny bit of air under the part of the forehead of the mask – you can see it pokes out from the block. The mask stayed suspended in the ice block pretty well. 

    I left it to freeze for a few days and if I do it again I'll let it go a shorter time as the cloudy part of the ice formed on the bottom (behind the mask). But anyway it came out pretty cool. 

    Mask White in Ice Block7
    Mask White in Ice Block7
    Mask White in Ice Block7
    Mask White in Ice Block33
    Mask White in Ice Block33


    After I thought I was done with the experiment and taking pictures,  I was rinsing off the block in hot water in my sink. As I was able to pull the mask out of the block I found that the mask left the impression of the face in the block! It looked super creepy and now I'm thinking for future experiments I should see about other shapes I can press into ice blocks… 

    Mask White in Ice Block13
    Mask White in Ice Block13
    If you like this post, you might also like:

    Dinosaur Head Ice Block

    Eyeball Ice Balls for Halloween

    and as usual, the complete Index of Ice Experiments on Alcademics is here