Category: ice

  • Fun with Limes Inside Clear Ice Balls

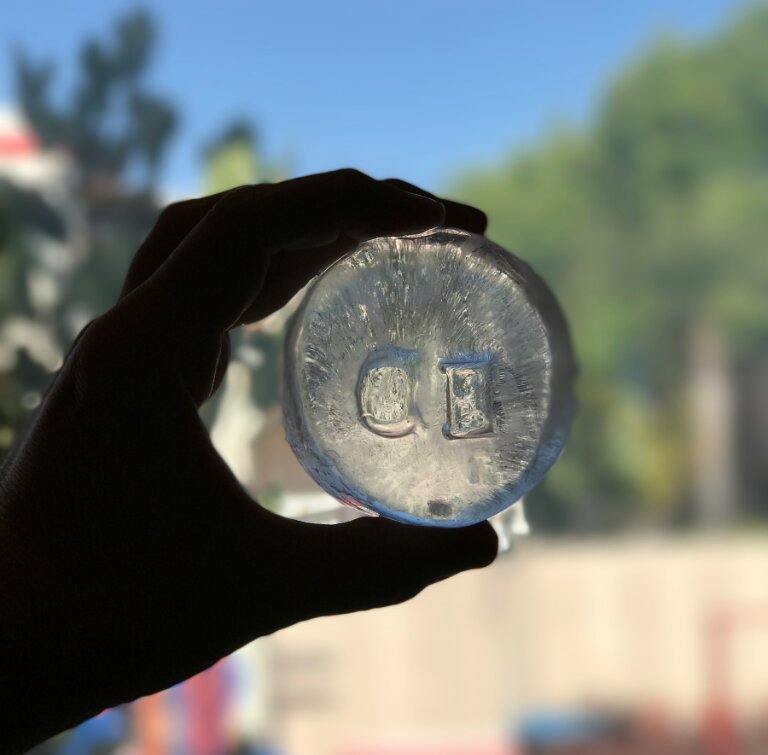
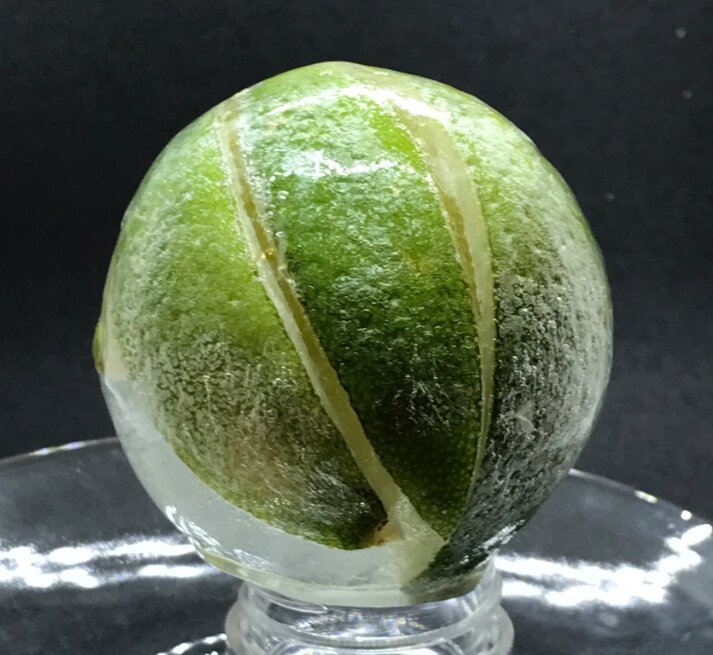
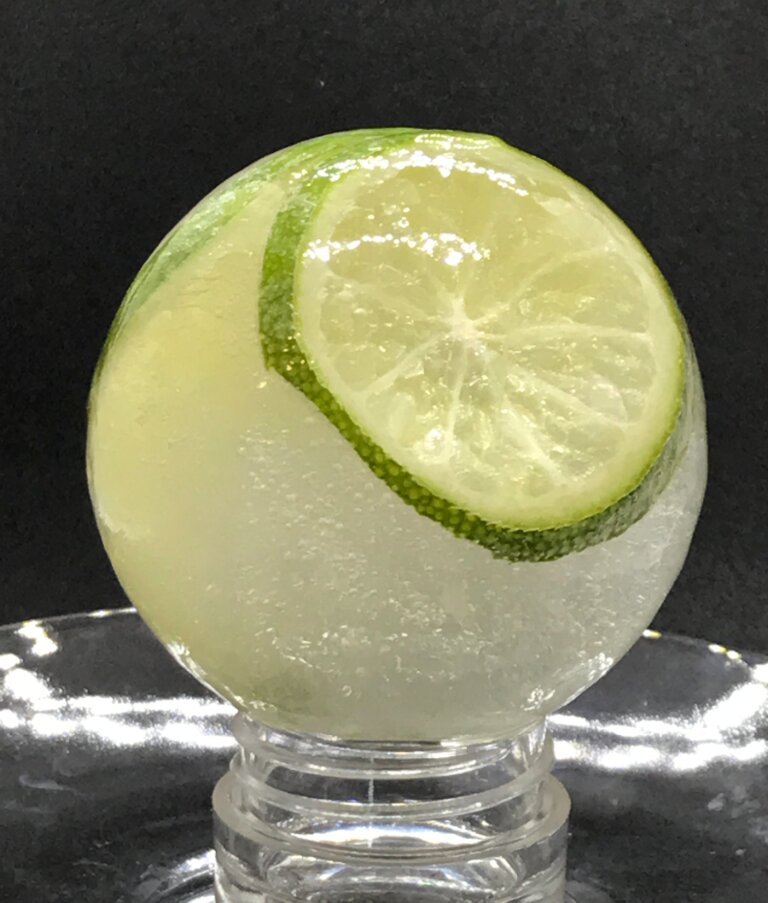
    Photo Apr 04  11 41 43 AMUsing this method of directional freezing (developed here on Alcademics) with thermos containers and ice ball molds to maximize the clarity of ice balls, I have been playing around with putting objects inside ice spheres. 

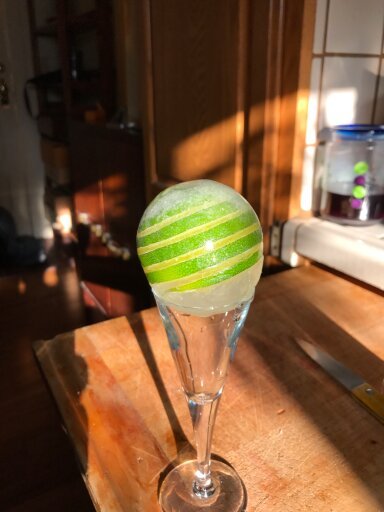
    I first did a spiralized lime that you can see here – it came out pretty awesomely. 

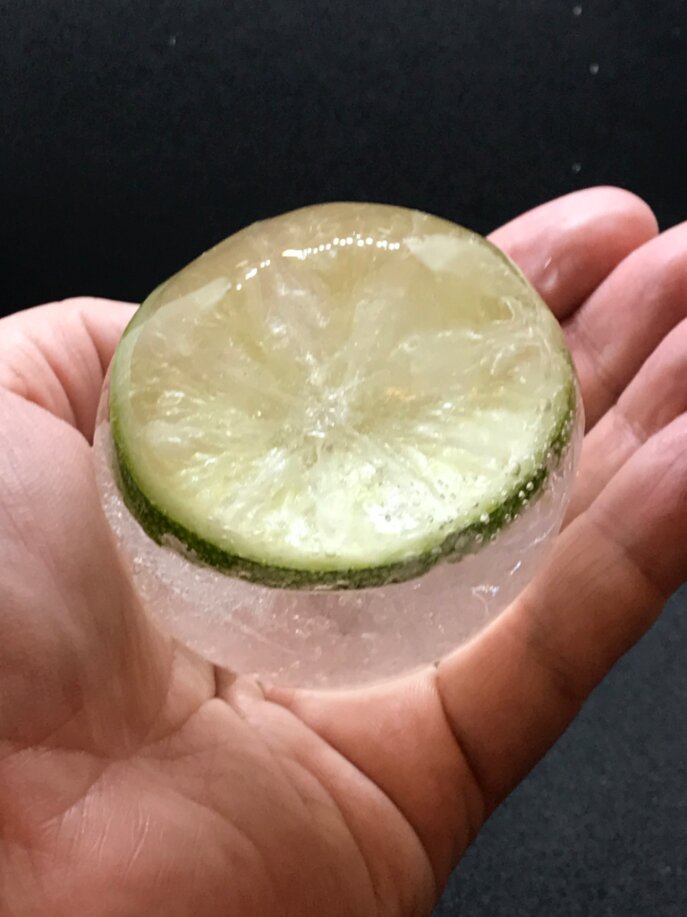
    Then the other day I made some lime wedges and lime slices and put them in my ice ball molds. 

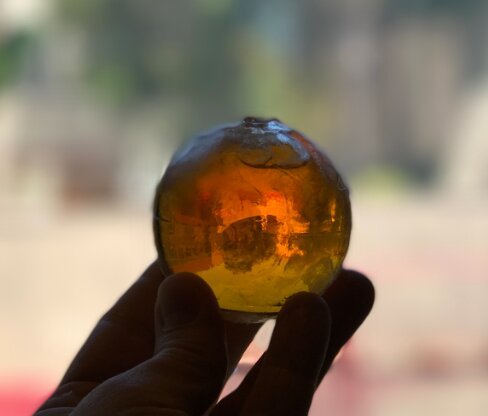
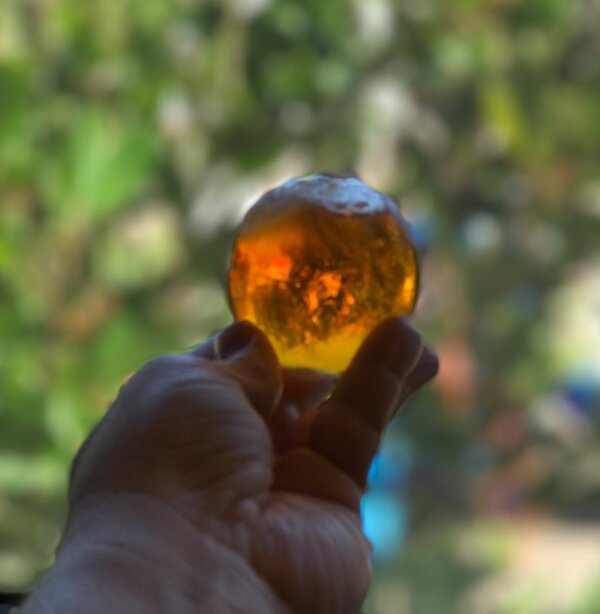
    When you freeze limes, it squeezes out some of the juice so the ice ball isn't crystal-clear as it is using this method with solid objects, but it still looks great and inside a cocktail you'd probably not notice. 

    Photo Apr 01  12 07 47 PM (1)

    Photo Apr 04  11 43 09 AM (1)

    Photo Apr 04  11 43 41 AM

    Photo Apr 04  11 50 04 AM

    To keep up on my ongoing icesperiments, follow along on my Instagram page


  • How to Freeze a Spiralized Lime Inside a Clear Ice Ball Sphere

    Lime Spiral Inside Clear Ice Sphere (18)
    You can freeze pretty much anything inside a clear ice sphere using Directional Freezing, the technique I pioneered here on Alcademics.


    As I've written previously, to make clear ice spheres you can use directional freezing with an ice ball mold on top of a thermos-style insulated container.

    Specifically, I use a Thermos Funtainer and this 2.5" ice ball mold as they work perfectly together. 

    Fill both the ice ball mold and the container with water (I use filtered water; no need to distilled or anything). Place the ice ball upside-down atop the thermos. It takes 20 or so hours to freeze in my freezer. 


    Photo Mar 27  8 05 06 PM (1) Photo Mar 27  8 02 21 PM


    Once you understand the basics, you can simply add objects inside the ice ball mold with the water to freeze. Make sure to shake them to get any air bubbles out and fill them to the top. 

    To make this lime spiral, I used this little tool called the Chef'n Lemon-Aid Citrus Spiralizer. I was trying it out and couldn't think of what to do with the spiralized lime once I'd made it. So I popped it into my ice ball mold, froze it overnight, and BEHOLD!


    lime spiral inside clear ice ball

    Photo Mar 29  8 29 56 AM

    lime spiral inside clear ice ball


    So, that came out pretty awesome. 


  • Iceberg Animal Ice Molds Let you Experience Local Cooling in your Glass

    Forgive me, I struggled with that headline. 

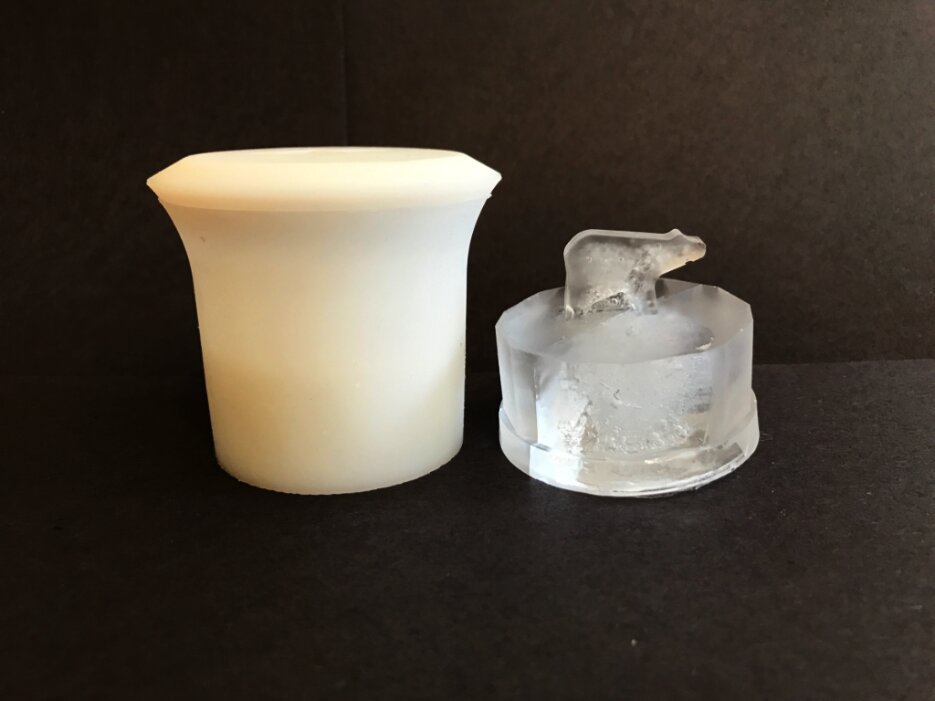
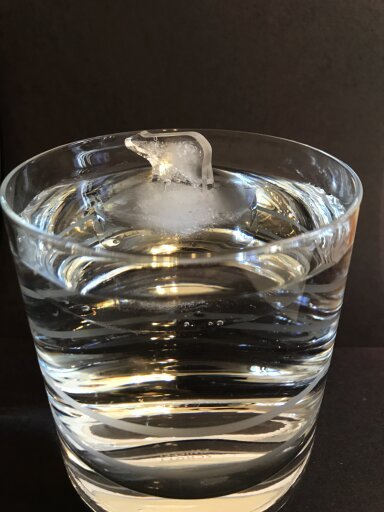
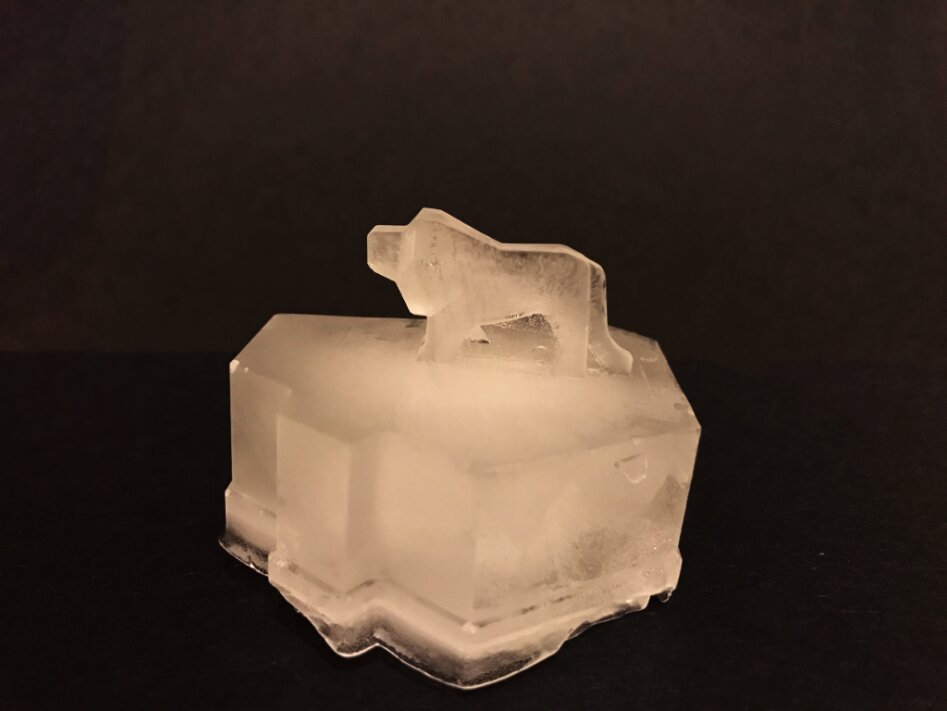
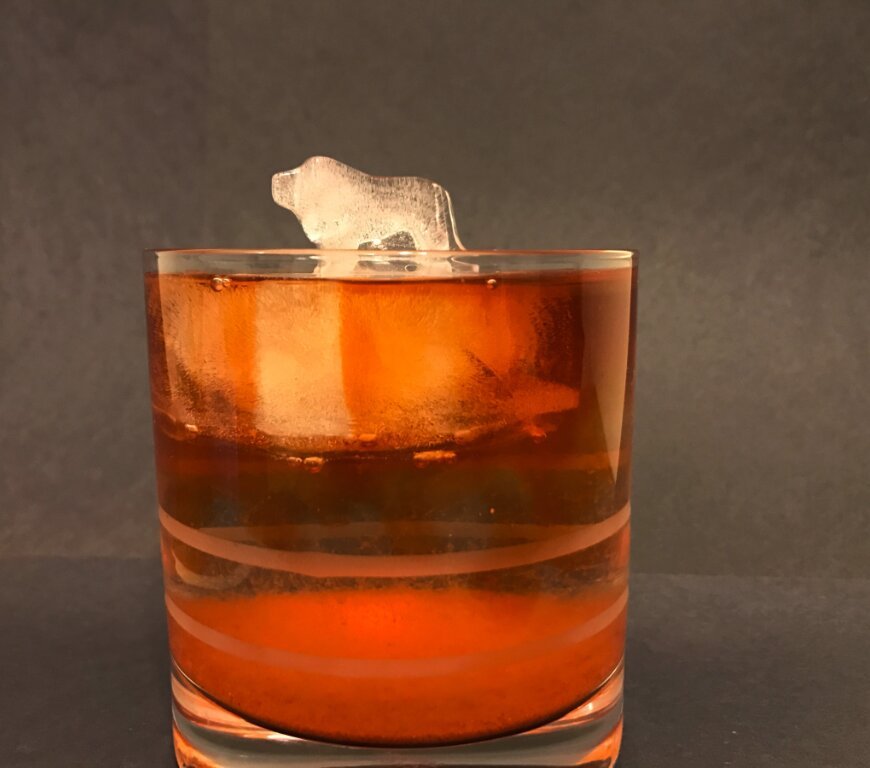
    Hey, I found these new kind of ice cube trays (on my regular search of new ice cube trays) that are pretty fun, if not totally clear. (I tried to hack them to make them come out clear, not very hard, but it didn't work.)

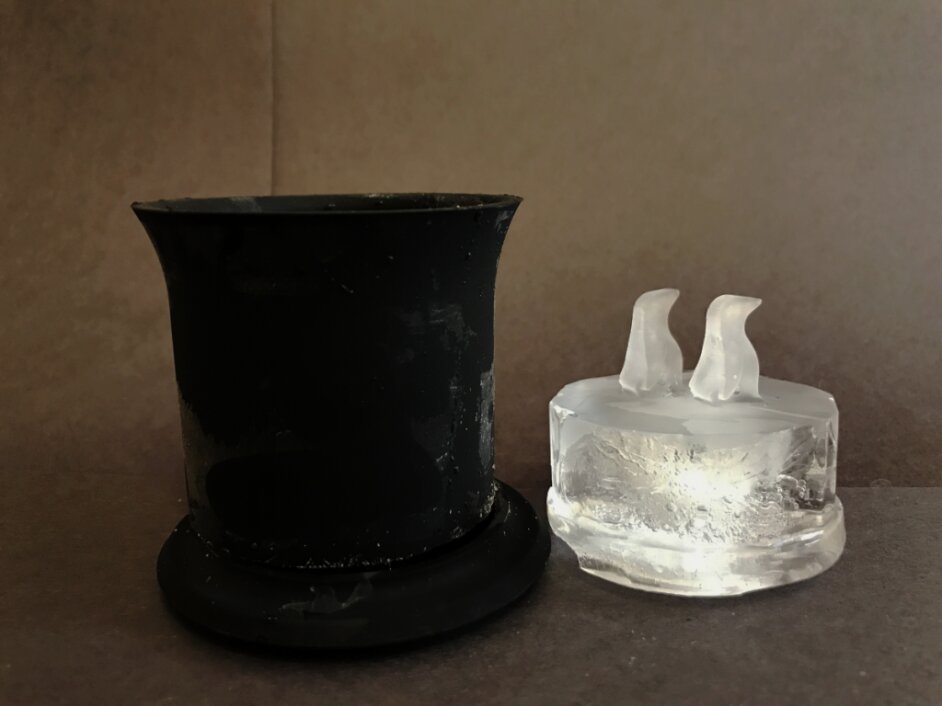
    They're animals on top of ice cubes so that they float above the surface of your drink. It's like they're stranded on the rapidly-dissapearing polar ice caps- ADORABLY! 

    As your friendly neighborhood ice reviewer, I felt it my duty to purchase and test these trays. I bought two of them – a larger one and a bargain model. First, that latter. 

    The Fivebop Silicone Polar Ice Cube Molds come in Penguin and Polar Bear shapes. They only cost 13 dollars on Amazon (follow that link). They are smaller than the Monos brand ones – so if you put them in a warm drink they might not last long. I suspect that they're not quite as sturdy as the other ones but they worked well enough!

    Penguins with tray
    Penguins with tray
    Penguins with tray
    Penguins with tray


    The monos 3D Ice Cube Mold Savanna comes in two versions: Lion & Hippopotamus Set and the Elephant & Gorilla Set. (They also have a Penguin and Polar Bear set that looks exactly like the Fivebop one but it's not available – not sure what's up with that.) I bought the Lion and Hippo one, as you can see from the below. 

    Hippo outside1
    Hippo outside1
    Hippo outside1
    Hippo outside1
    Hippo outside1


     Good times with ice! 

    For all of the ice experiments on Alcademics, including how to make perfectly clear ice with Directional Freezing, see the Index of Ice Experiments Page.


  • How to Make the Death Star Ice Mold Turn Out Clear

    Update: Learn more about this in The Ice Book, out May 2023!


    A28F700F-A39F-4F58-BC33-60E8FD785743

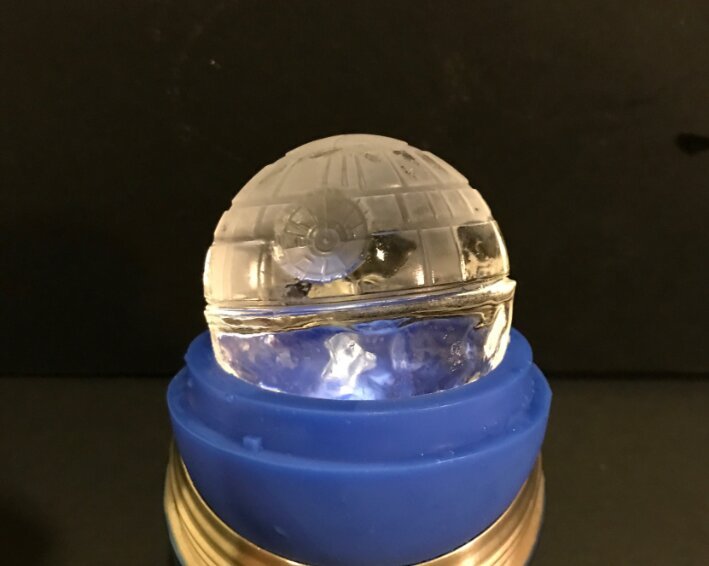
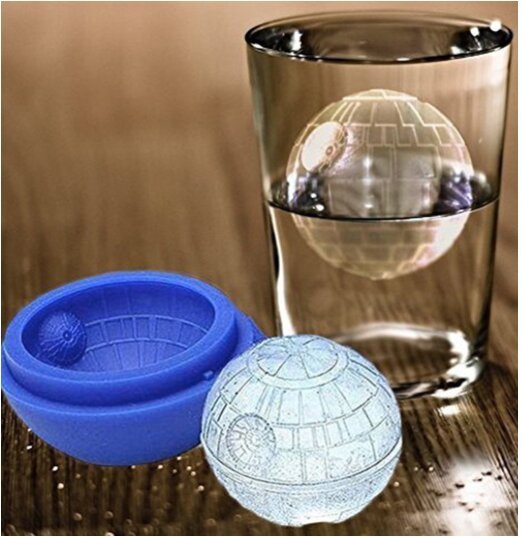
    Did you receive one of those cool Star Wars Death Star ice molds as a gift (or buy one for yourself), only to have it come out looking not like the advertisement:

    Screen Shot 2016-12-24 at 9.47.27 AM

    Image from the ad on Amazon.

    But more like this?

    14563CC4-9D54-453A-A2E3-FB5FBC0EB596


    Yeah, more like post-Skywalker Death Star. 

    Don't worry, I have a fix for you. The trick is take advantage of Directional Freezing, a technique I pioneered here on Alcademics.com. 

    In a nutshell, the regular way ice ball will freeze is from the outside-in. The ice "wants" to be clear in a nice neat organized lattice so it pushes trapped air into the center of the ball, where it appears cloudy and also cracks as it expands. With Directional Freezing, we make sure the ice ball freezes from the top to the bottom, pushing that trapped air out the hole in the bottom. 


    Unnamed-1

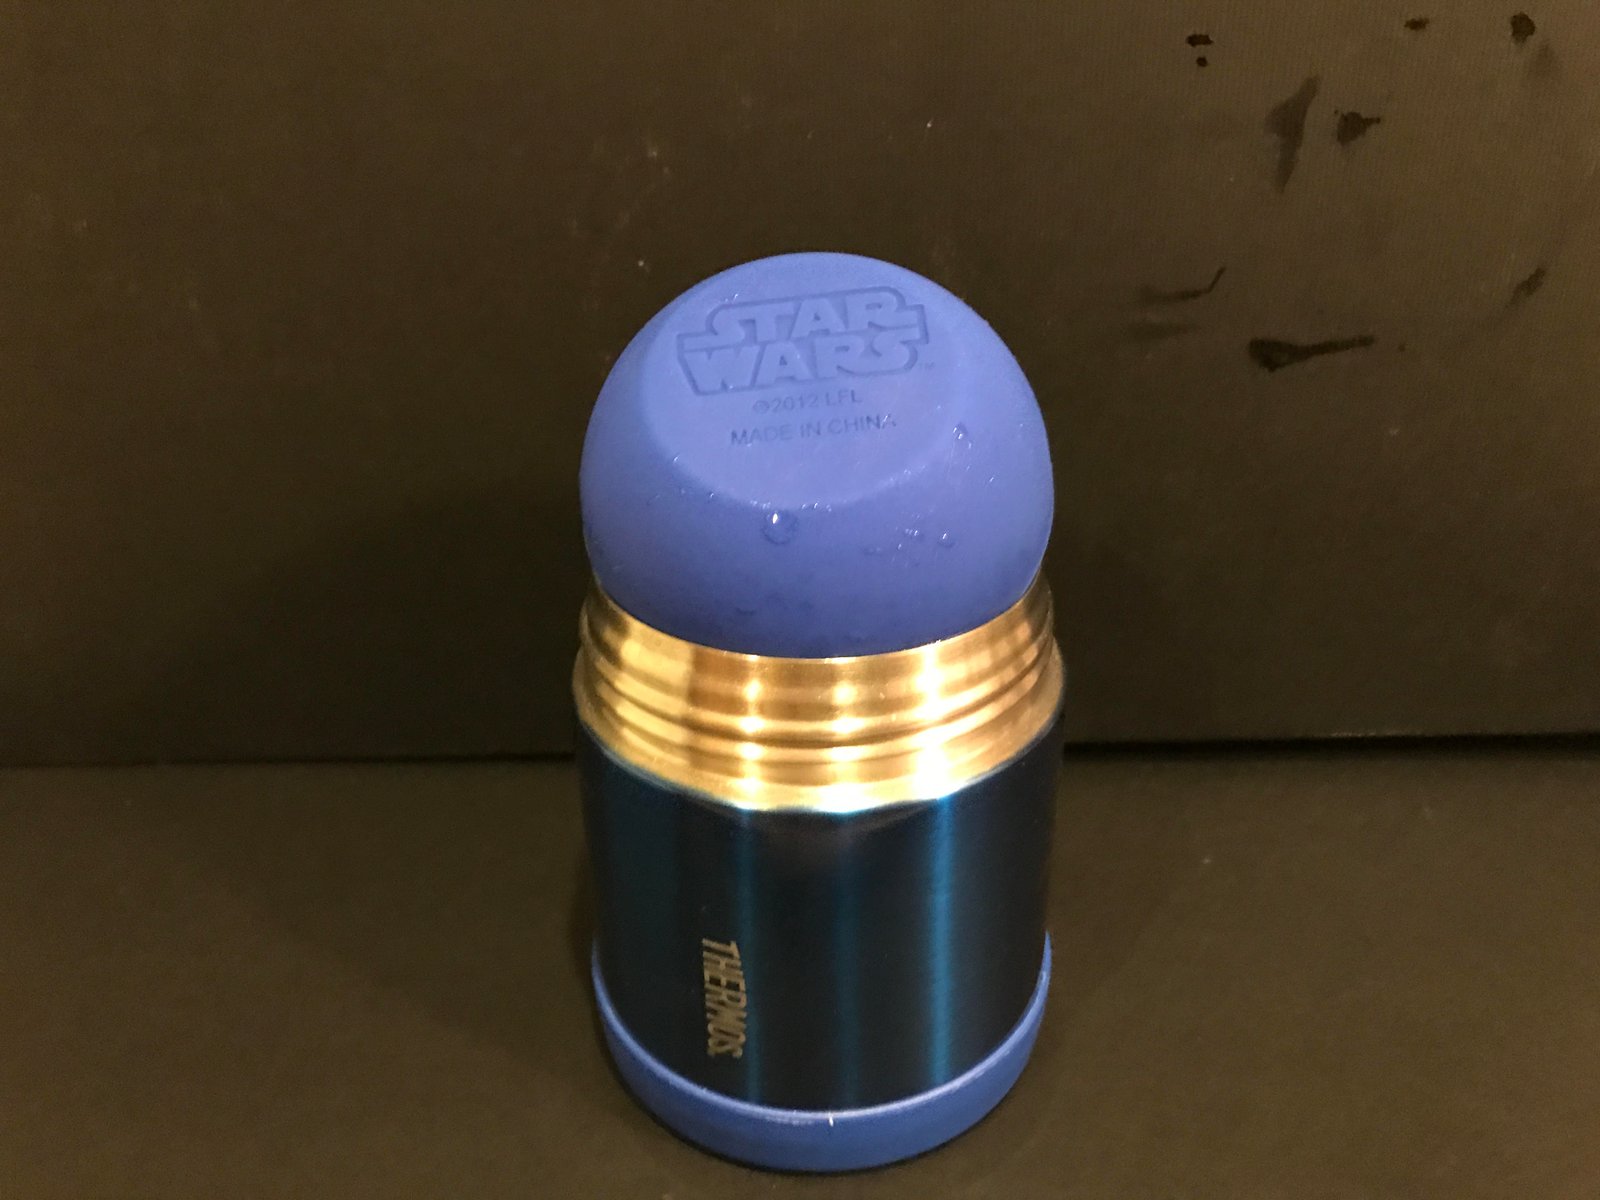
    We accomplish this by using a Thermos Funtainer (or other similar insulated mug, but this one fits the 2.5" ice ball molds perfectly and takes up the least amount of space in your freezer). 

    1. Fill the Thermos with water
    2. Fill the Death Star ice ball mold with water (I use water from a Britta filter)
    3. Hold your thumb over the hole in the Star Wars ice ball mold and turn it upside down, setting it on the Thermos with the hole facing into the thermos. 
    4. Put it in the freezer and wait 12 20 hours or so for it to freeze, depending on your freezer. 

    The ball should now be super clear. 

    Unnamed 6B96F31F-D0C1-4141-B6C6-DF4AC4CBC84C

    Common issues are that it comes out more egg-shaped or that it's a touch cloudy on the last part to freeze (where the hole is). If you're experiencing that, try:

    • Move it so that the hole is either directly down in the center of the thermos, or a little on an angle towards one side (depending on if your freezer is excessively cold or warm)
    • Beware excessive vibration/jostling the container in your freezer, usually caused by opening and closing the door a lot. This can cause bubbles and stop the directional freezing process. 
    • Some super-obsessed Alcademics readers claim that to get every last cloudy bit out of the ice ball (often the last part to freeze is slightly 'frosty' in appearance), use bottled water. We haven't figured out why this would make any difference, but they claim it does. 
    • Most sink faucets have a aerator on them – even if your water doesn't need to be filtered, letting it sit a while or removing the aerator can help if the ice is still cloudy and freezes fast. 

    Enjoy your super clear Star Wars Death Star ice balls, and may the force of Directional Freezing be with you.


    To see all the many, many ice experiments on Alcademics, follow this link to the Index of Ice Experiments


  • Nothing Shaken, Nothing Stirred: The Perennial’s Strained Relationship with Ice

    San Francisco restaurant The Perennial has a cocktail program in which none of the drinks on the menu are either shaken or stirred. What's up with that?

    The program, lead by Jennifer Colliau (also of The Interval and Small Hand Foods) focusses on reducing waste with a big emphasis on water waste.

    DSCF2781

    Ice frozen into bottom of glasses. Photo by Jason Rowan.


    Ice Machine Waste

    According to Colliau, both Kold Draft and Hoshizaki ice machines (which produce the large clear cubes in most better bars in the US) waste 50% of the water that goes into them. The way these machines make their ice is that water runs over or is sprayed over a cold plate; and apparently the run-off is simply sent down the drain.

    The Scotsman pellet ice machine, on the other hand, she says is 95% efficient. Thus the desire was to not use the water-wasteful machines in the program. They use only the Scotsman machine, but they don't use it for everything. 

    A second point of water waste: The average shaken or stirred cocktail is assembled in a mixing glass or cocktail shaker, shaken or stirred, and then strained and poured onto new ice in the serving glass –  and the shaking/stirring glass ice is dumped out (using nearly twice the amount of water). Then the cocktail shaker/mixing glass must also be washed/rinsed out. Colliau sought to eliminate this waste. 

    Reducing Ice Use

    For stirred cocktails on the menu at The Perennial, the drinks a batched in advance and are served in glasses in which a specific amount of water has been frozen to the bottom (glasses are kept in the freezer obviously). Stirred drinks on the menu are also pre-diluted so they don't need to be stirred but rather just poured. The liquids are kept refrigerated until service, then simply poured into the ice-containing glasses. I asked Colliau how she developed the system. She said:

    I originally stirred these drinks to various temperatures, depending on their alcohol content, until they tasted the best. I measured the drink going in to the beaker then out to see how much dilution resulted from the ice melt. Then, because all of our freezers are the same, I took that dilution proportion and held the resulting drink in the freezer to make sure it tasted great even at that colder temperature.

    Served in rocks glasses with ice frozen into them, approximately every 5 minutes the drink gets about 5 degrees warmer until it hits around 35F. It's important that the drink taste delicious over time.

    Ideally we would White Lyan-style this execution and have different freezer temps for different drinks, but we use these freezers to chill glassware and keep sherbet and large ice in them, so we hold them all cold and manipulate the dilutions to work for each drink.
    For shaken cocktails, things are even more complicated – the act of shaking is to roughly mix and emulsify ingredients together. To accomplish this, they use 1/3 cup of Scotsman ice, and run the cocktail through a blender in a small mason jar until there is no ice left. Thus the drink is "shaken" and no ice is dumped out at the end. Colliau says she'd definitely prefer a less noisy option, but it's the best they can do so far. 


    IMG_2650

    Mason jar mouths fit blender blades. "Shaken" cocktails are blended until the ice is all gone.


    For off-menu cocktails, they have cubes from 2" Tovolo ice cube trays that they can use for rocks or cracked for stirring.  

    Stirring to Temperature

    For off-menu drinks that are not pre-diluted, they stir drinks to temperature; as temperature directly relates to dilution. 

    The idea is that because ice kept in the well is basically at 32 degrees (F), all dilution of the drink will result in known temperature reductions (and vice versa). Thus to serve a drink the bartender can put in some cracked ice in the glass, stir a bit, prepare other more complicated drinks while it is diluting/melting, then check the temperature and stir more/add more ice if needed, until it reaches the desired final temperature. Any extra ice will be dumped.

    Colliau notes, "Cobbled ice has so much surface area that it over-dilutes too quickly to stop when the drink is ready to go."

    DSCF2743

    Tall drink served on pellet ice with straw straw and dehydrated citrus wheel. Photo by Jason Rowan.

    Temperature of Stirring

    For low-alcohol drinks and those served on glasses with ice frozen into the bottom, they stir to 35 degrees. For regular stirred drinks like a Manhattan or Martini, they stir to 32 degrees as there will be no additional dilution from ice in the glass. And for the Gimlet at The Interval, they stir down to 25 degrees because the drink uses high-proof gin and additional dilution is needed.

    Colliau says, "These are temps that I like for certain drinks, and they are guidelines rather than hard rules. Above all the drinks should be delicious! Using temps makes consistent execution across staff much, much easier."
     

    Other Eco Savings

    • For straw tasting of cocktails, not only do they not use plastic straws (actual ones made of straw are give to customers), they use a system of a spoon and metal straw – you dip the straw into the drink then empty it into a spoon that you use to taste. Thus you don't need to wash the equipment each time. 
    • Water un-drank from water pitchers on tables is collected, combined, and used to water the rooftop garden.
    • They don't "burn" the ice wells at the end of each night: Ice in the wells is used the next day as the ice for chilling syrup and juice bottles. At the end of the week (they are closed on Sundays) they drain clean the ice wells. 
    • To cut down on waste of citrus, they used preserved whole limes in one drink and make whole-grapefruit marmalade for another.
    • For fresh juice, they will use leftovers for one day, and then make sherbet for any leftovers at the end of the week. She notes, "Closed on Sundays, juice on Mondays, use 1-day-old juice on Tuesdays in the service well and squeeze fresh to par, keep rotating like that so ideally we use all of the day-old juice the next day, then on Saturday night we mix the lemon, lime and orange juices with milk and pineapple gum syrup and turn it into sherbet. (No grapefruit for medical contraindications.)" 
    • For purchasing decisions, they look at the carbon footprint of not only the actual product, but its bottling and transportation. High-proof spirits mean less water is shipped in bottles; heavier bottles mean more carbon as well. Shipping is a far less carbon-intensive mode of transport than trucking, so Colliau notes that trucking bourbon across the country from Kentucky might ultimately have a higher carbon footprint than shipping it to California from Japan, even though the distances are vastly different. 

    I'm sure there are tons more environment-saving considerations and processes in place – and this is just on the drink side of the program. This is definitely a more thoughtful process than pretty much every other bar attempting to reduce waste. Really, really impressive.


    412HieI+crLHomework: Colliau says she got a lot of information about carbon footprint of transporting bottles and other ingredients from the book How Bad Are Bananas? I'm planning to read it one of these days. 


  • Testing Out the Rabbit Clear Ice Tray

    I received a sample of the forthcoming Rabbit Clear Ice Cube Tray, which will be "only available at Bed Bath & Beyond starting in the fall," though I don't see it on the site yet. I'll link to it when it goes live. 

    Now it's available here.

    The predicted retail price is $19.99, far less expensive than any other clear ice tray on the market. 


    • ClearIceTray_R4-01511_side
    • ClearIceTray_R4-01511_tray-out-of-foam
    ClearIceTray_R4-01511_tray-out-of-foam

    Brand Images


    As you can probably tell from the images, this ice cube tray takes advantage of Directional Freezing, the technique I pioneered here on Alcademics. 

    What is not visible is that each of the four blue ice cube holders has a hole in the bottom, so you fill the tray with more water than fits in the cube part alone. Directional freezing (from the top to the bottom since the sides are all insulated) will cause trapped air and impurities to push down into the bottom of the chamber, leaving the top (the entire ice cube) very clear. 

    To remove the ice cubes, you pull the plastic part out of the base cooler, and pop the cubes out of the tray. My first trial with this was quick and painless. Below are pictures from my first trial.

    IMG_2609

    Takes up a "row" of freezer space

    IMG_2609
    IMG_2609

    IMG_2609

    Pull out the top tray from the insulation and run warm water over to remove cubes easily

    IMG_2609
    IMG_2609

    IMG_2609

    The remainder of ice beneath the tray. I didn't let them freeze completely so they look more clear than they'd be if completely frozen.

    IMG_2609


    Pros: The price point is great; and it's a good proof-of-concept of a directional freezing tray. It's easy to use, and it will probably be a big gift this holiday season. If you take photos of cocktails at home, you can finally not have the ugly white bits in your cubes. 

    Cons: It's large; taking up a good chunk of freezer space, and you only get one highball glass worth of ice cubes out of it. The cubes aren't super big, so while you may impress yourself/your guests with your clear ice cubes, you're not going to blow their minds as you might with a 2-inch cube. 


  • With Pokemon Ice Balls You Can Catch All The Drinks

    Pokemon Go is taking America by storm, but if you want in on the action without leaving the comfort of your home bar you might try making these Pokemon-themed ice balls instead.

    Pokemon ice ball7


    The process is really easy. I did it with two different sized ice ball molds:


    • IMG_2087
    • IMG_2099
    IMG_2099


    Step 1: Fill the bottom half of an ice ball mold with red liquid. I used cranberry juice in one (the darker one) and one of the red flavors of Gatorade in the other. Let it freeze overnight.

    Pokemon ice ball14


    Step 2: Chill some water. Put it in the refrigerator for a long time, then into the freezer for 20-30 minutes so it is just above freezing. You don't want to add hot water to the mold or it will make the red color bleed into the other half of the ice ball.

    Step 3: Attach the top of the mold and fill the other half with the cold water. 

    Step 4: Wait for it to freeze then pop it out and catch all the drinks.


    • Pokemon ice ball6
    • Pokemon ice ball10
    Pokemon ice ball10


    • Pokemon ice ball12
    • Pokemon ice ball9
    Pokemon ice ball9


    These Pokemon ice balls would be fun in non-alcoholic Pokemon cocktails or perhaps in a Pokemon Gin & Tonic. 


    Pokemon ice ball4
    Pokemon ice ball4


  • What is Directional Freezing?

    Directional Freezing is a simple method to make crystal clear ice by controlling the direction that water freezes. It was first explained here on Alcademics.com by Camper English (me) in December 2009 after months of experiments.  The method has been written about in books, used in commercial products, and is employed in many small cocktail bars around the world. 

    The Directional Freezing method is: Allow water to freeze into ice from only one direction (one side of a container) and the ice will be clear until the very last part to freeze. The last part to freeze (if allowed to freeze at all) will be cloudy. 

    Slide2The simplest (and original) way to make a clear ice block by directional freezing is to fill a hard-sided picnic cooler with water, place it in a freezer, and allow it to freeze with the cooler's top off. The water will only freeze into ice from the top-down, and only the last 25% or so of the ice block that forms will be cloudy. If the block is removed from the freezer before this point, one will have a perfectly clear slab of ice. Otherwise, the bottom cloudy portion of the ice block can be cut off from the clear part. 


    How Traditional Ice Cubes Freeze and Why They Are Cloudy

    Slide1In a traditional ice cube tray, which is not insulated on any side, cool air hits all sides of the tray. Ice forms on the top, bottom, and sides, and freezes from the outside toward the center. It is the center part of an ice cube where it is cloudy and cracked (the cracking through pressure because ice expands as it freezes), while the outsides are typically clear.

    We say that ice wants to freeze into a perfect crystal lattice (though want isn't the proper term) and trapped impurities and air prevent it from doing so. When water freezes, it pushes any trapped air and impurities away from the first part to freeze. In a traditional ice cube this is towards the center of the cube. Using directional freezing, it pushes the air/impurities/increase in pressure towards the bottom of insulated cooler (or the last part of any controlled-direction freezing container). 

    Further Reading

    This link to the index of ice experiments on Alcademics lists just about everything myself and Alcademics readers have tried to make clear ice: experiments that failed (such as using boiled water), how to make clear ice cubes, how to make clear ice balls, and using other shapes and containers to save space in the freezer. 


    Strawberry ice sphere (30)


  • Make Perfectly Clear Ice Balls Using a Beer Koozie

    Boiled vs two unboiled
    Alcademics readers have found numerous ways to make clear ice balls, all taking advantage of Directional Freezing, the process I developed (and named) to make perfectly clear ice using an insulated cooler.

    You can find an index of all the ice experiments on Alcademics here.

    Some of the ice ball methods are:

    Today's technique is a variation of Making Clear Ice Balls Using an Insulated Mug (probably the least space-intensive method), which I fact-checked here. It's basically just a different insulated mug. 

    This technique comes from Alcademics reader Cody P, who refined the method. He says, "Doing ice balls like this is just like your article on using a mug, but I left a few mugs too long and they broke from expansion (no big deal if a little can breaks)."

    This method uses a beer can in a koozie with the top cut off. 

    The technique is:

    1. Buy a Yeti Colster. (Another brand might work, but Yeti makes particularly good insulated mugs/koozies.)
    2. Buy some ice ball molds. Cody P said he thinks he bought his (seen in the pictures) at Williams Sonoma, but they're the same size as these 2.5" ice ball molds.
    3. Cut the top off a beer can (and consider filing or taping the top edge to prevent it cutting you when using. 
    4. Put the can in the Colster and fill it with water.
    5. Fill an ice ball mold almost full (leave a little room) with water.
    6. Hold your thumb over the hole of the ice ball mold and set it upside-down (hole facing down) on top of the can in the Colster. 
    7. Allow to freeze overnight or roughly 8-10 hours. Remove frozen ice ball. 

    Can and coozy

    Removing excess water
    Removing excess water

    Boiled vs two unboiled

    (For first-time readers, what is happening is that the water in the ice ball is the first part to freeze, pushing trapped air/impurities away from the point of freezing down into the insulated mug.)

    Though I've not had additional success with boiling water before freezing, Cody P has. He observed: 

    1. If you boil the water then the ice comes out SUPER, unboiled gives these air bubbles on the surface but still comes out 100X better than a regular mold.
    2. If you don't pour out some water like I'm doing in one of the pictures, your ball can become an egg as seen in the ice ball picture.
    3. It takes about 8-10 hours to freeze a ball in my freezer but I'm not sure what the temperature is.
    4. If you just want blocks of ice, regular tap water works great since it freezes super slow and is a small volume of water (I think). I found that after about 14 hours I can take out the large block you see and break it in half to use for whiskey and such. They are also decent sized to use an ice ball press.

    Pictures of the ice from the bottom of the can are below.

    Boiled4
    Boiled4


    Thanks much to Cody P for the method and for sending in the pictures!


  • Use an Aquarium Pump to Freeze Objects Inside Ice Blocks

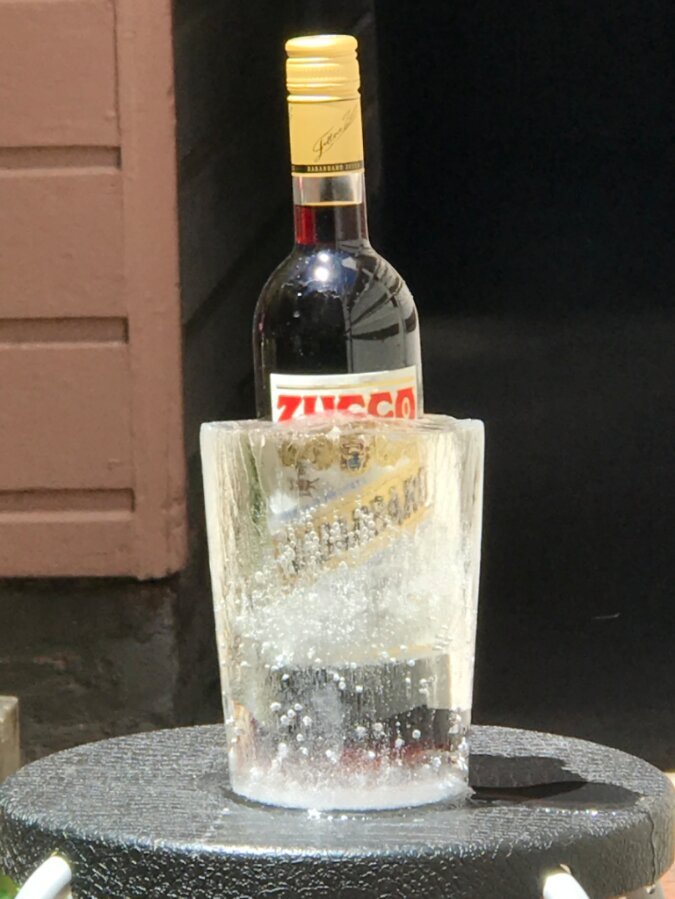
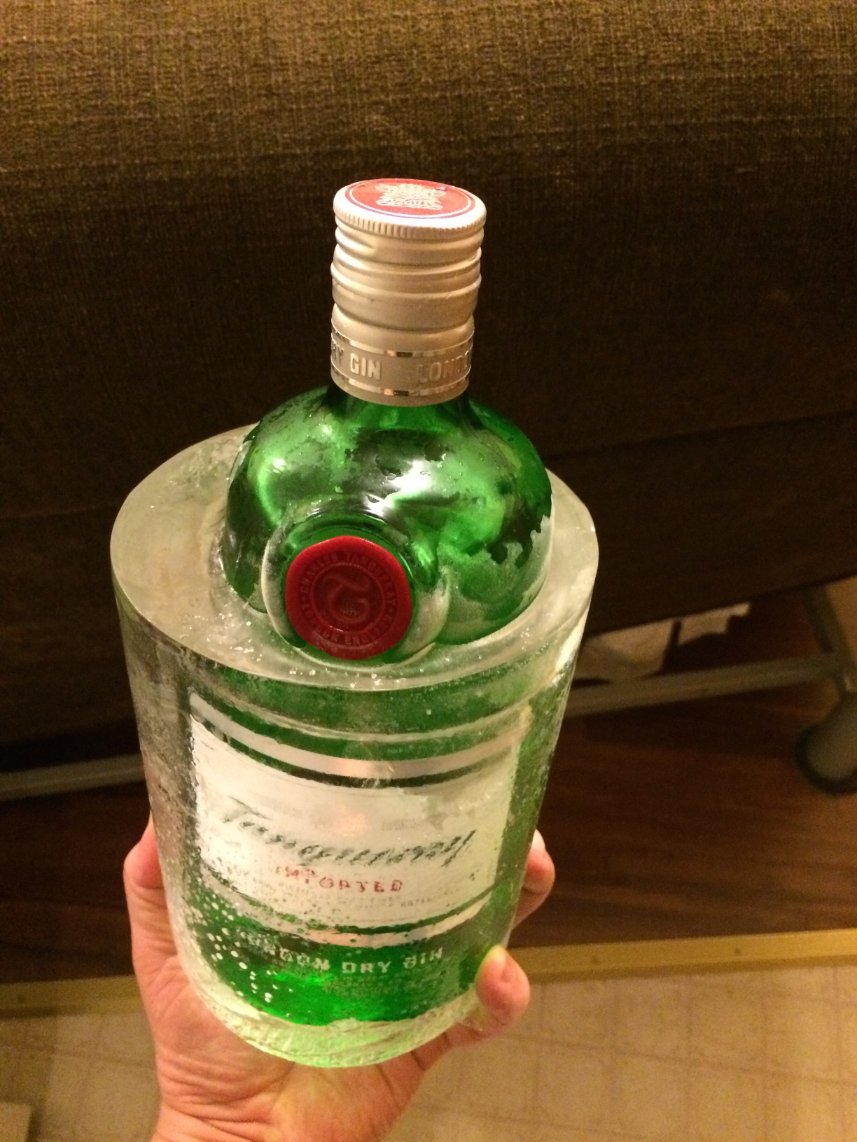
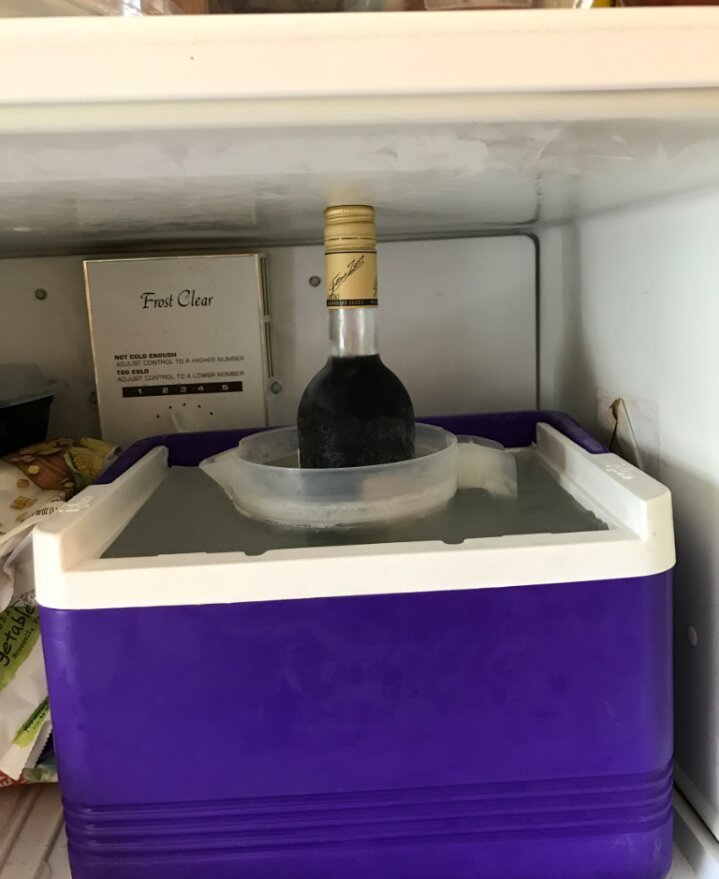
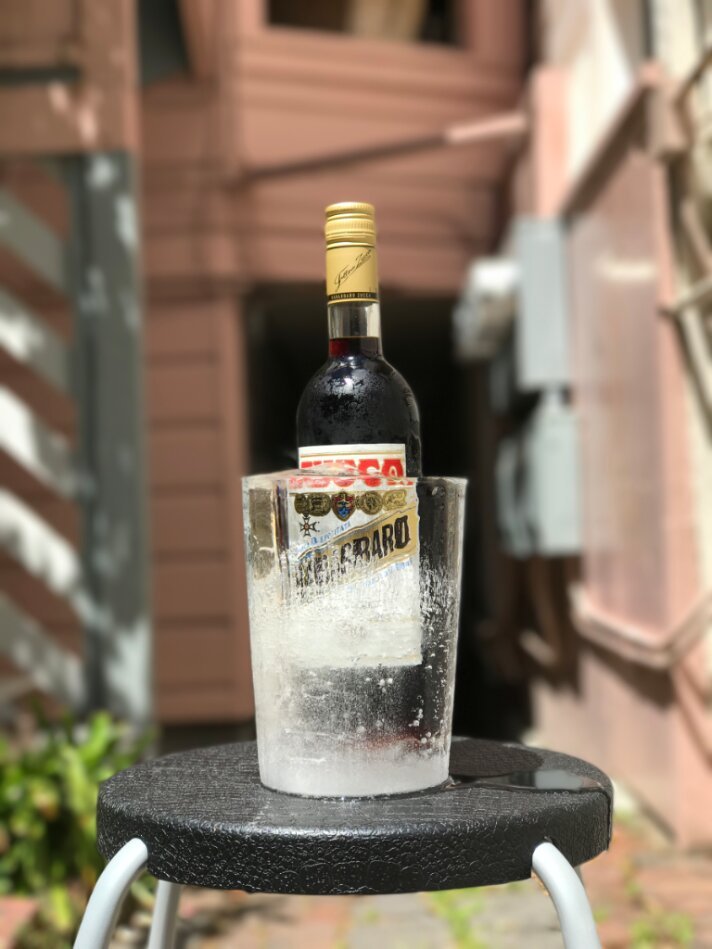
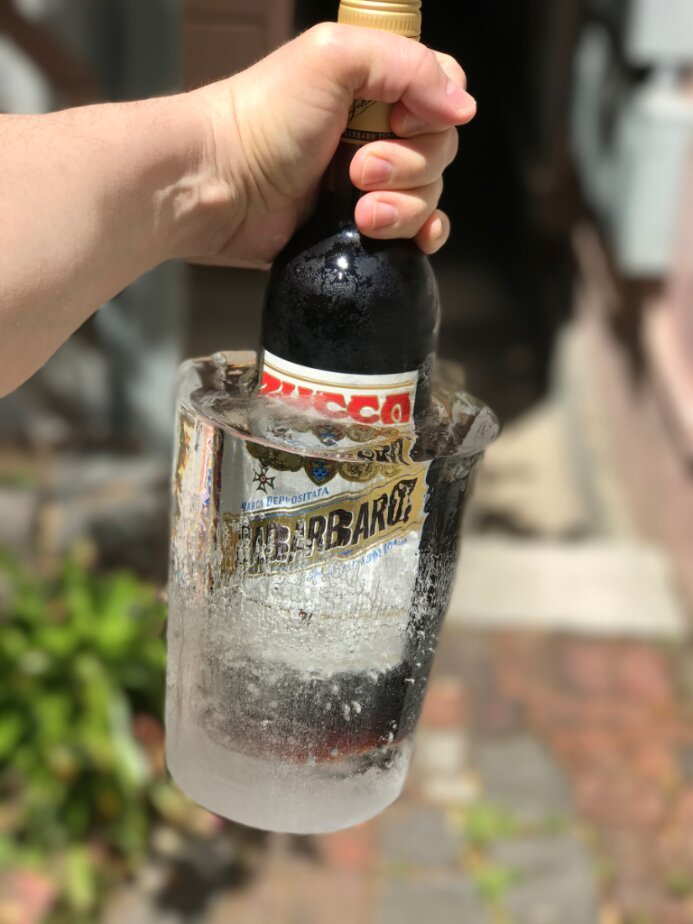
    6a00e553b3da20883401b8d159845d970c.jpgYou can make a clear block of ice using an insulated cooler with the Directional Freezing method. You can also use this method to freeze objects inside of ice blocks including freezing a full-sized bottle inside an ice block.

    If you are able to add an aquarium pump to the mix, you can make clear ice from the bottom up without any cloudy parts at the end; a method that mimics how professional ice block machines work. 

    (All of the many, many ice experiments posts are located here in the Index of Ice Experiments.)


    Today we'll talk about how to make clear ice with an aquarium pump and no cooler, and how this same method allows us to freeze objects in an ice block also without an insulated cooler.


    While I've always favored the non-electricity Directional Freezing method, Alcademics reader fang2415 prefers to use an aquarium pump without (much) insulation. This takes up little less space in the freezer, and it seems like a much faster method than with insulation – as below, he says he gets a 4-liter ice block every day! 

    In short, fang2415 places an aquarium pump at the top of an uninsulated container of water in the freezer, just barely insulating the top of the container with bubble wrap to help prevent it freezing over. He then found that this also works to freeze objects inside ice blocks. 

    He describes the method:

    The method is really simple: basically it's the same thing I now do to make most of my ice using an aquarium pump in a plain Tupperware-style plastic 5L container, but this time I threw a bottle inside the container and used tinfoil as a cover since the bottle was too tall for the lid to it.


    02_inside_freezing_rig01_freezing_rig

    I've been making all my ice this way recently, and every day I get a big beautiful 4-liter-or-so block of ice. The only real annoyance is cutting the pump out. 

    I filled the container up to about .5 inch from the top and stuck my 150 L/H aquarium pump to the side just below the surface. Usually I aim the pump so that the outlet goes across the middle of the surface, but this time I kept it to one side so that the jet went around the side of the bottle's neck.

    I've found that insulation barely matters with the pump method, although I usually cover the top with two layers of bubble wrap to reduce freezing at the top. Tying the bubble wrap with string works just fine; it just means that you need to knock the top ice-collar off at the end.

    After chiseling the pump out (which is probably the most difficult part of the process), I had a bottle with the top conveniently exposed inside a large squarish block of clear ice. 

    03_block_with_pump_front
    03_block_with_pump_front

    He then chisels out the aquarium pump and cuts or runs water over the outside edges to smooth out the block of ice and make the bottle label more legible. 

    Thanks once again to dedicated ice nerd fang2415 for not only doing the experiments, but for taking pictures and sharing with the Alcademics audience!