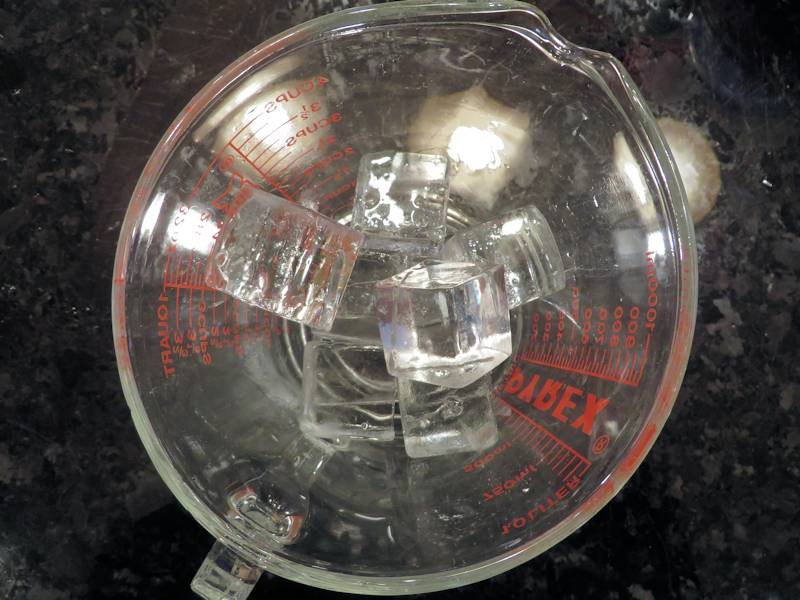
Category: ice

  • How to Freeze a Bottle in a Super Clear Ice block

    I've done a few years' worth of ice experiments here on Alcademics, and sometimes bartenders contact me on how to solve ice problems. (That should be my new reality show: Ice Whisperer.) 

    Here is the index to the ice experiments on Alcademics, where you'll find how to make clear ice blocks, clear ice cubes, clear ice spheres, and many other ice successes and failures. 

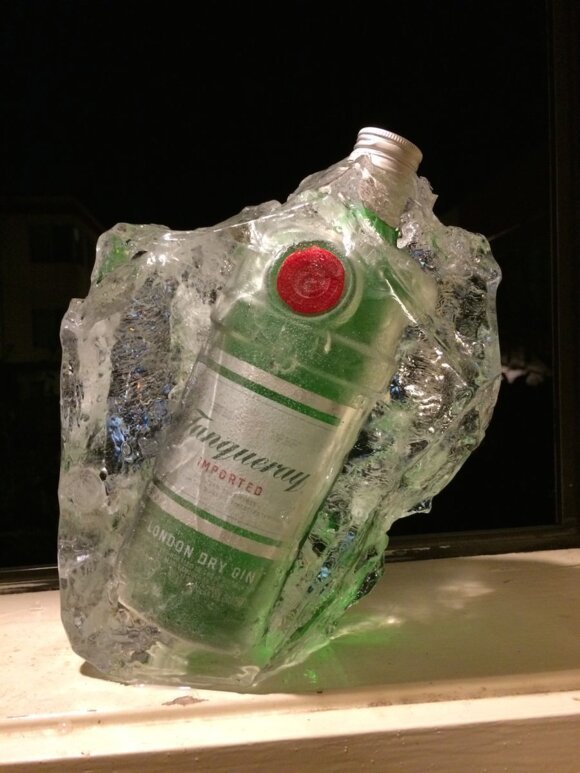
    IMG_7067

    One bartender was curious about some ways to present bottles in ice yet still be able to read the labels. I presented a few ideas and have probably found a solution that works for the bar (that I'll share when it's open), but this method is something that does work but wasn't a great fit for that particular program. 

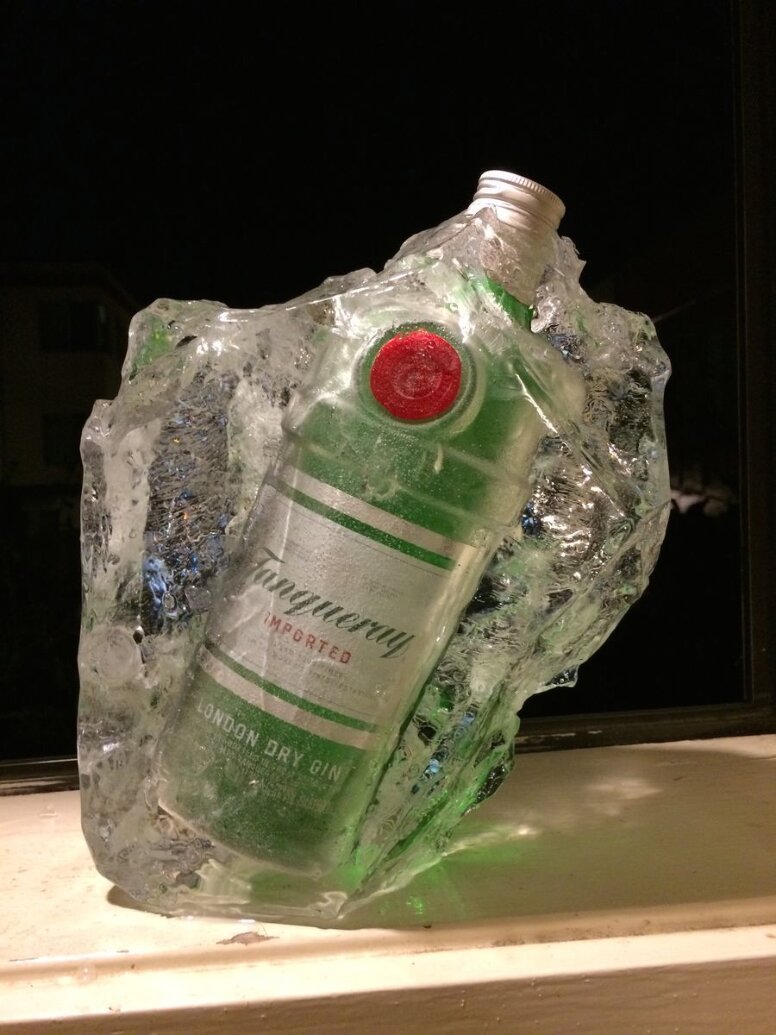
    Anyway, enough with the backstory. Look at this cool spinning bottle!


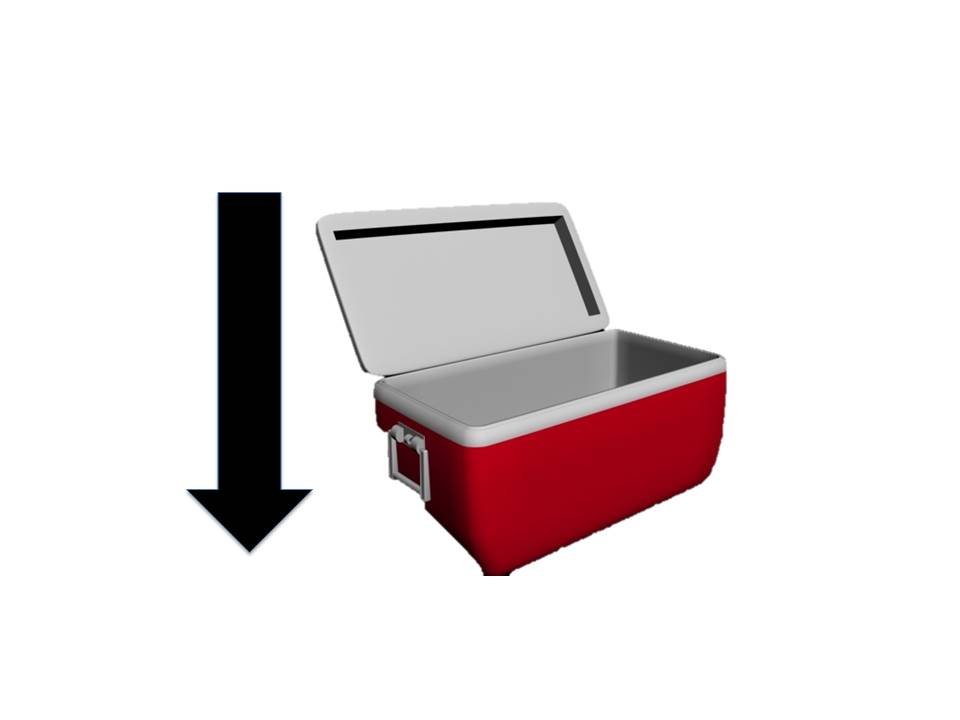
    This technique uses directional freezing (freezing inside an insulated cooler with the top off so that it only freezes from the top-down), with the bottle raised high so that it's in the clear part of the ice block. 

    Method for Freezing a Bottle in a Clear Ice Block: 

    1. Fill a picnic cooler with water.

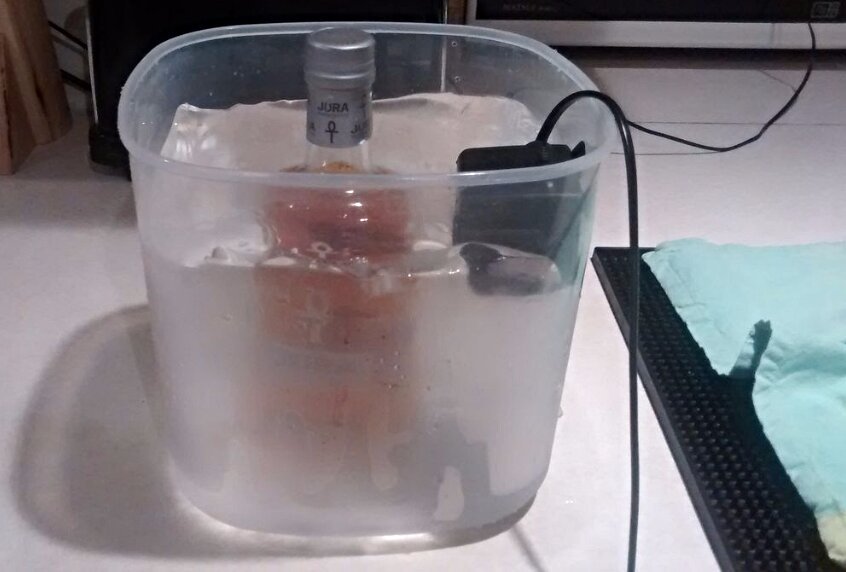
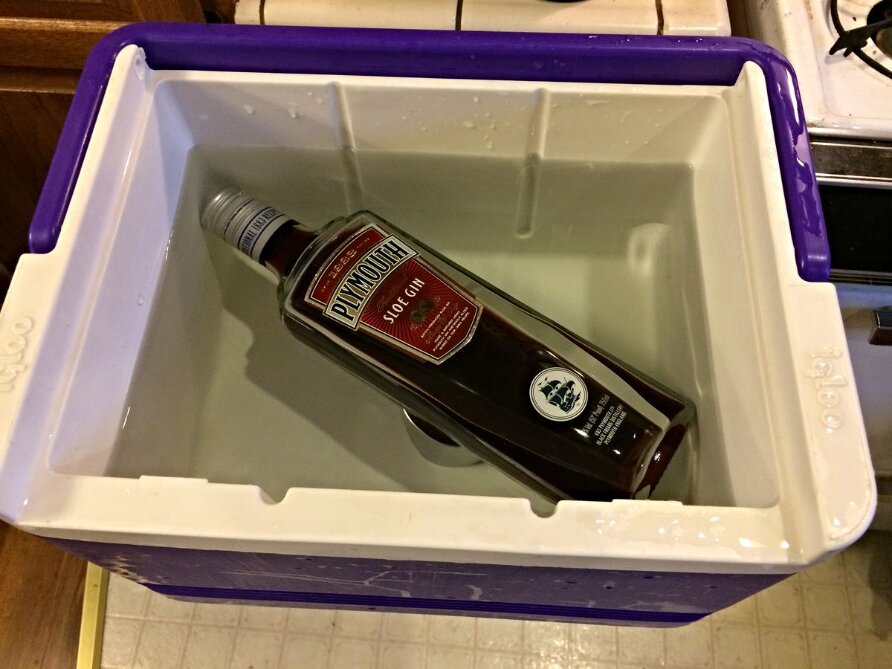
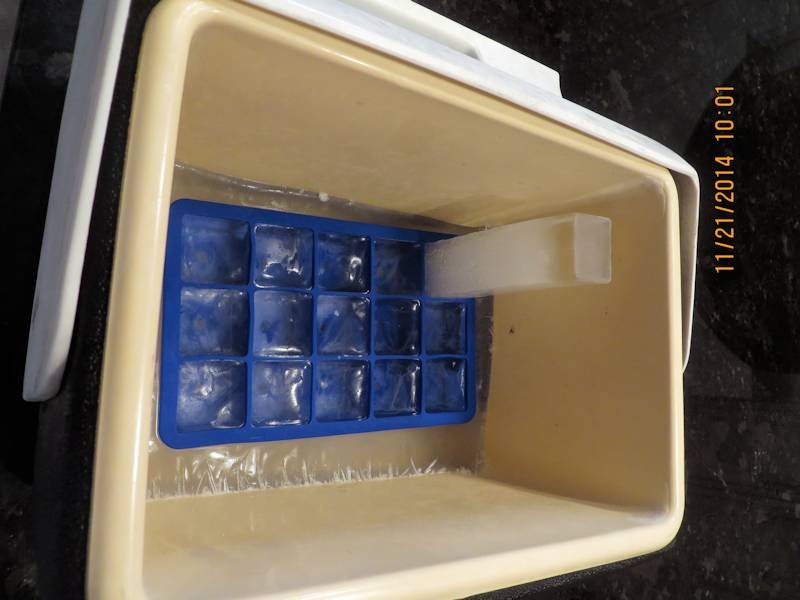
    2. Place some sort of stand on the bottom of the cooler. I used a plastic box in one experiment and an oversized metal piece that looks like a napkin ring in another. Anything that lets water move through it is ideal. 

    3. Place the bottle on its side, diagonally across the cooler. Note that very tall bottles may not fit in your cooler. Fill the cooler with water to an inch or two above the bottle. 

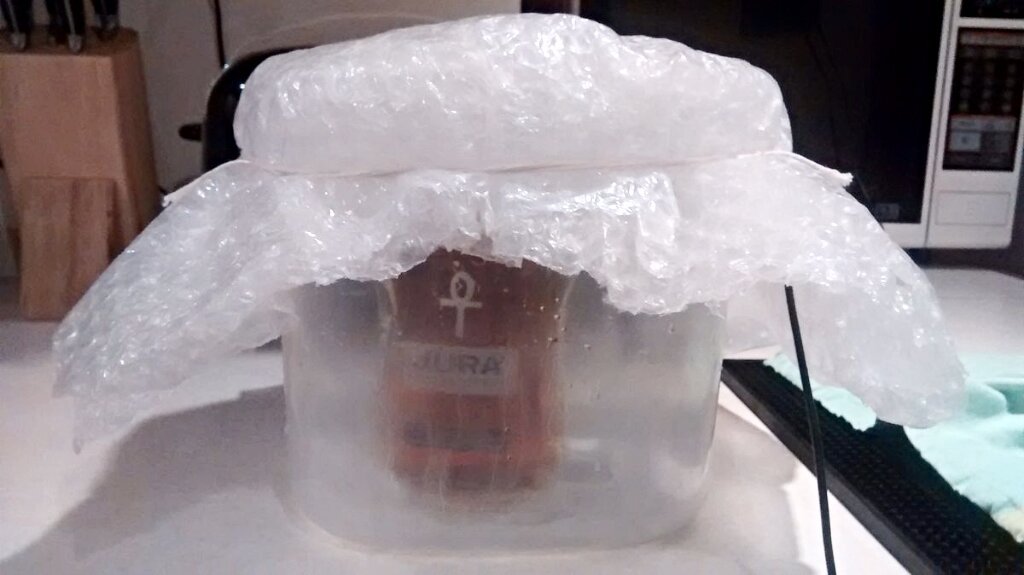
    4. Leave the top off the cooler and let it freeze for a couple of days. 
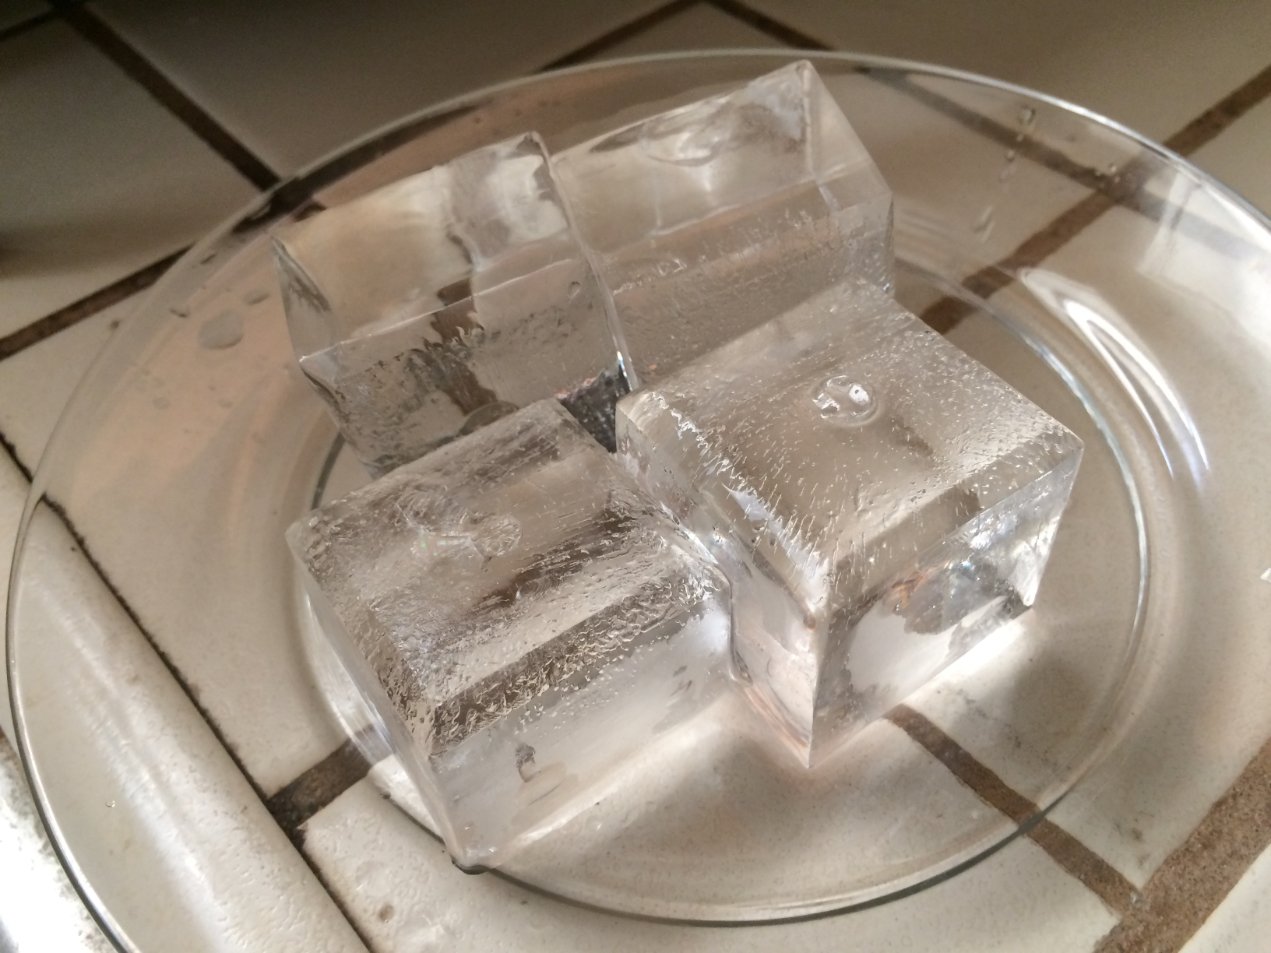
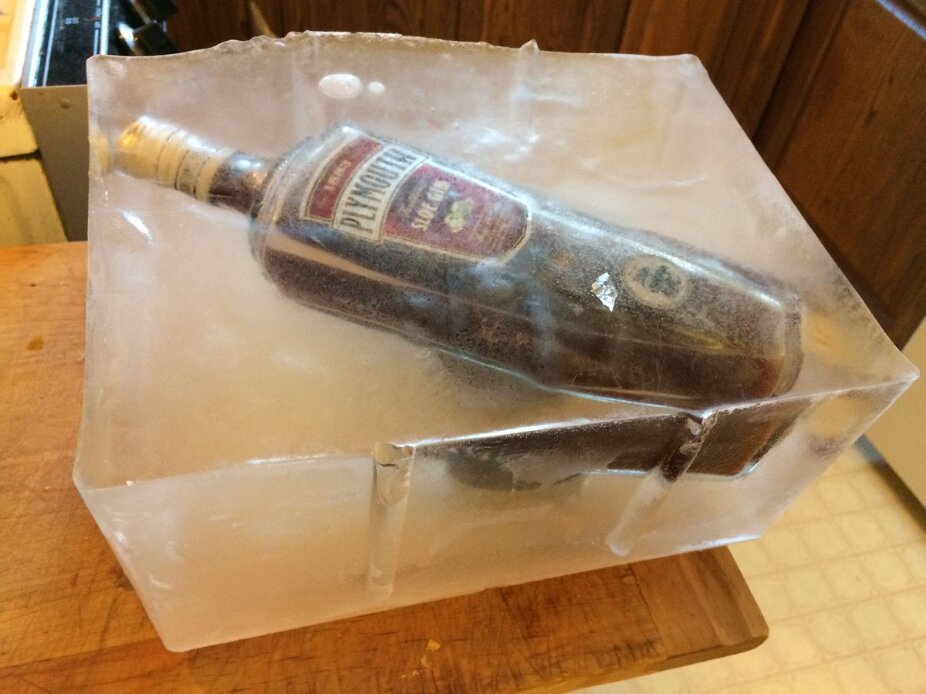
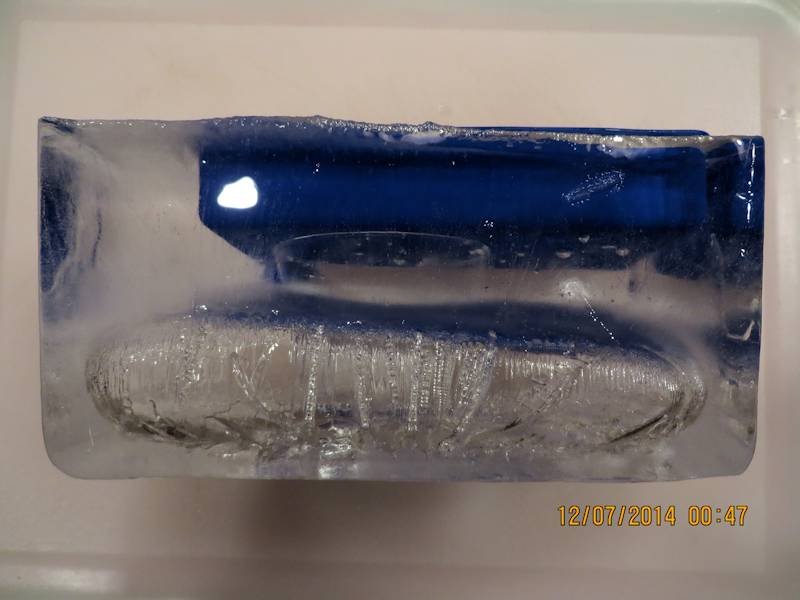
    5. When the block freezes either all the way through to the bottom of the cooler, or (better year) just to the point at which it starts to become cloudy at the bottom part of the block, remove it from the freezer. Tip over the cooler and let the block slide out. 

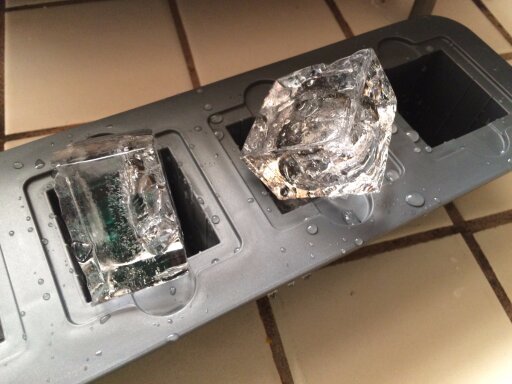
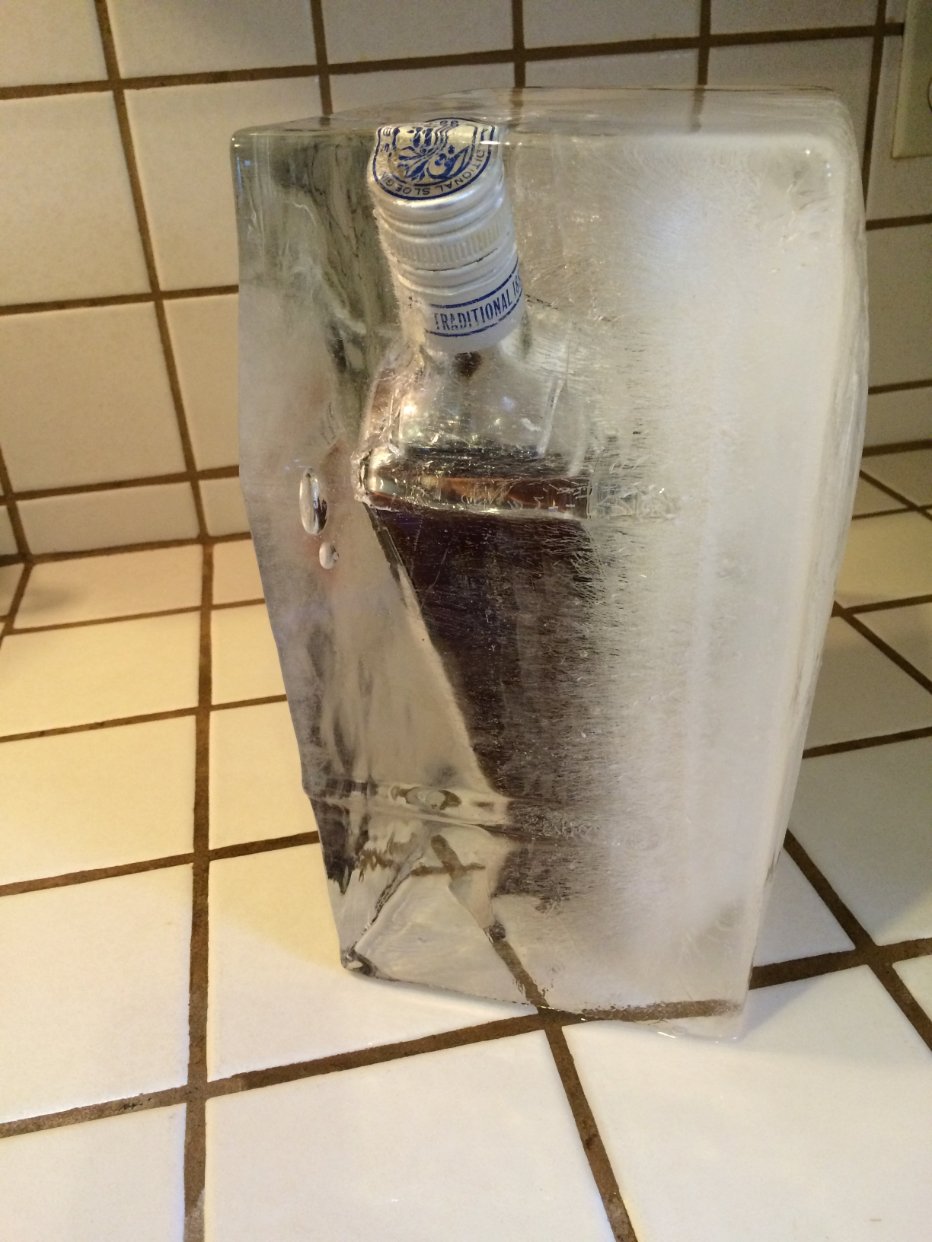
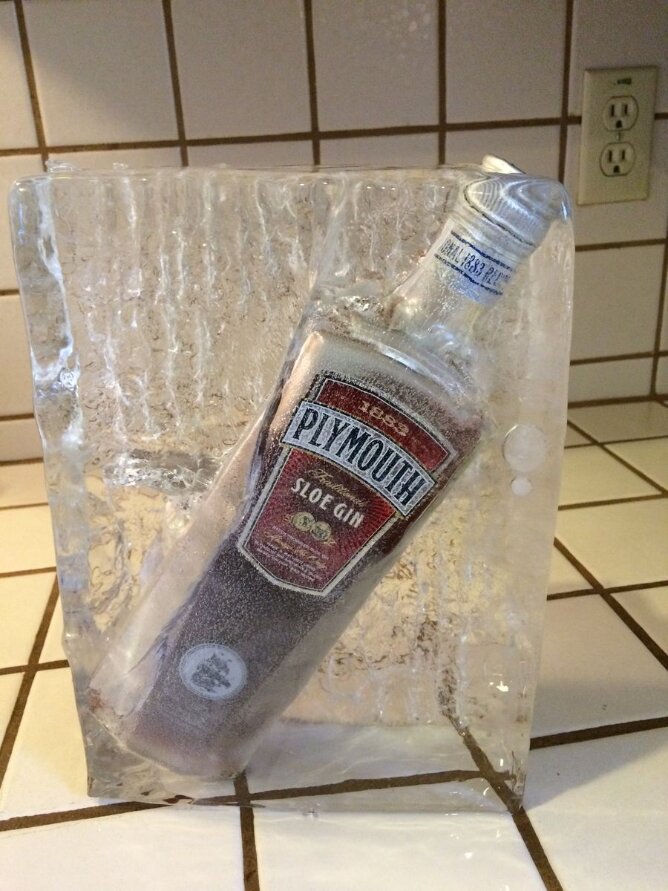
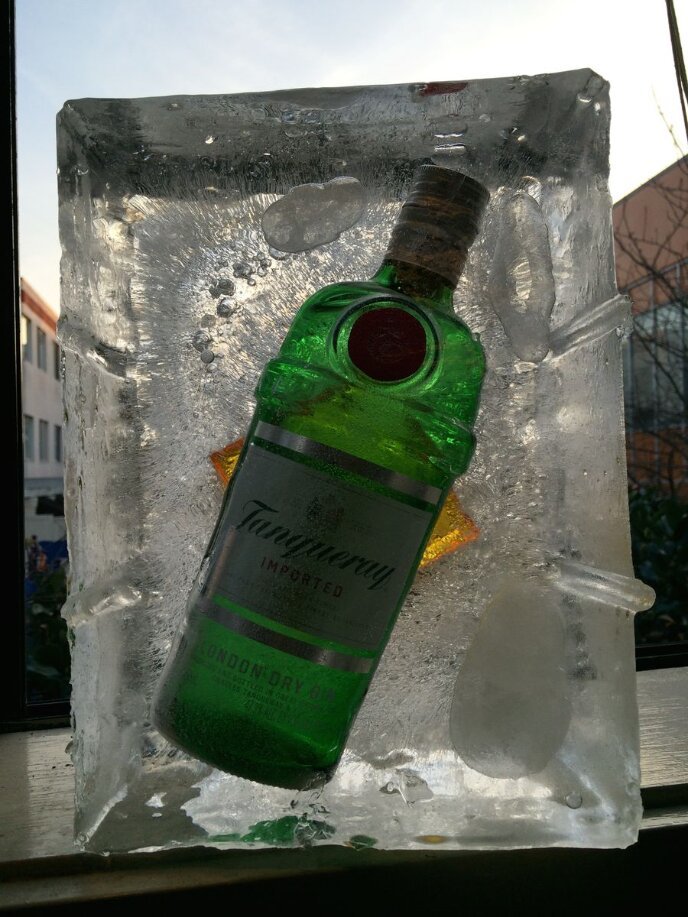
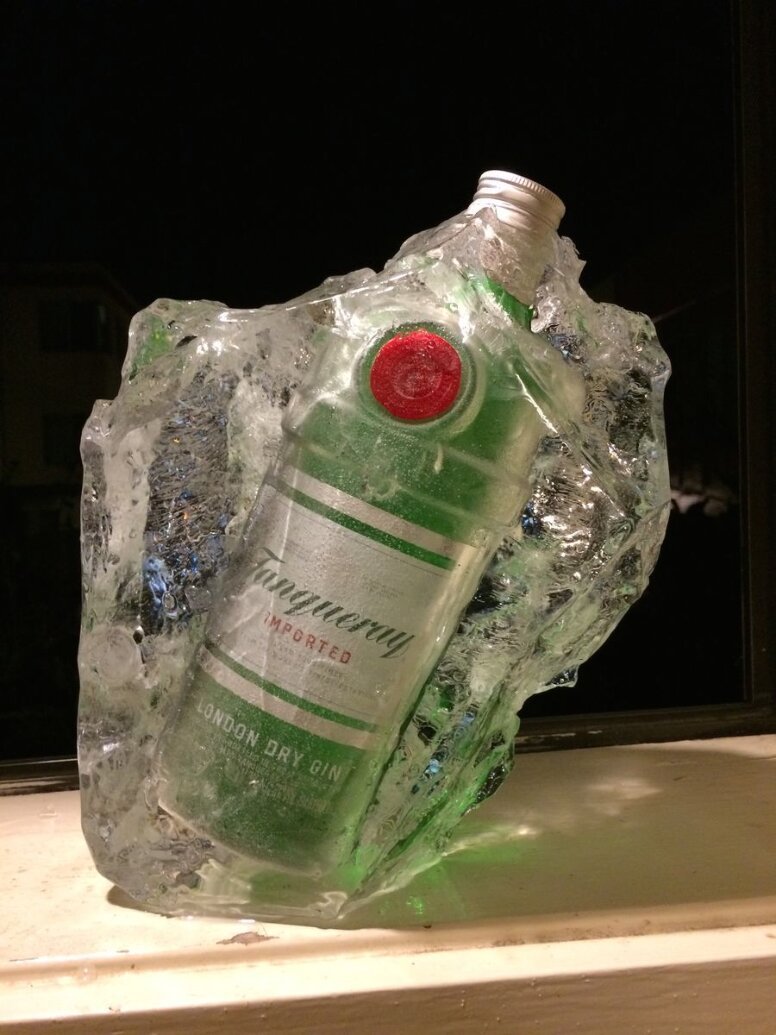
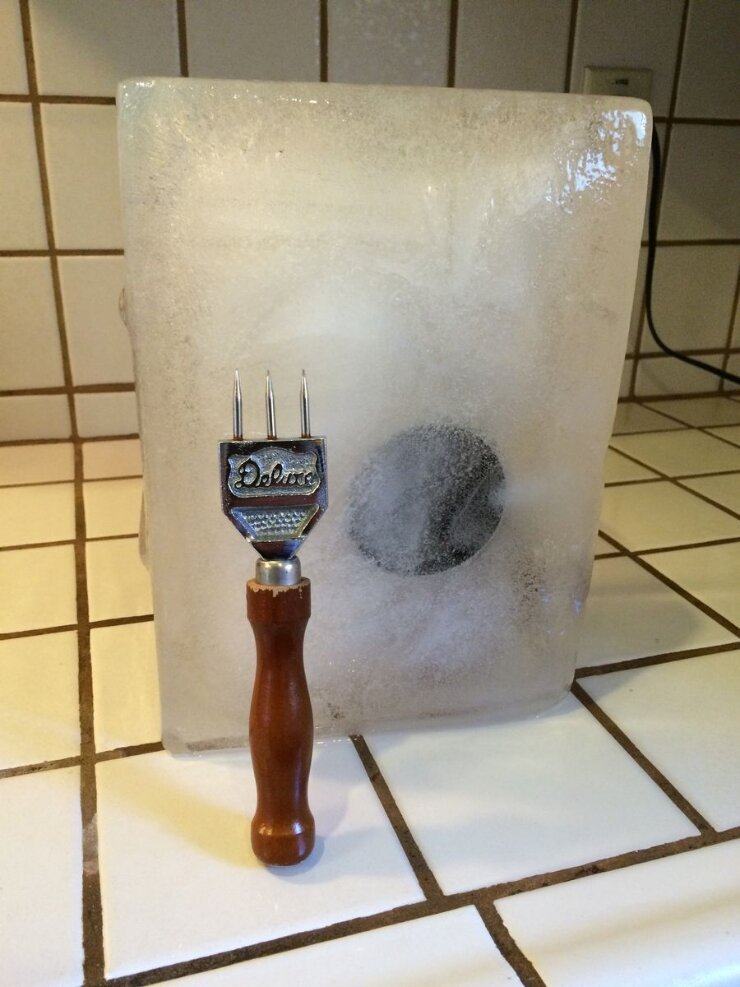
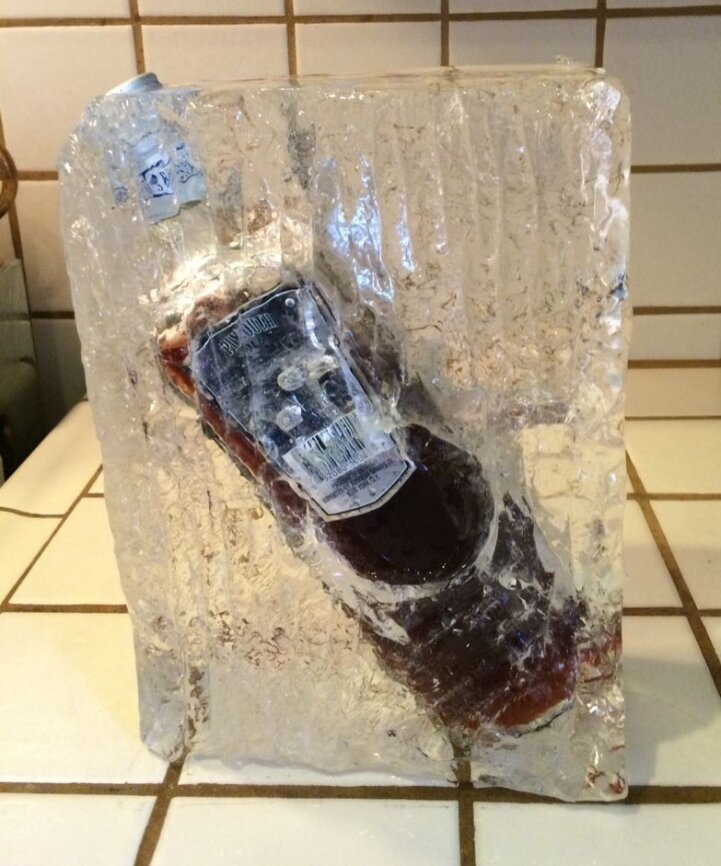
    6. Let the ice slowly warm to temper it, then use an ice pick (the three-prong one is my preferred tool for this task) to scrape off the cloudy section. You can break off the cloudy ice in any creative way you want. As you can see, for the Tanqueray I did a super cool nugget-style chipping, while for the Plymouth Sloe Gin I did a scrape on only one side so that it's super flat on the front surface. 

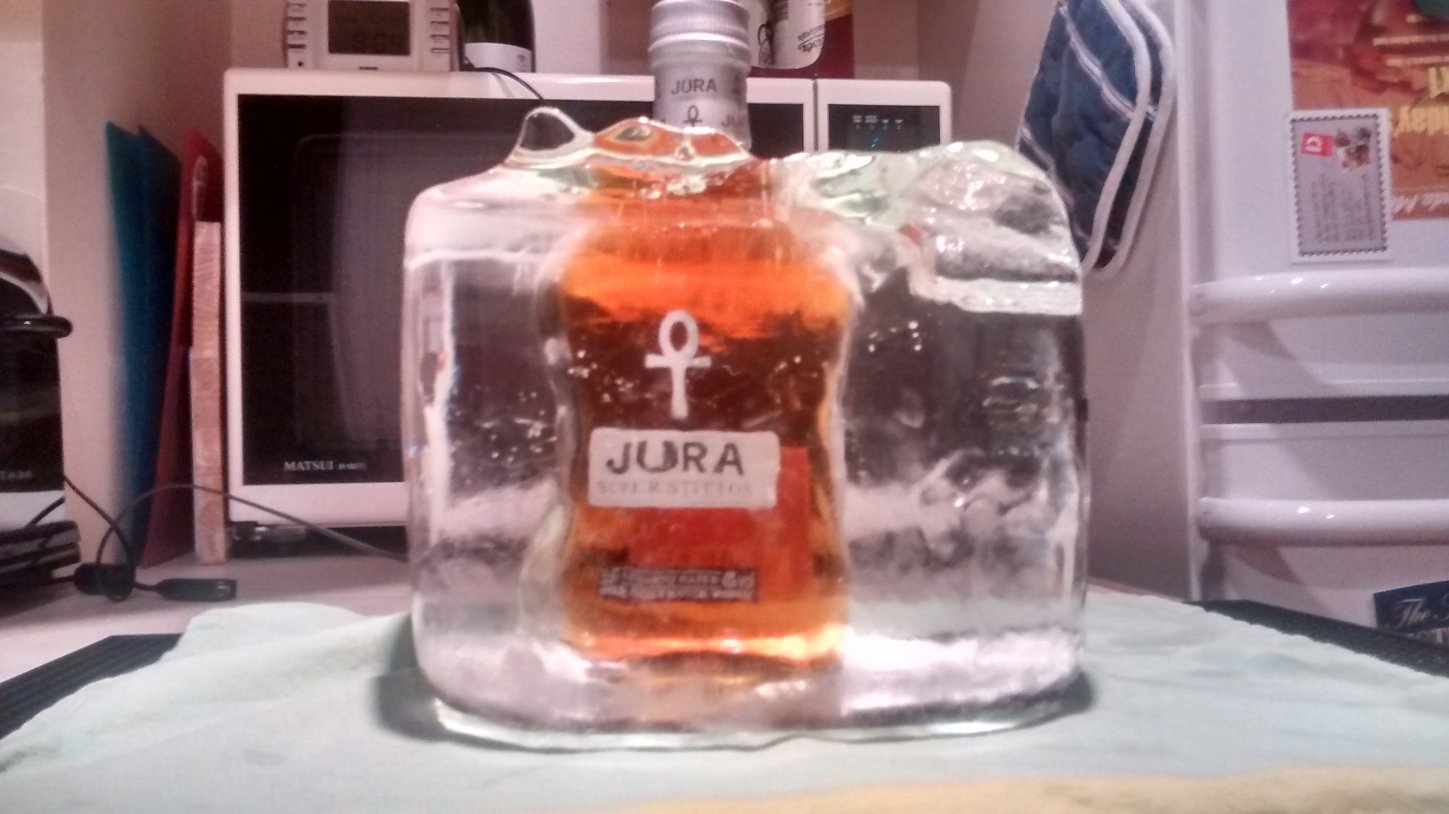
    As you can see, the top of the bottle is at the corner of the block, so you can easily open it and pour from the bottle still.

    Example One

    IMG_9245

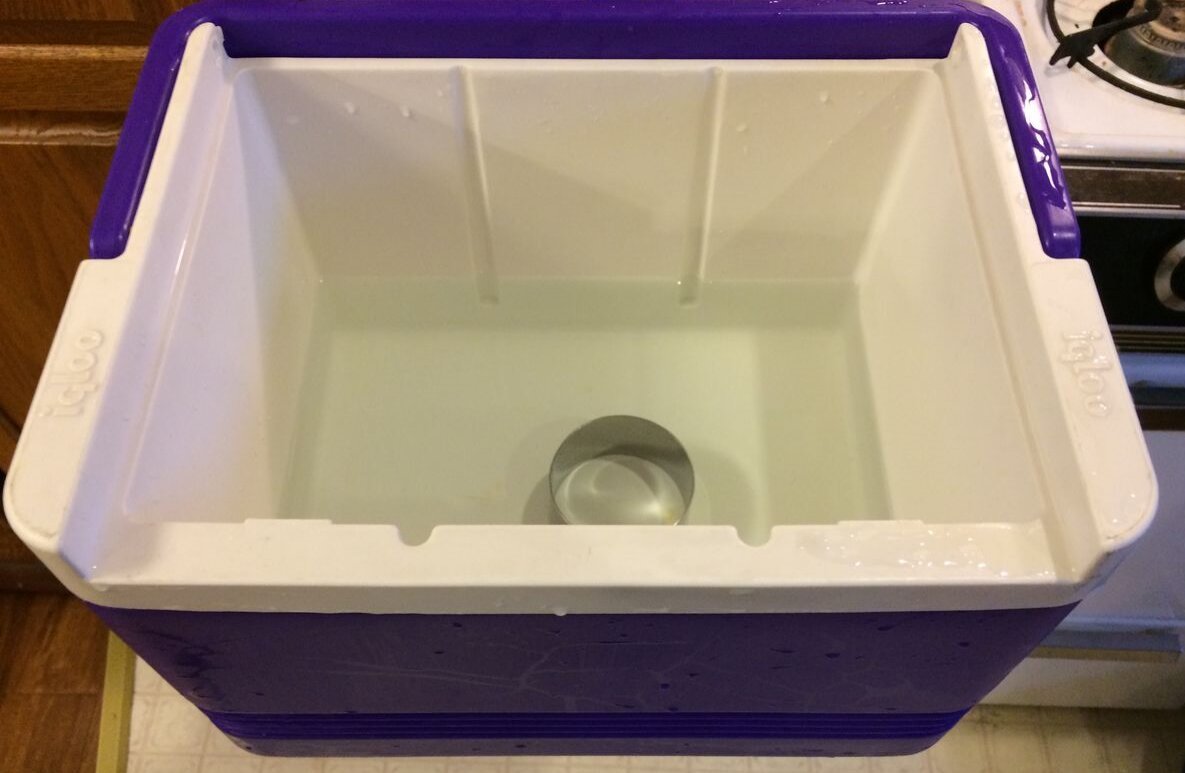
    Looking down on the cooler with a big napkin ring at the bottom on which the bottle will sit.
    IMG_9249

    The bottle sits on the stand with enough water to cover it.

    IMG_9264
    IMG_9264

    IMG_9264

    From the bottom: Now to chip off that cloudy layer!

    IMG_9264


    IMG_9264

    Ta Da!


     Example Two


    IMG_7021

    Frozen block with bottle. You can see the yellow of the plastic open box I sat the bottle on.

    IMG_7021


    Enjoy.


  • Making Clear Ice Balls with Tovolo Sphere Ice Molds and a Cooler

    We already know that you can make perfectly clear ice balls using a round silicone ice mold and an insulated mug.

    (Read about all the ice experiments on Alcademics by following the link to the index.)

    Now Alcademics reader Jason F. has refined the process using larger Tovolo Sphere Ice Molds and a cooler.

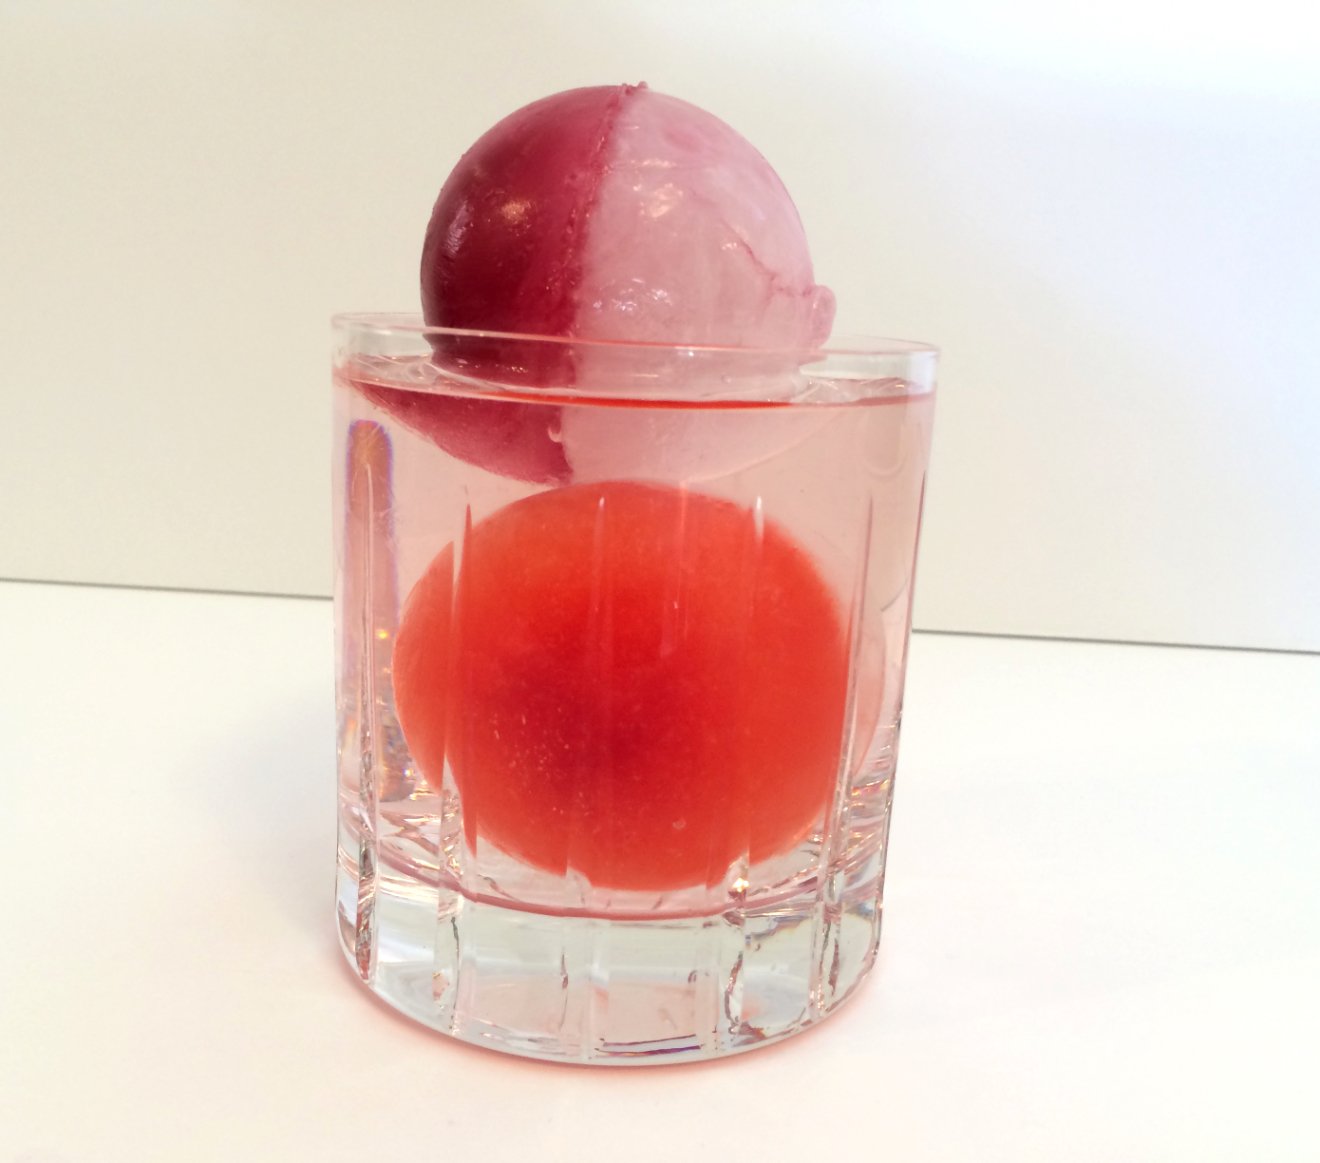
    Clear ice ball alcademics dot com

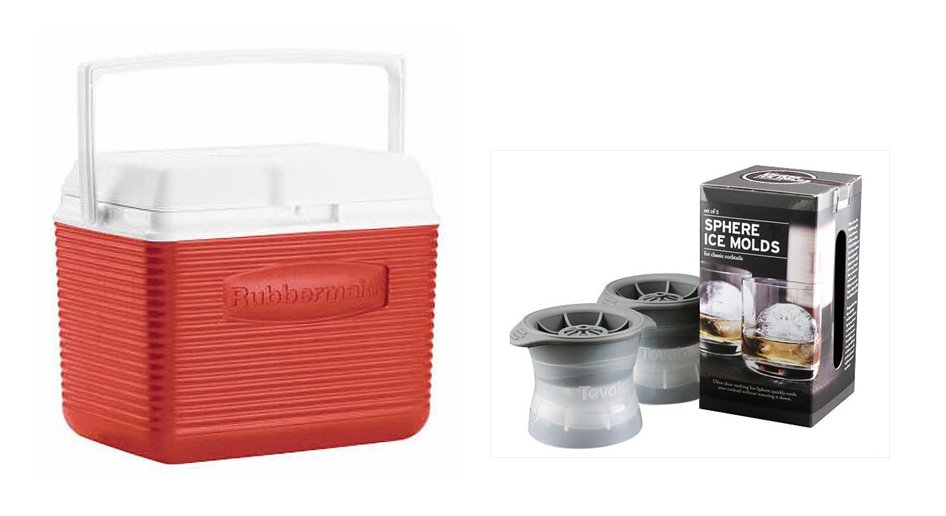
    The equipment is specifically the:

    Cooler and ice sphere molds

    If you're new to the ice experiments on Alcademics, it might help to read the top stories linked to from the Index of Ice Experiments on Alcademics

    This ice ball process is similar to the method using the insulated mugs and making ice blocks/cubes in a cooler:

    • You fill the ice ball molds with water, and float it hole-facing-down in water in the cooler.
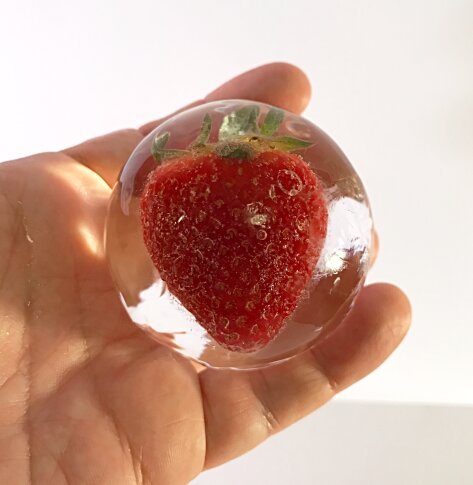
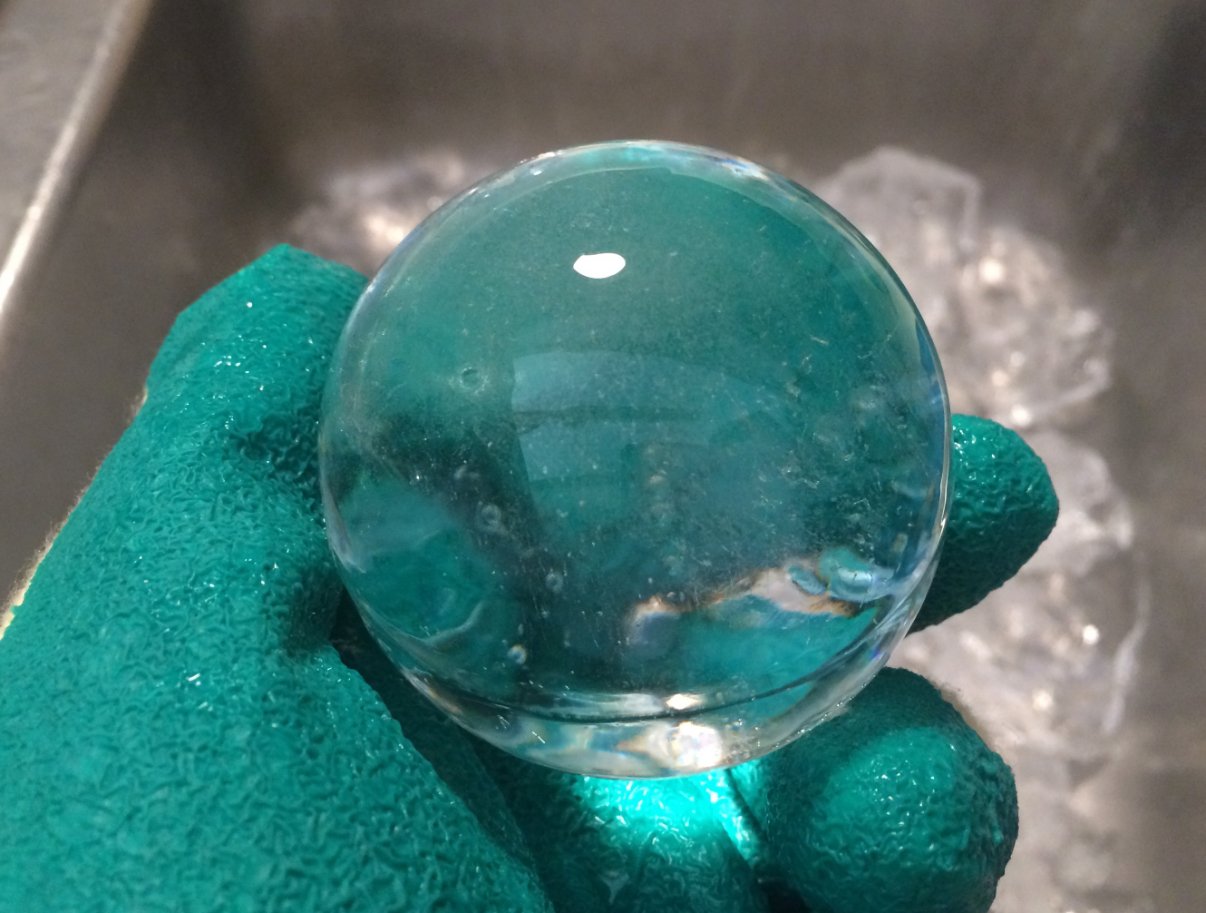
    • As the water freezes from the top-down (due to the insulated cooler), it pushes any trapped air and impurities toward the bottom of the cooler, leaving only clear ice in the mold. 

    Method:

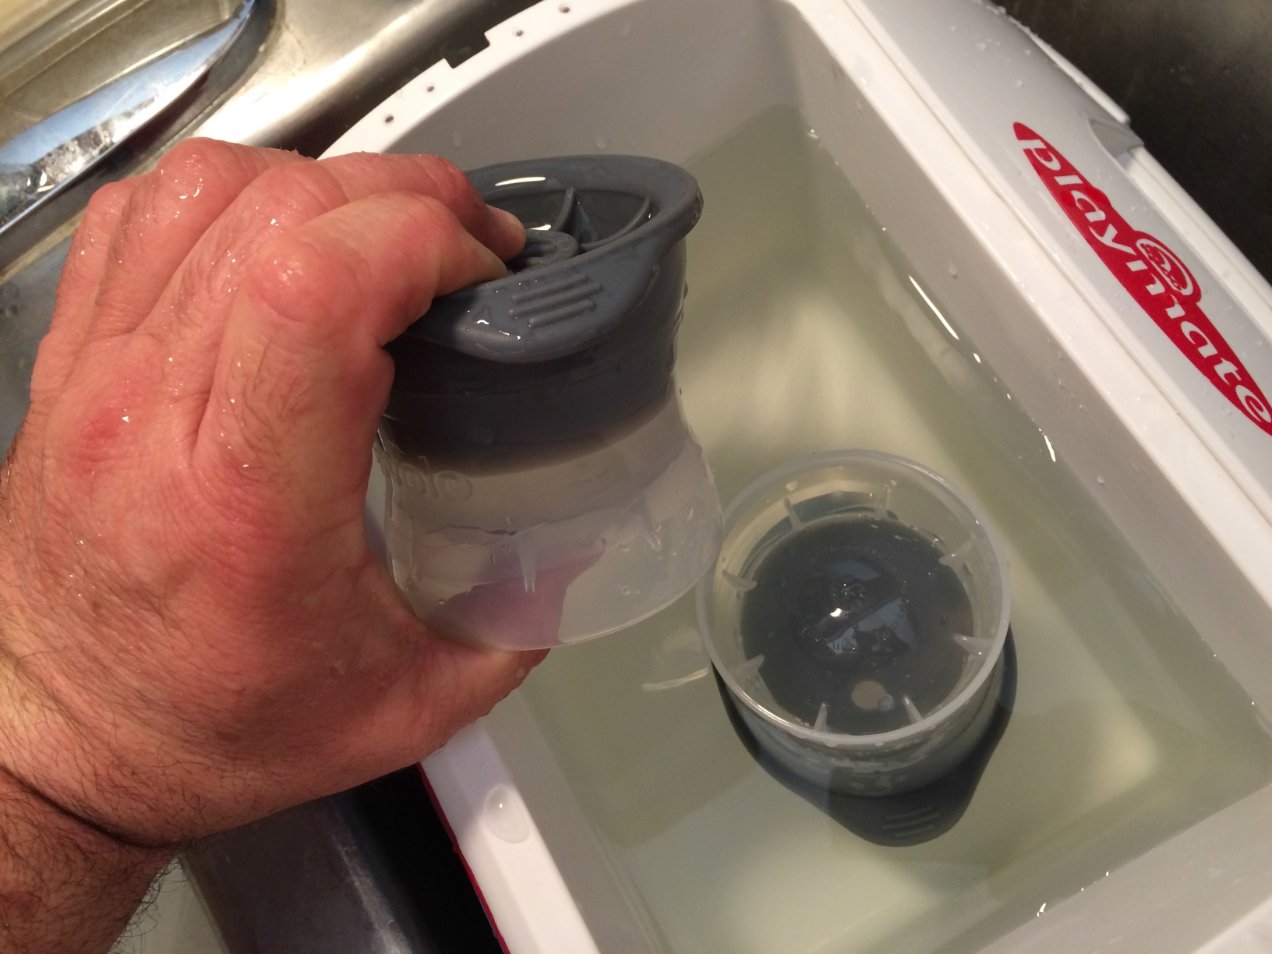
    Fill the cooler almost full with hot tap water. Allow it to cool for a few hours until it is about body temperature. Separate the molds put them in the water and re-assemble them under water making sure that all of the air is out of them.

    Grasp the top and bottom of the mold keeping one finger over the drain hole of the mold. Take it out of the water and dump the water remaining in the white plastic part of the mold.

    Wet ice molds


    Place the mold back in the water, hole side down and release your finger from the drain hole on the rubber side of the mold. This will ensure that air has not gotten in and give the top some buoyancy.

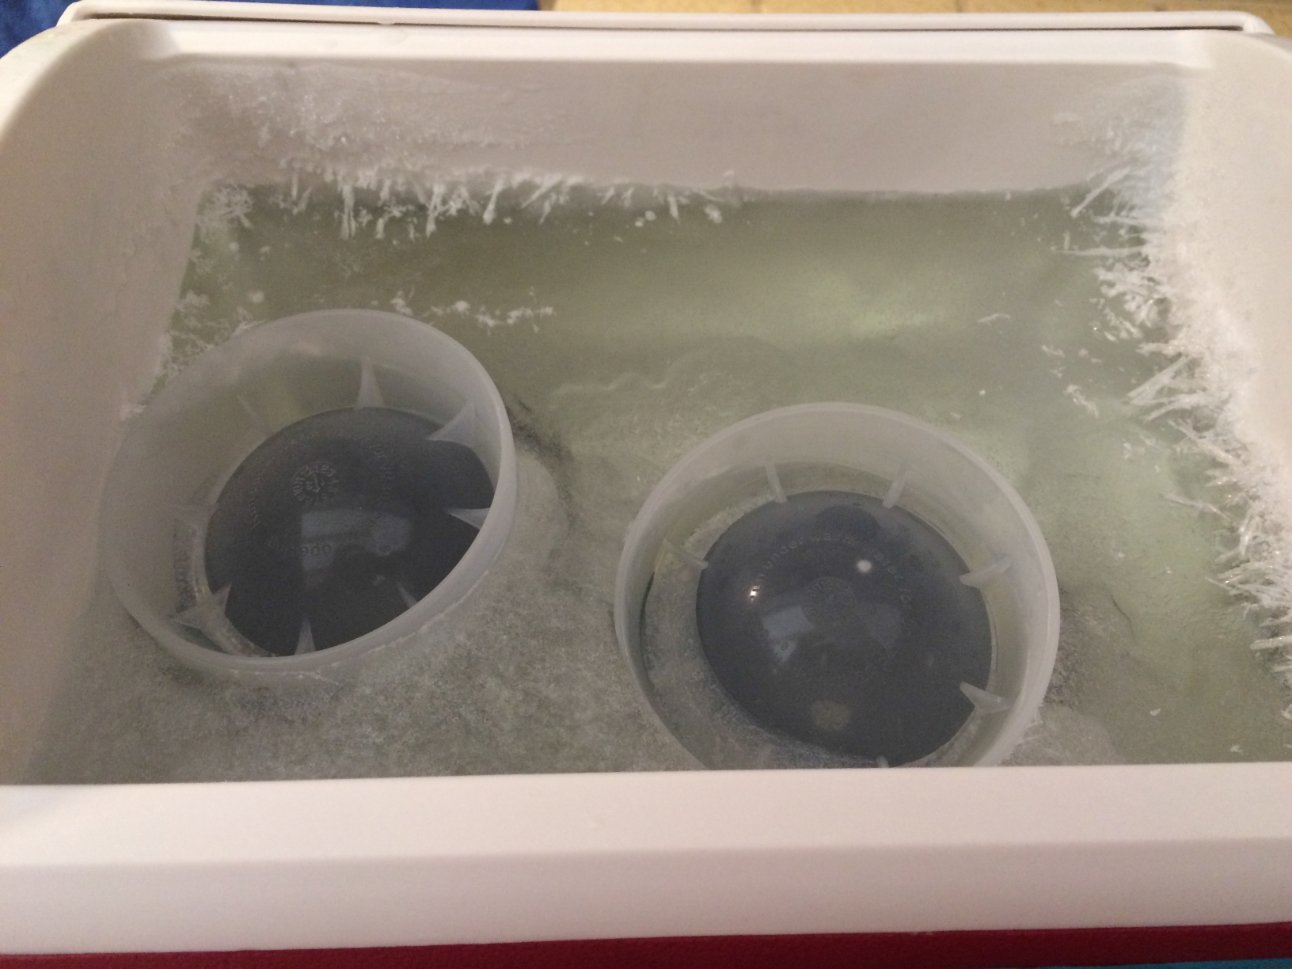
    Place the cooler in the freezer for 48 hours. The ice will form at about 1 inch per 12 hours. The block will not freeze all the way through and that is exactly how you want it!
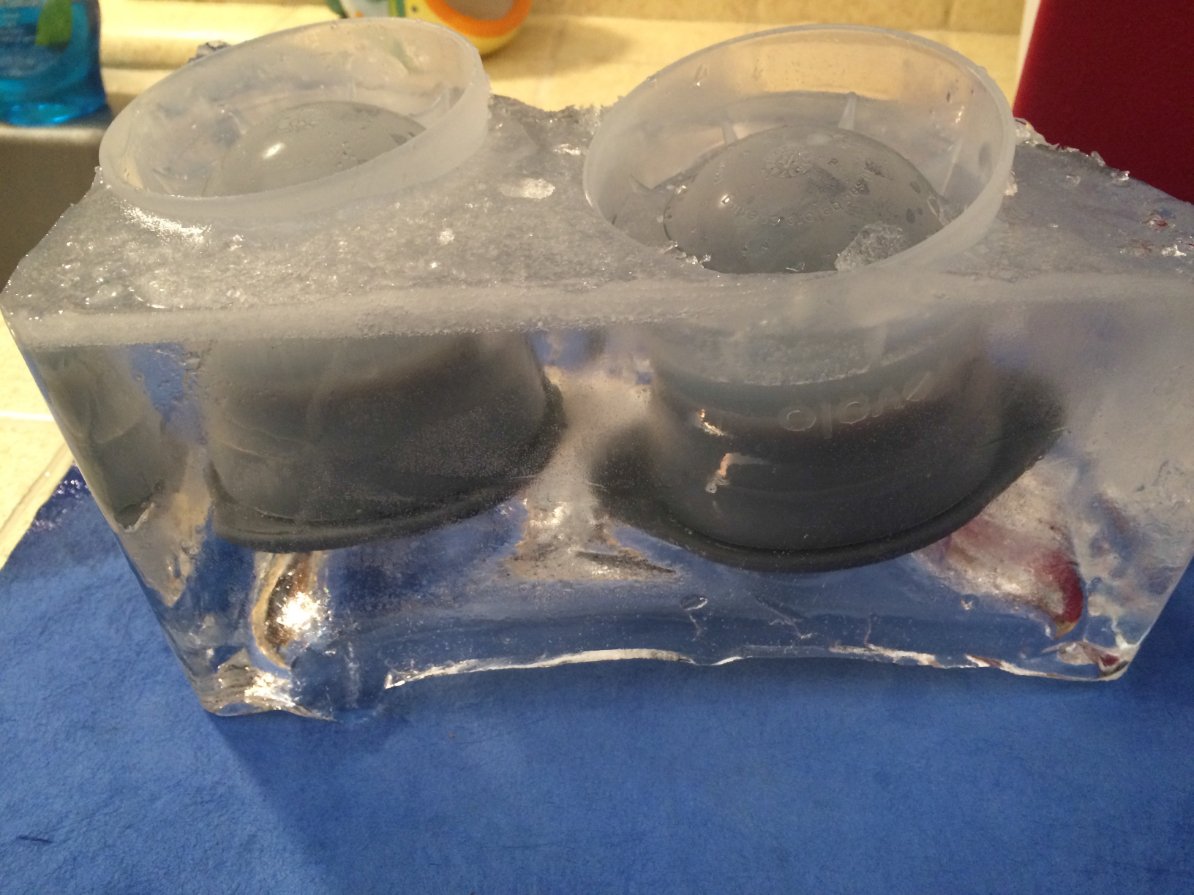
    When you remove your cooler it will look like this:

    Frozen ice molds

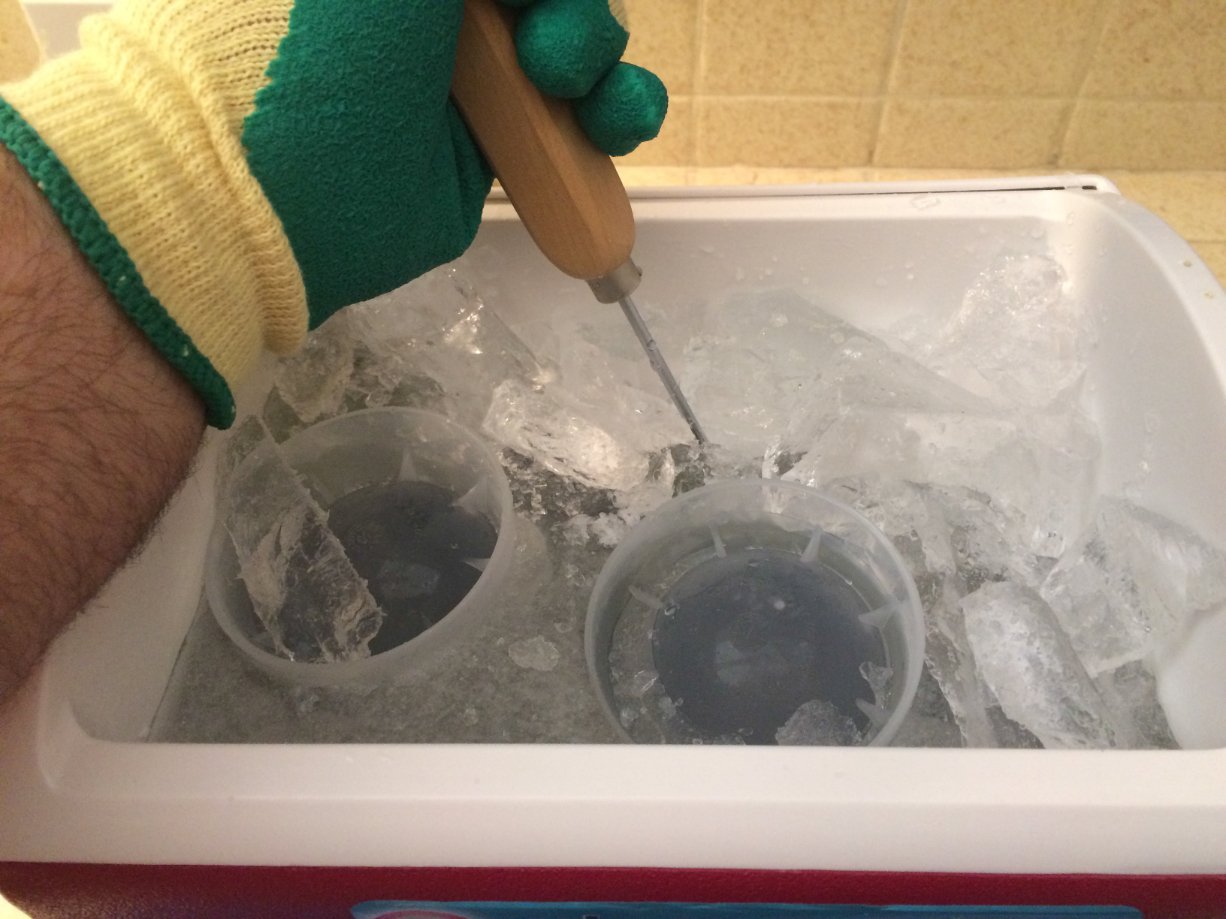
    Chip away the surrounding ice using the ice pick. Reserve the ice as you will have some nice, clear rocks for other cocktails.

    Chipping away ice

    You will get a block out with the molds frozen in it. Work on the shammy or tea towel so it does not slip around.

    Ice molds in block

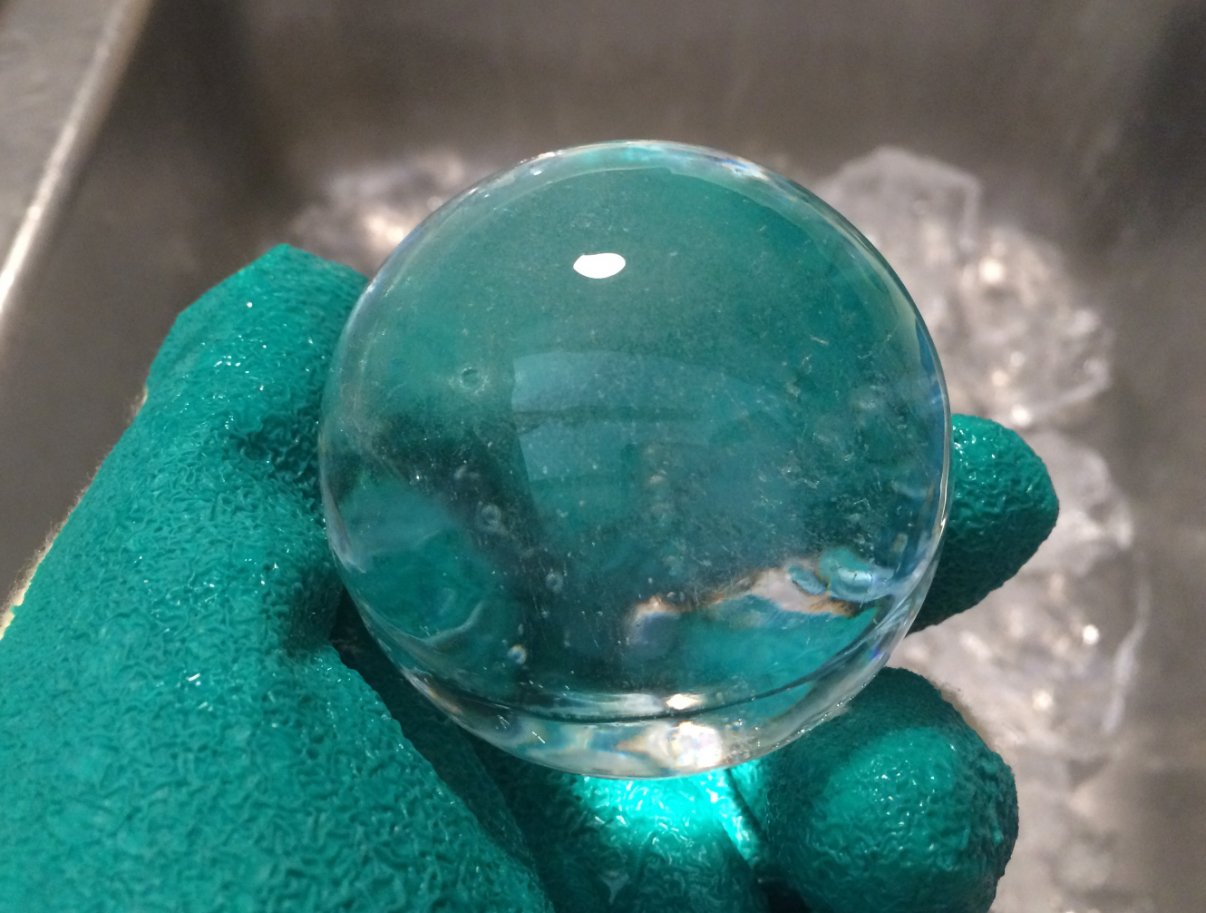
    Remove the sphere from the molds, they will just pop out no need for running water over them.

    Tempering The Ice 

    Allow the spheres to temper (sit out) on the towel for about 10 minutes. Tempering them is an important step so that they don’t crack when liquid is poured over them.

    You can store them in the freezer but remember to temper them when you remove them.

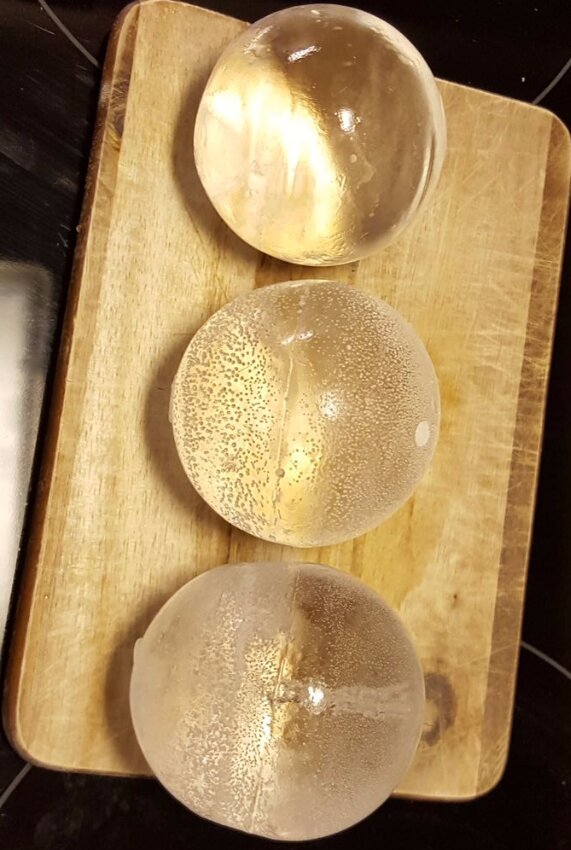
    When they come out of the mold or freezer they will be dull on the outside. You know they are tempered when they are clear all around.

    Clear ice ball alcademics dot com

    Thanks much to reader Jason F. for the method, the text, and the pictures! 

    The index of all ice experiments on Alcademics is here


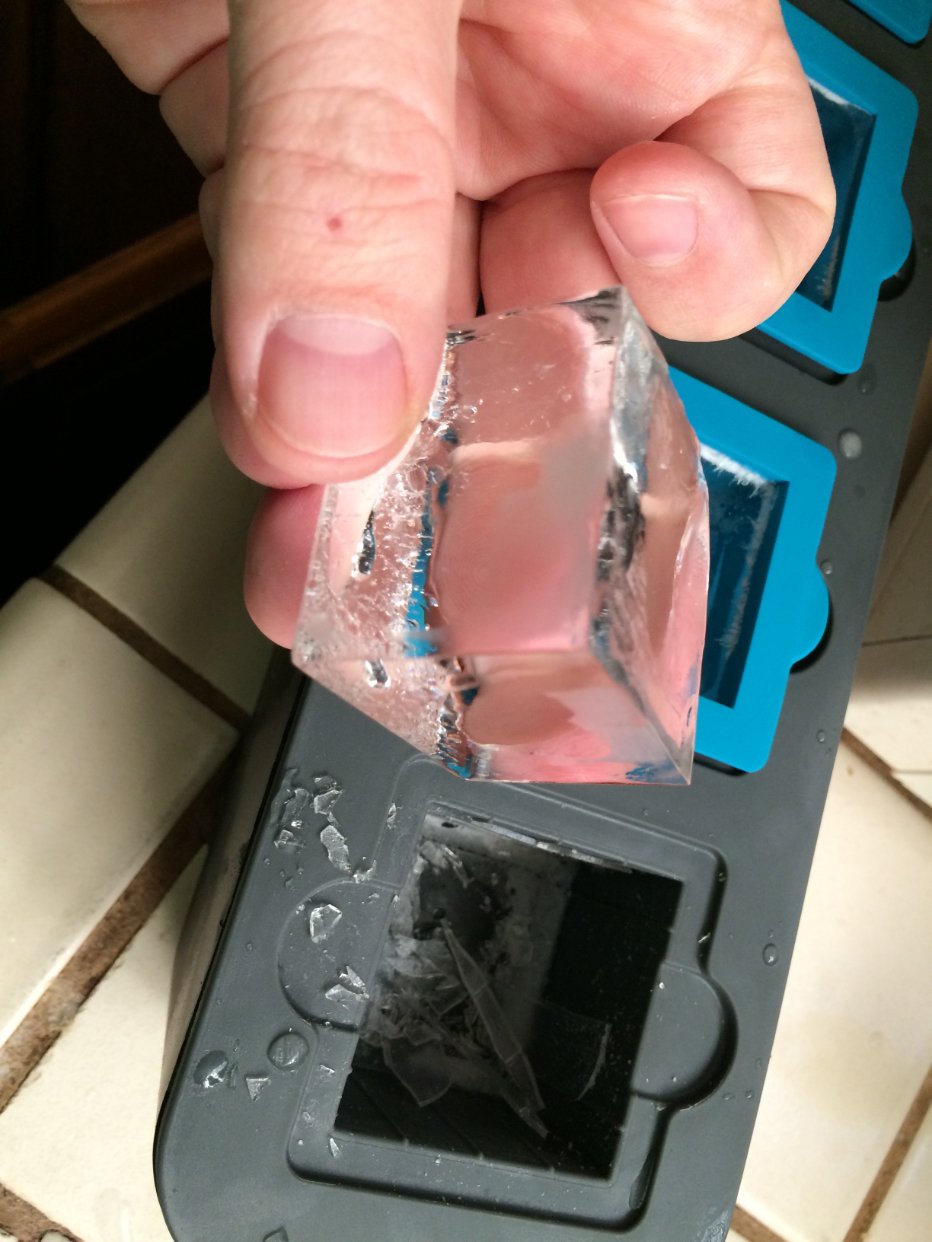
  • A New Clear Ice Ball Maker That Seems To Work Okay

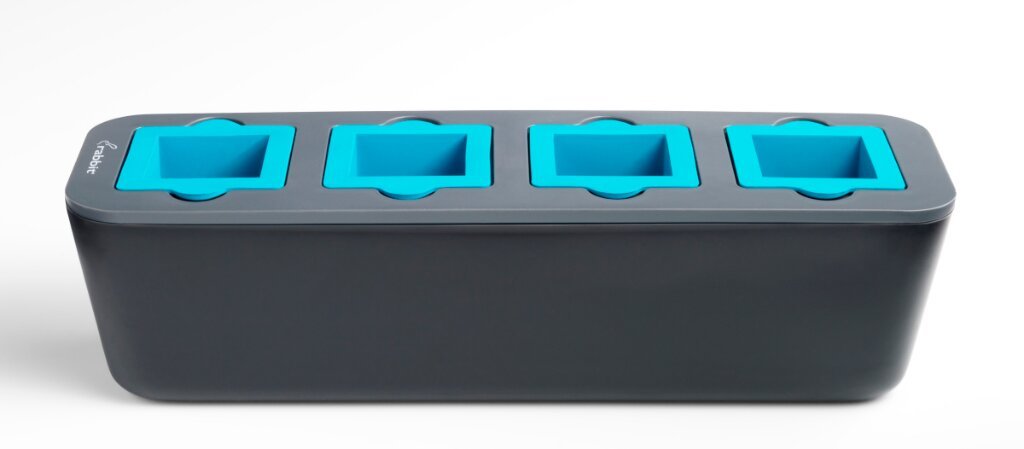
    You may recall from a billion years ago I found a clear ice maker that works similarly to the directional freezing/Igloo cooler method. It was the Polar Ice Tray and I wrote about it here.

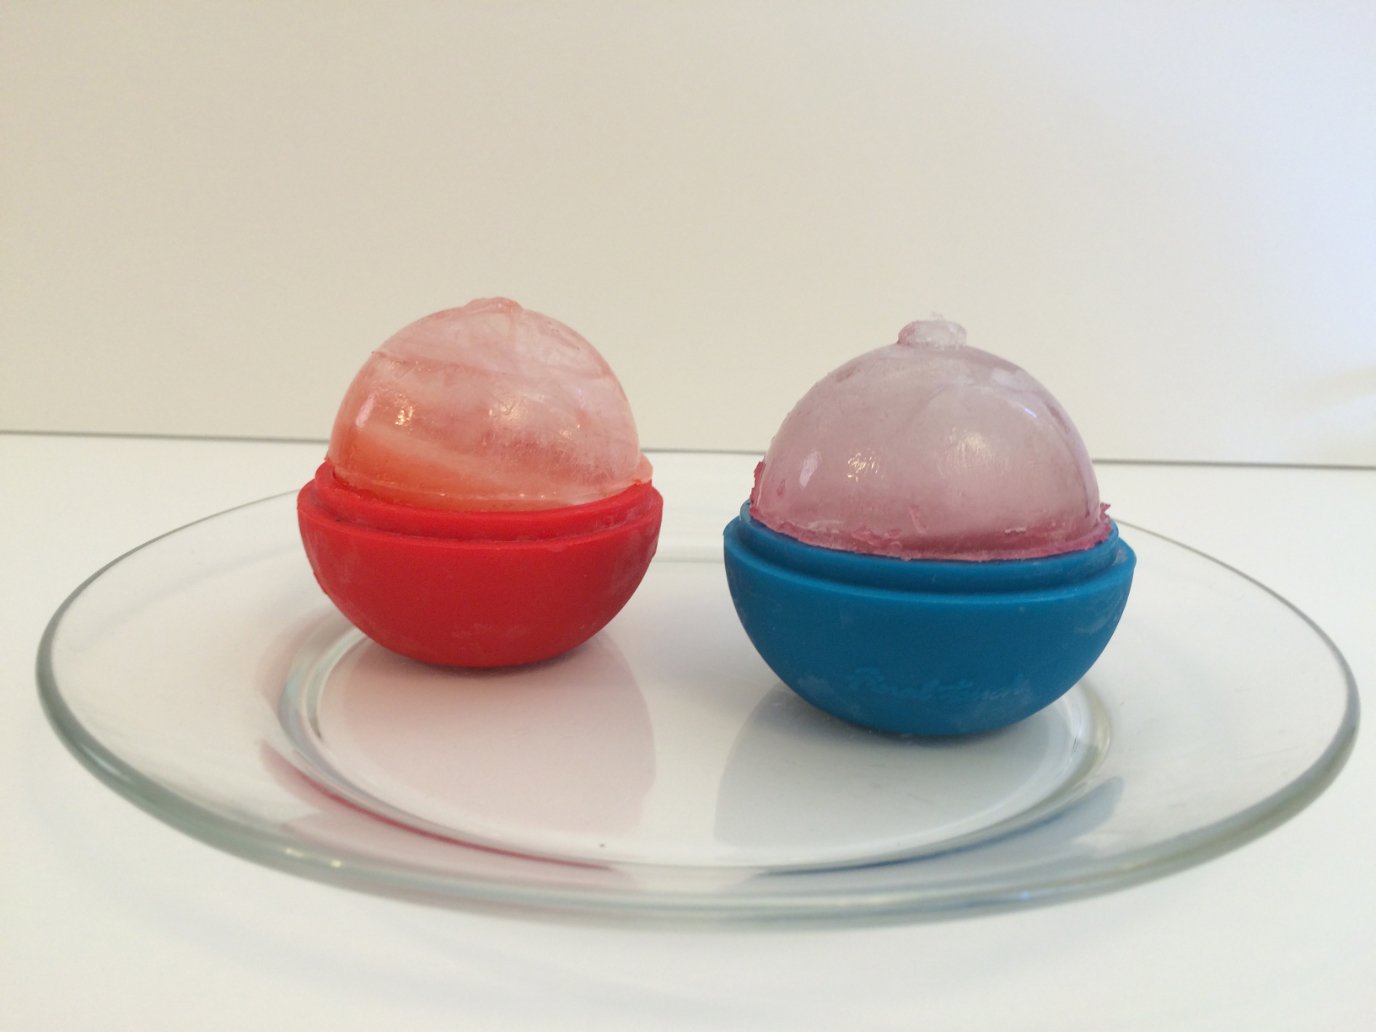
    Now the same company has launched a clear ice ball maker and they sent me one to test out. So that's what I did.

    Long story short: It worked great on my first trial, but not every time. 

    IMG_7100

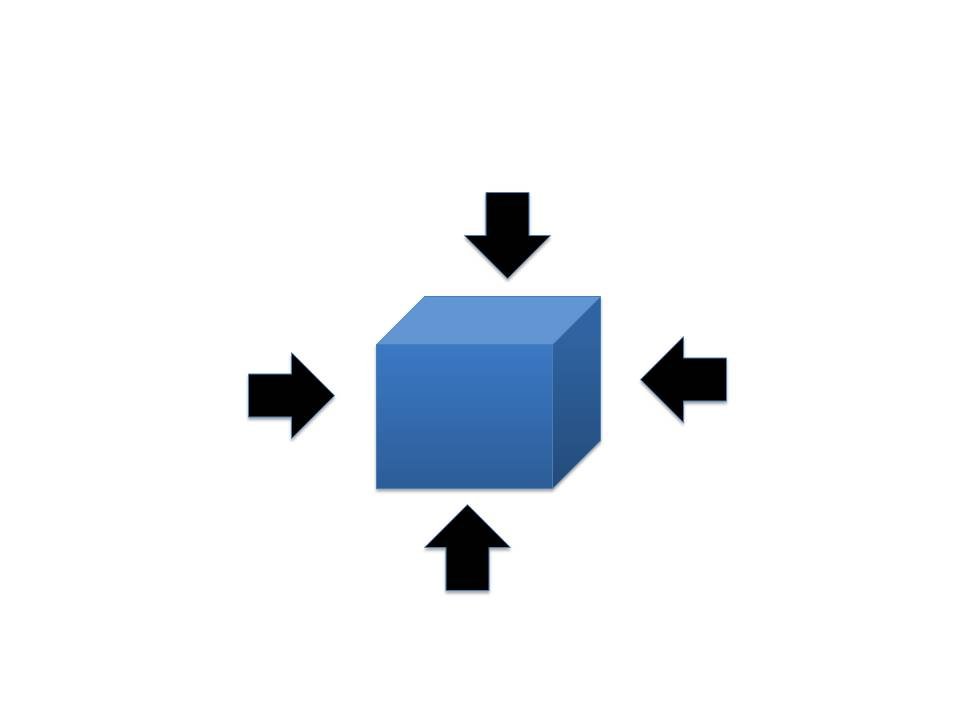
    The Polar Ice Tray works just like the directional freezing method of making clear ice balls (read about that here or all the ice experiments on Alcademics here): The container is insulated on all sides but the top is not. The ice freezes from top-down, pushing trapped air and impurities downward. 

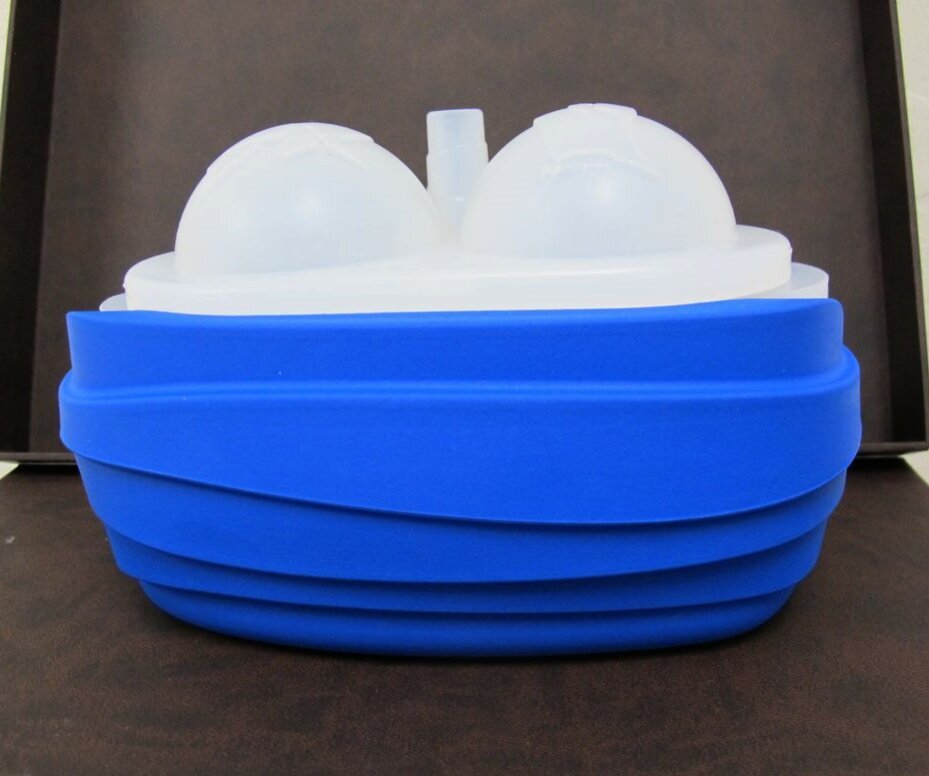
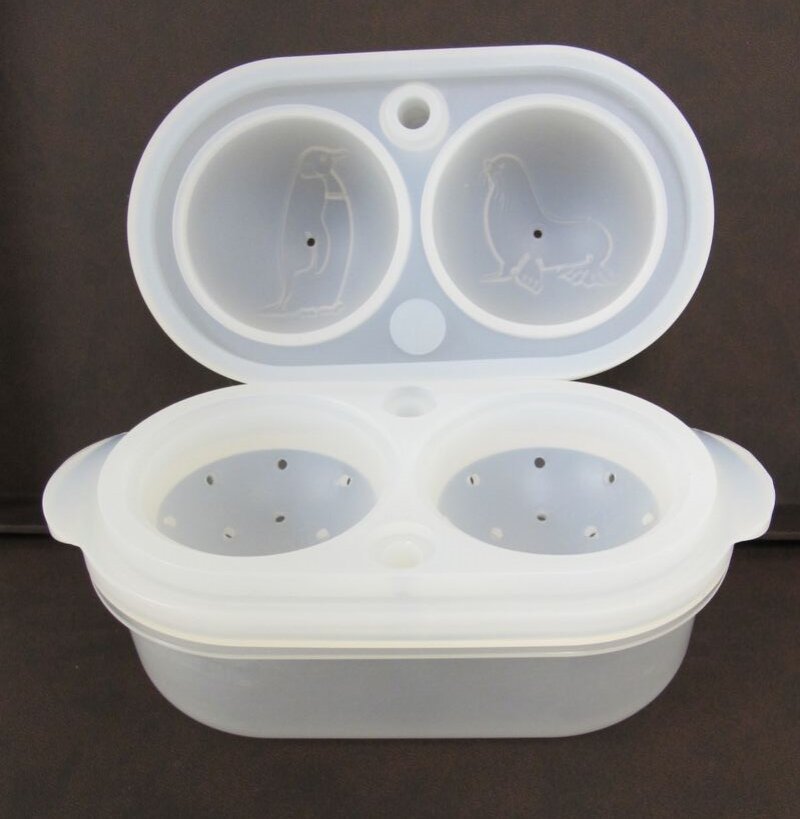
    What this product does is offer an easy way to get the water into the molds and the balls out afterward. It's shaped like a little tug boat. 

    IMG_2773

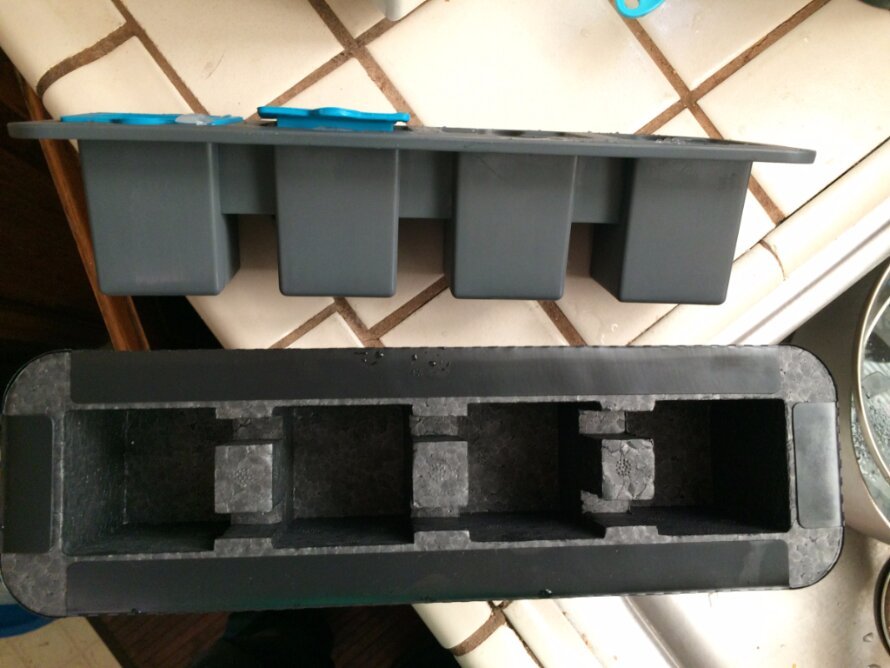
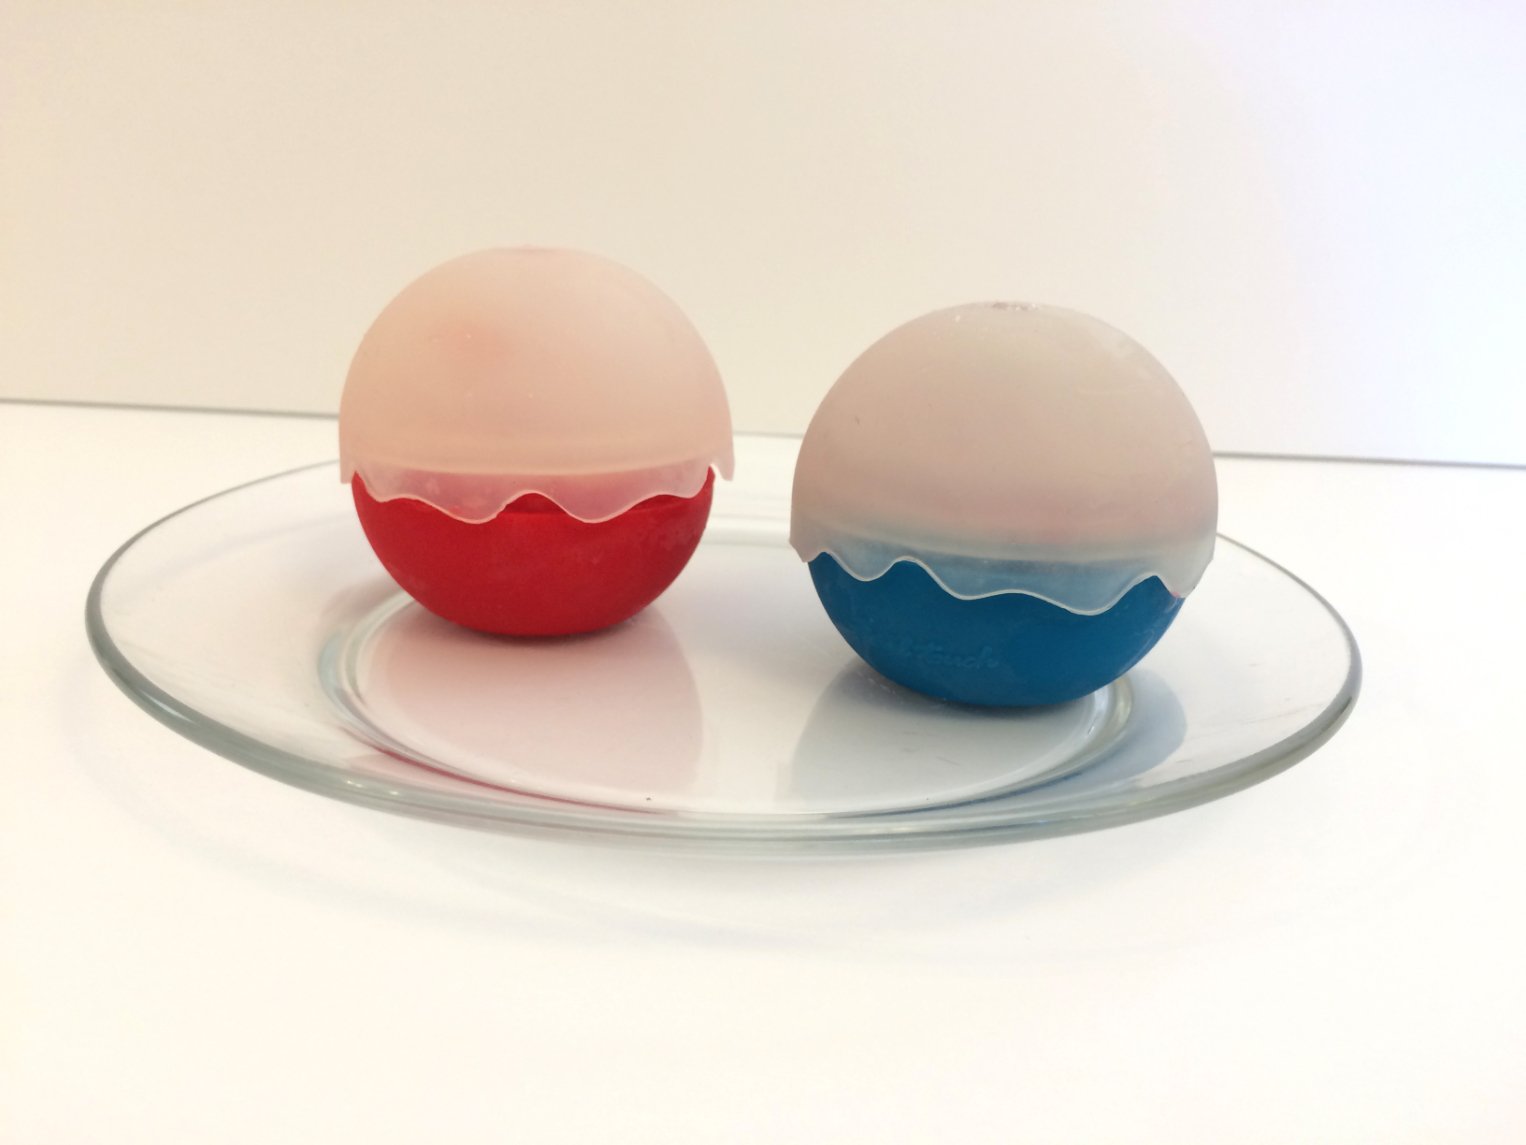
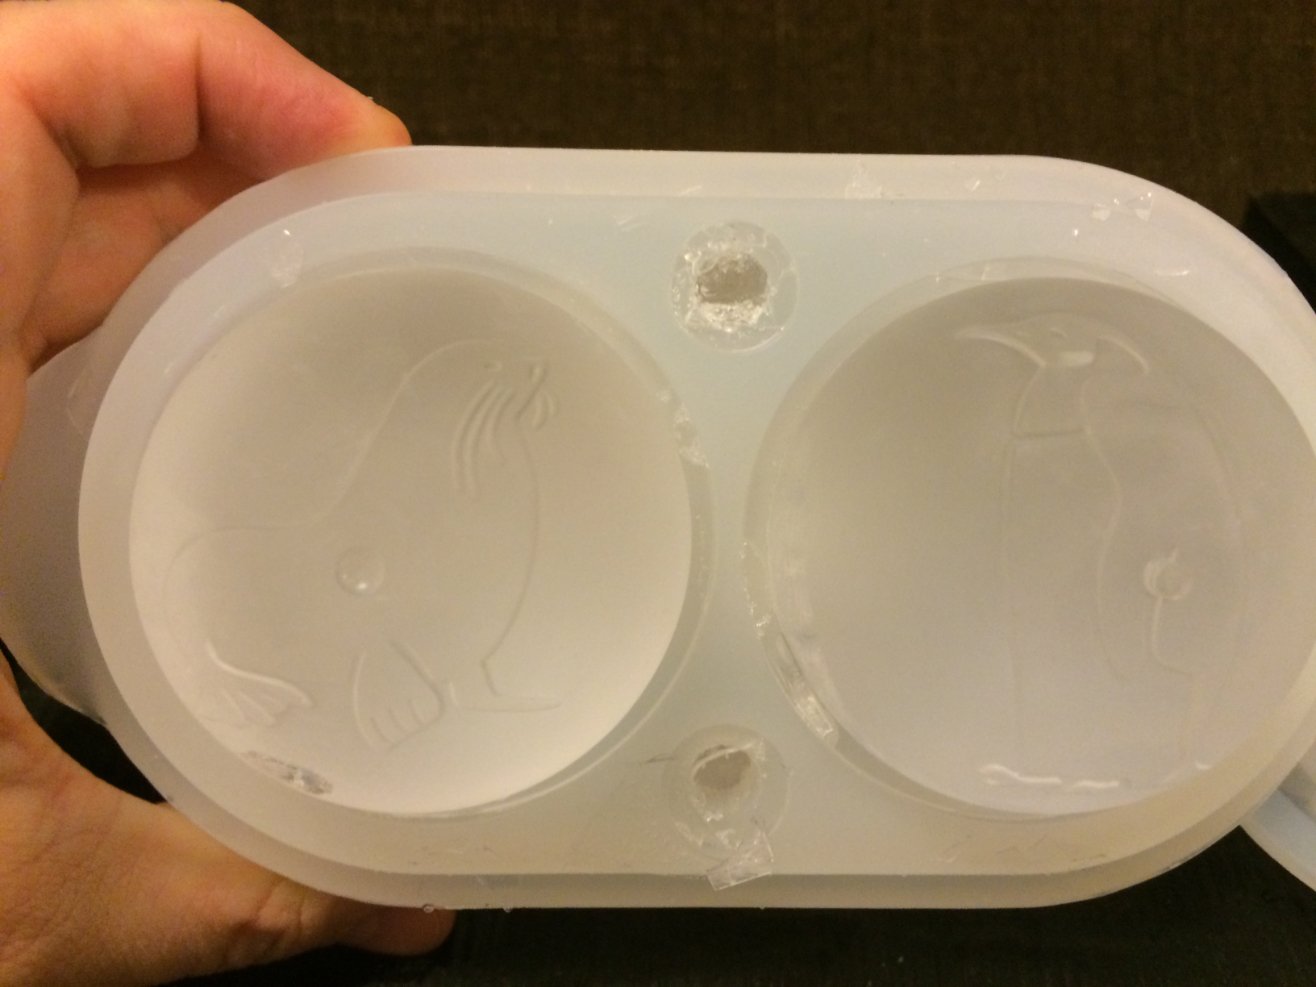
    The outer blue container is just softish foam. Inside there is a top and bottom half of the ball mold (this model comes with animal shapes that are pressed into the top), and a bottom water receptacle. 

    IMG_2778

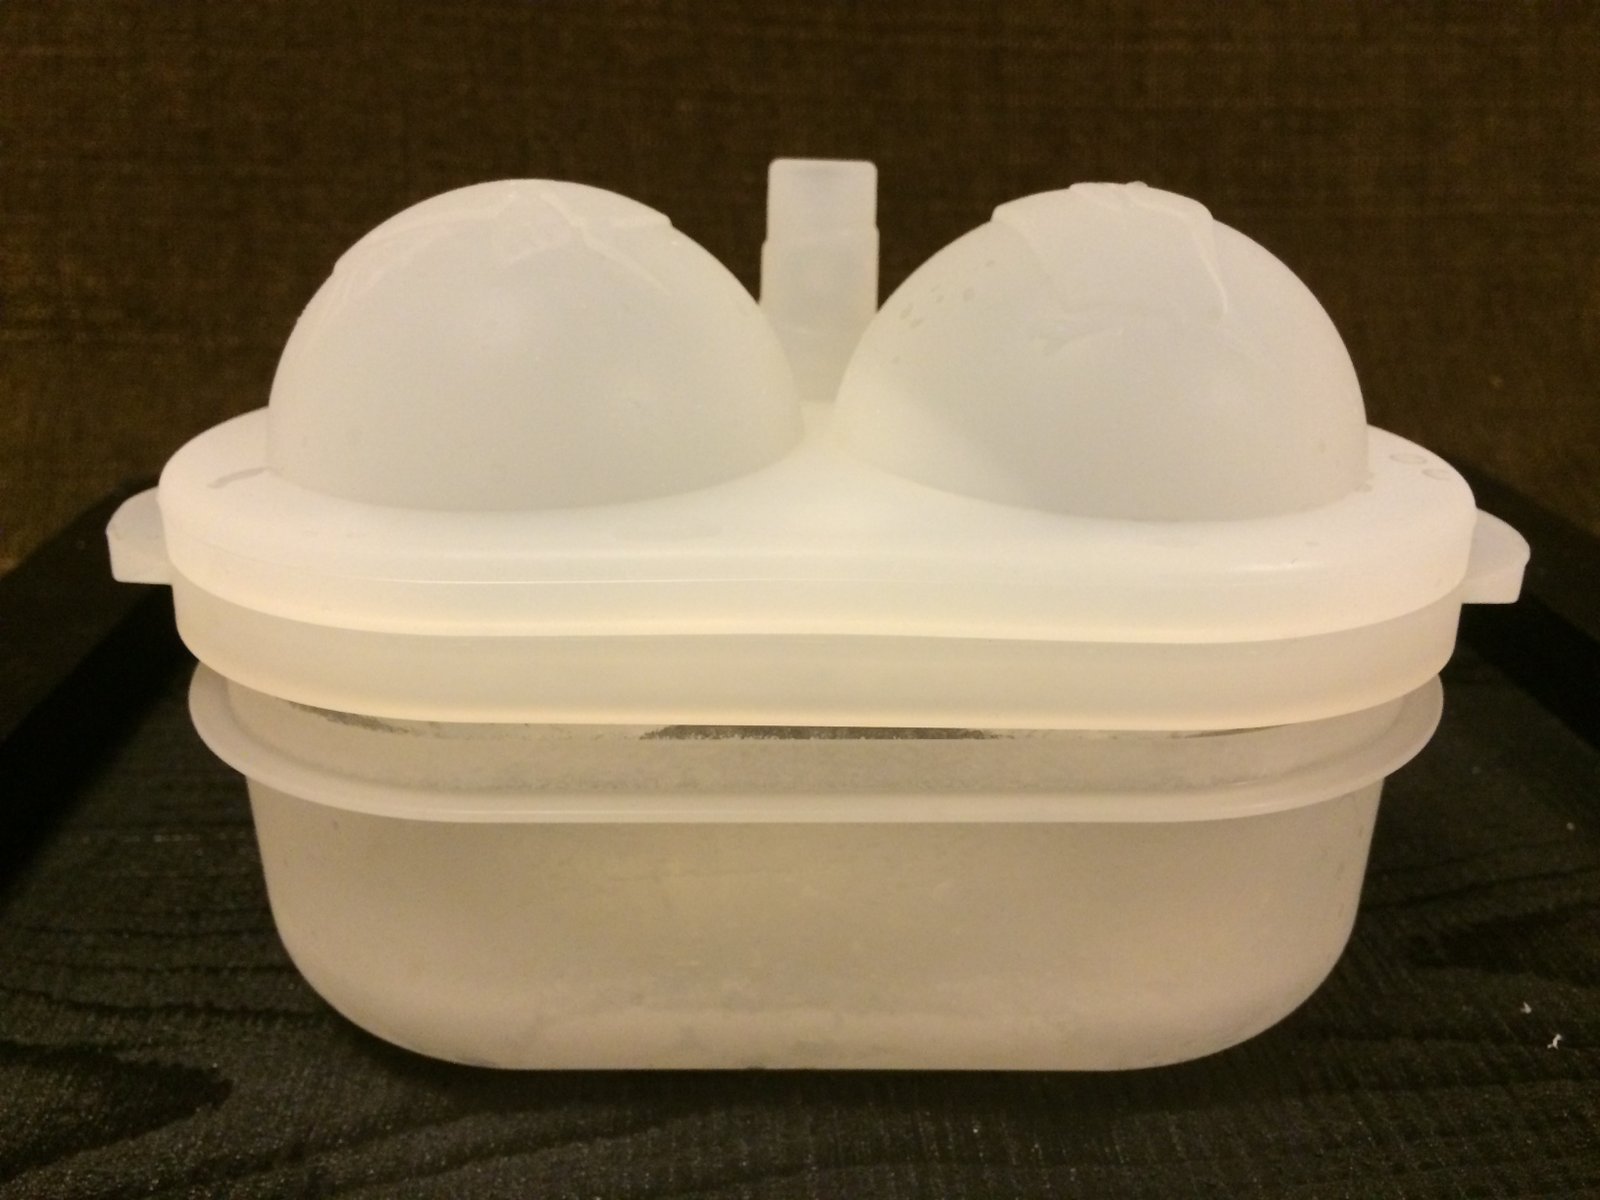
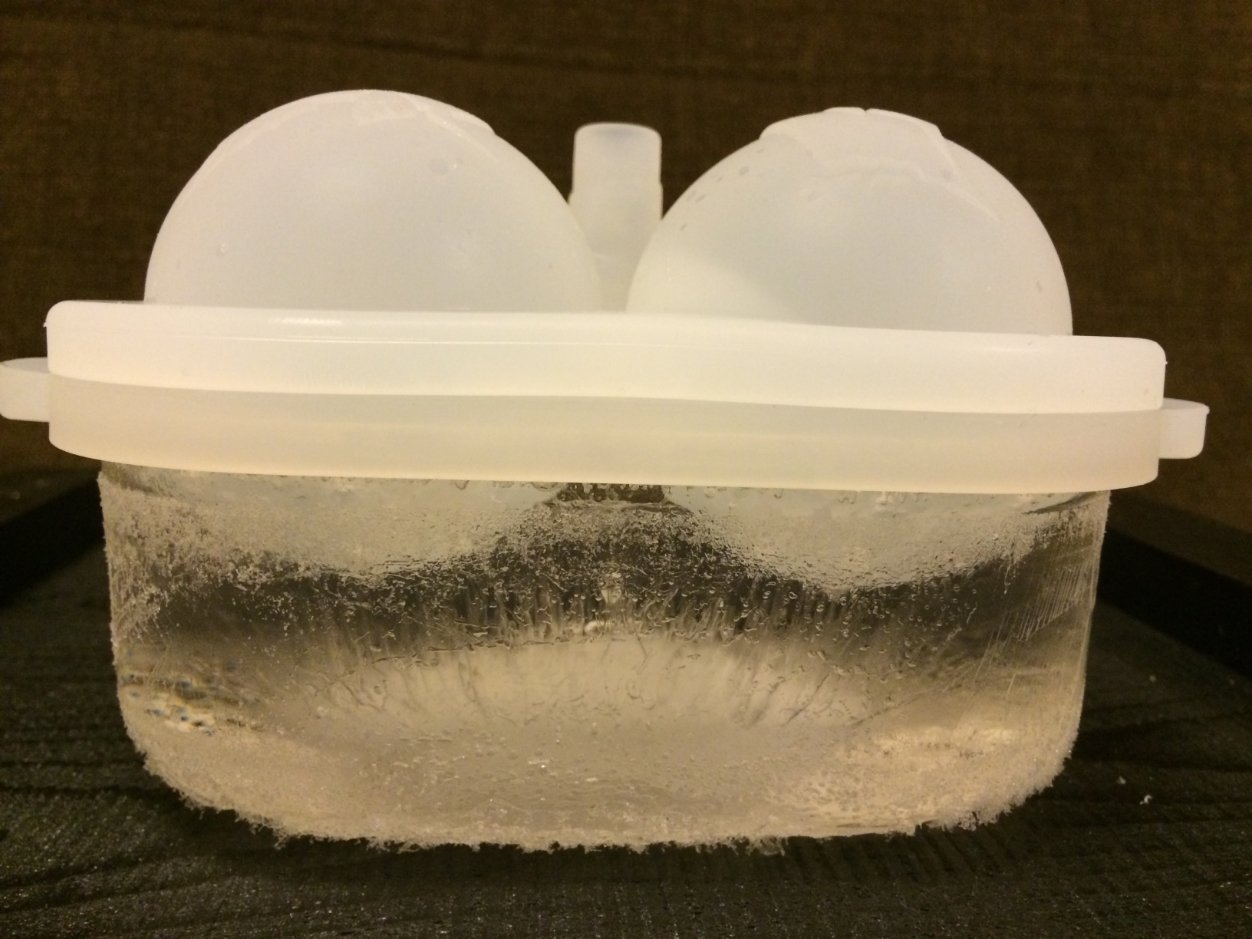
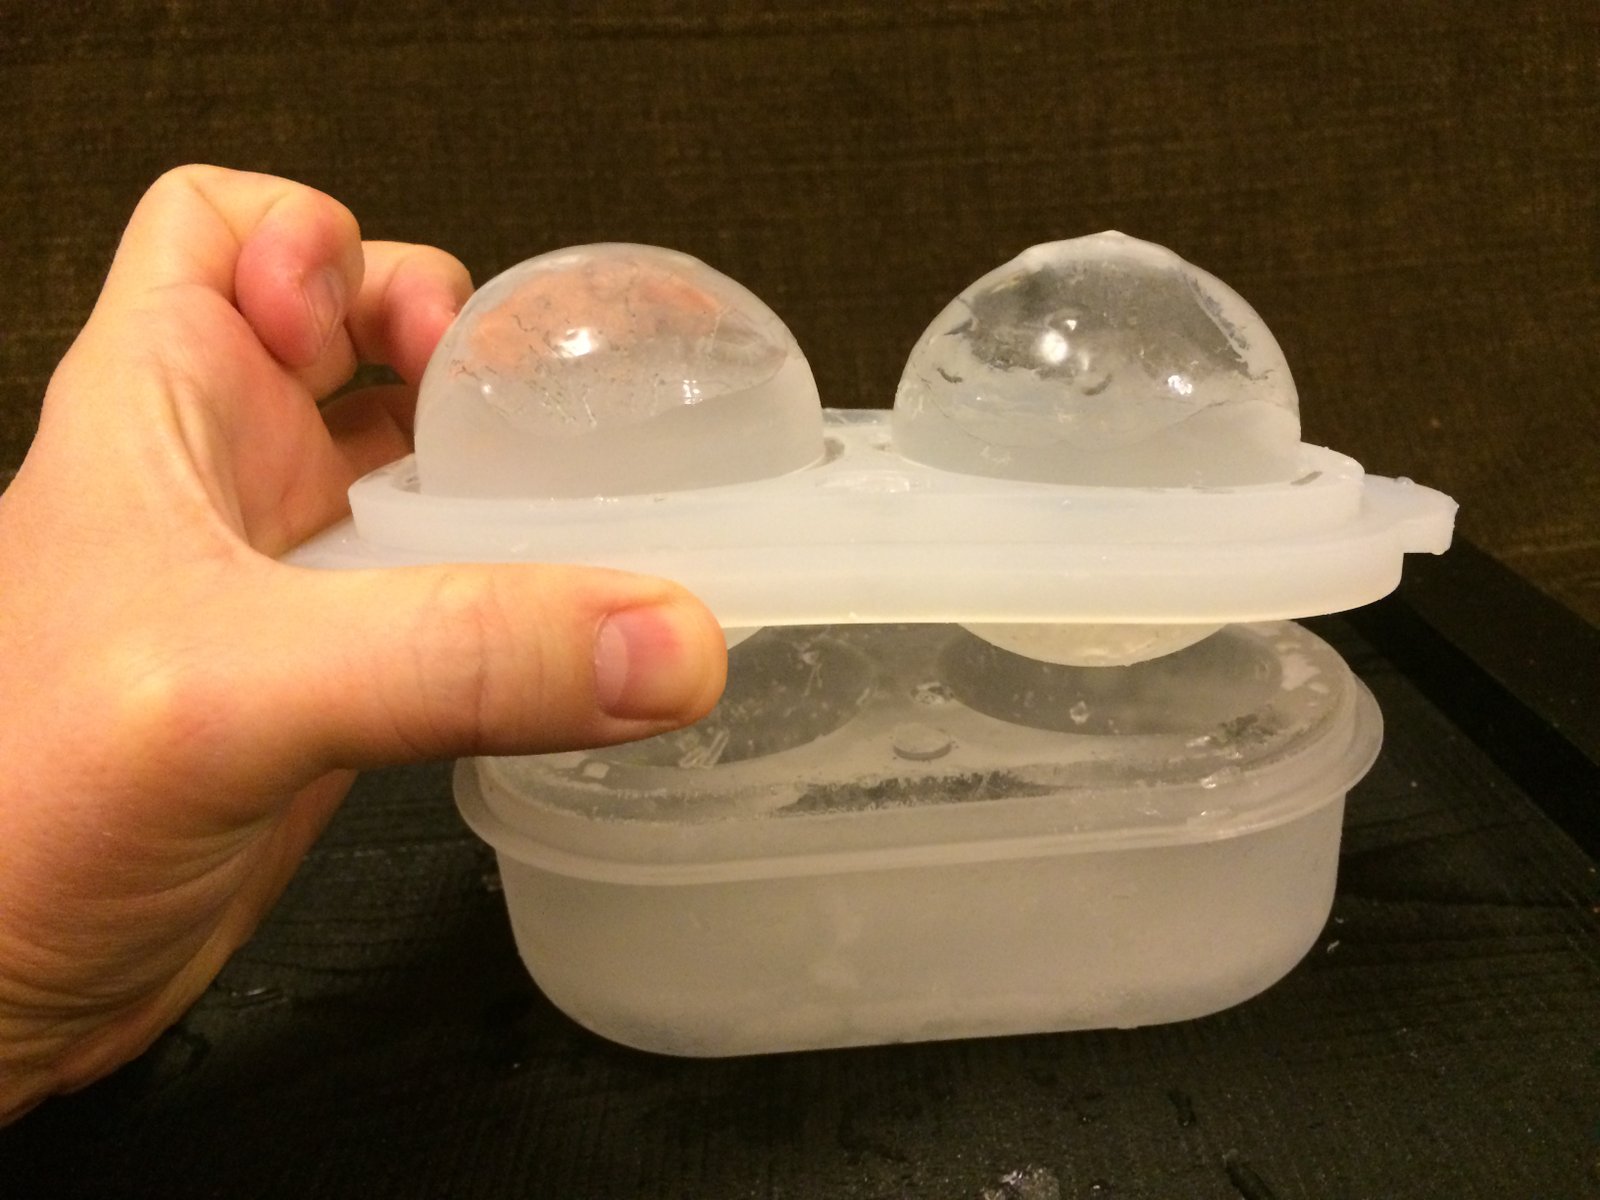
    The bottom half is perforated so the cloudy part is pushed into the receptacle. To use it, you fill water in the little spout and then let it freeze for a day. Here it is after freezing. 

    IMG_7093

    IMG_7095

    The cloudy part of the ice is on the bottom. 

    IMG_7094

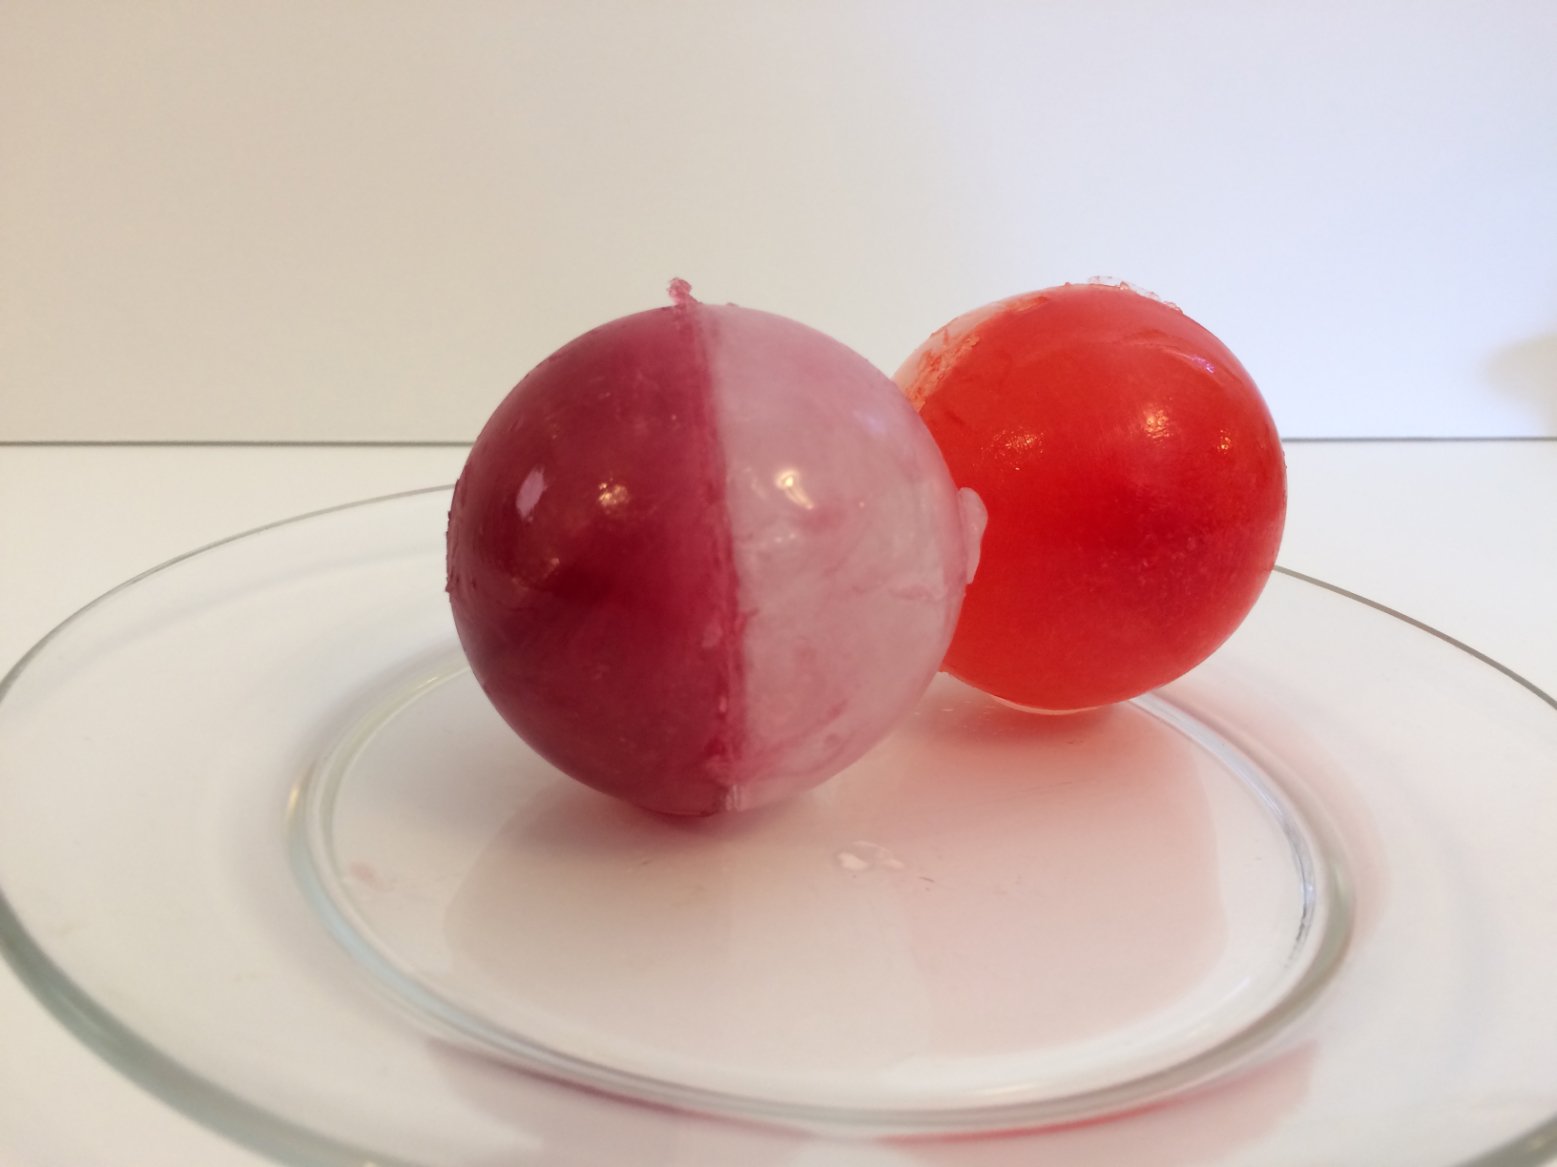
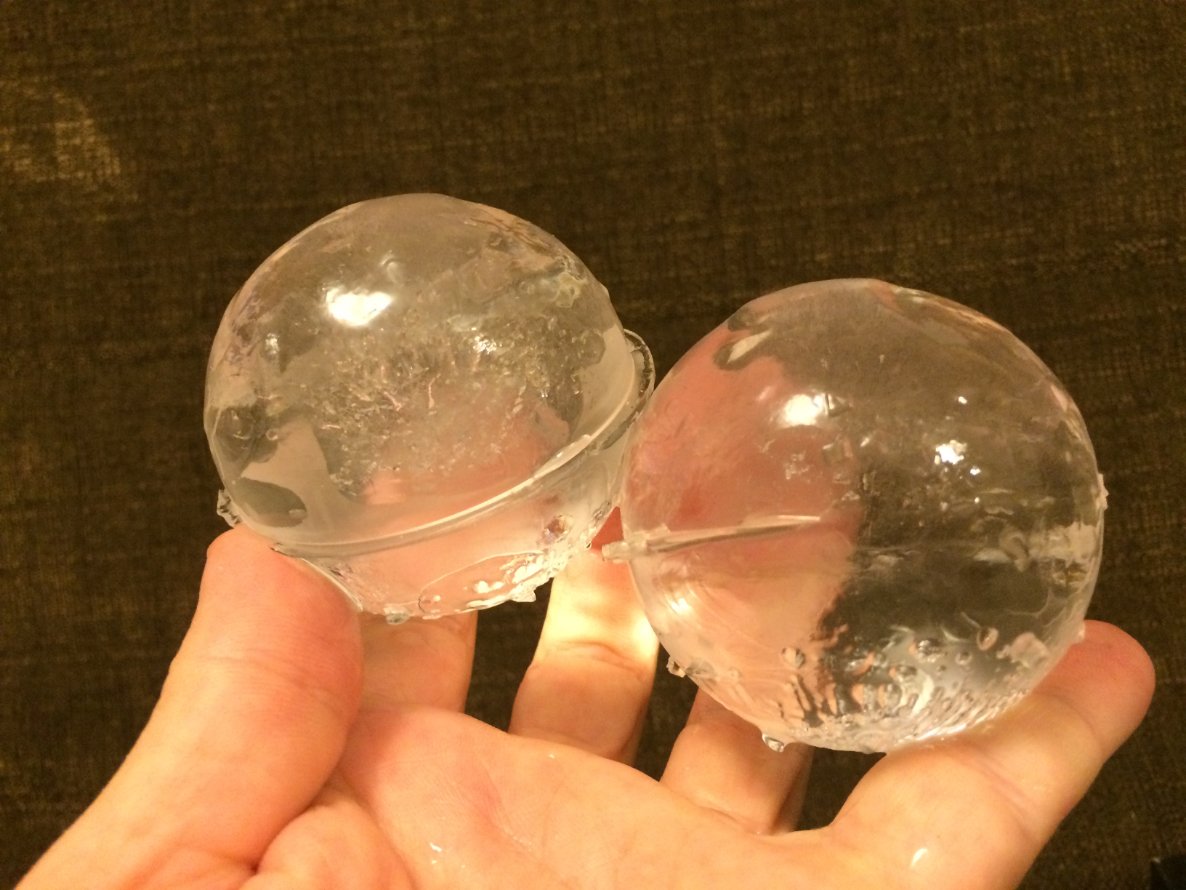
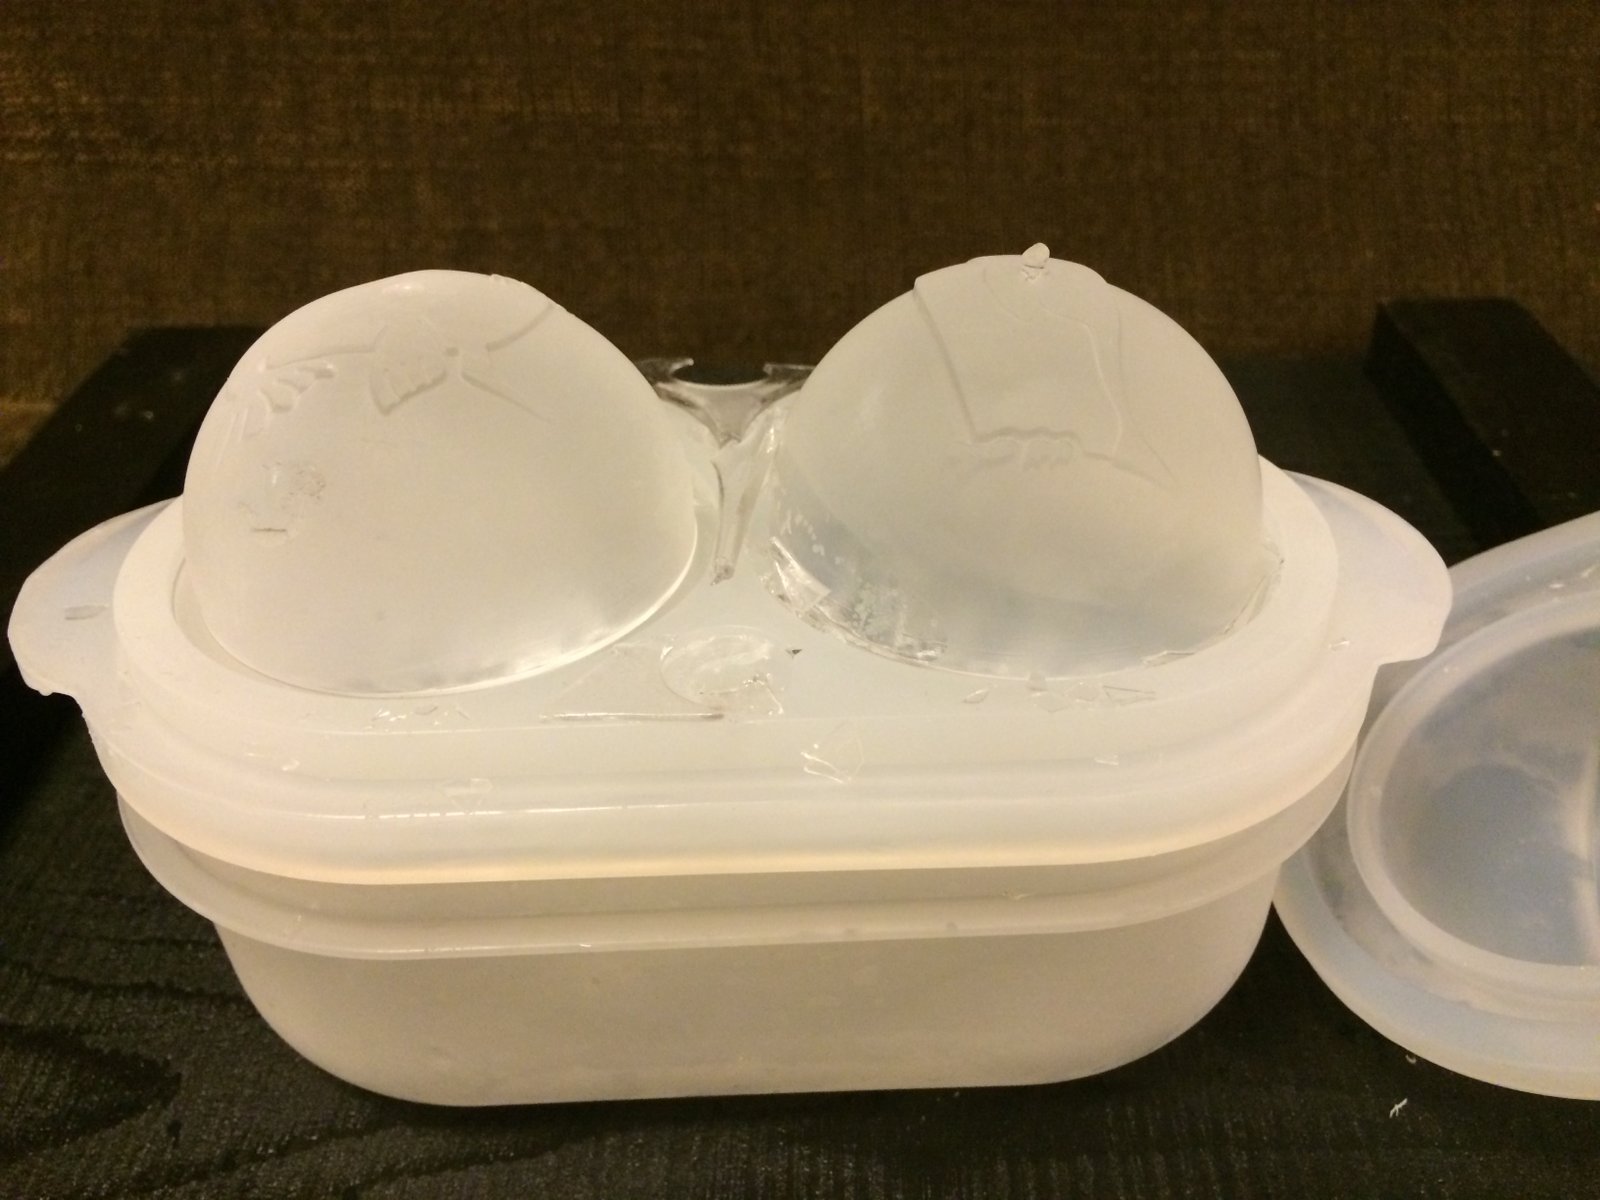
    Now for the big reveal. 

    IMG_7096
    IMG_7096
    IMG_7096

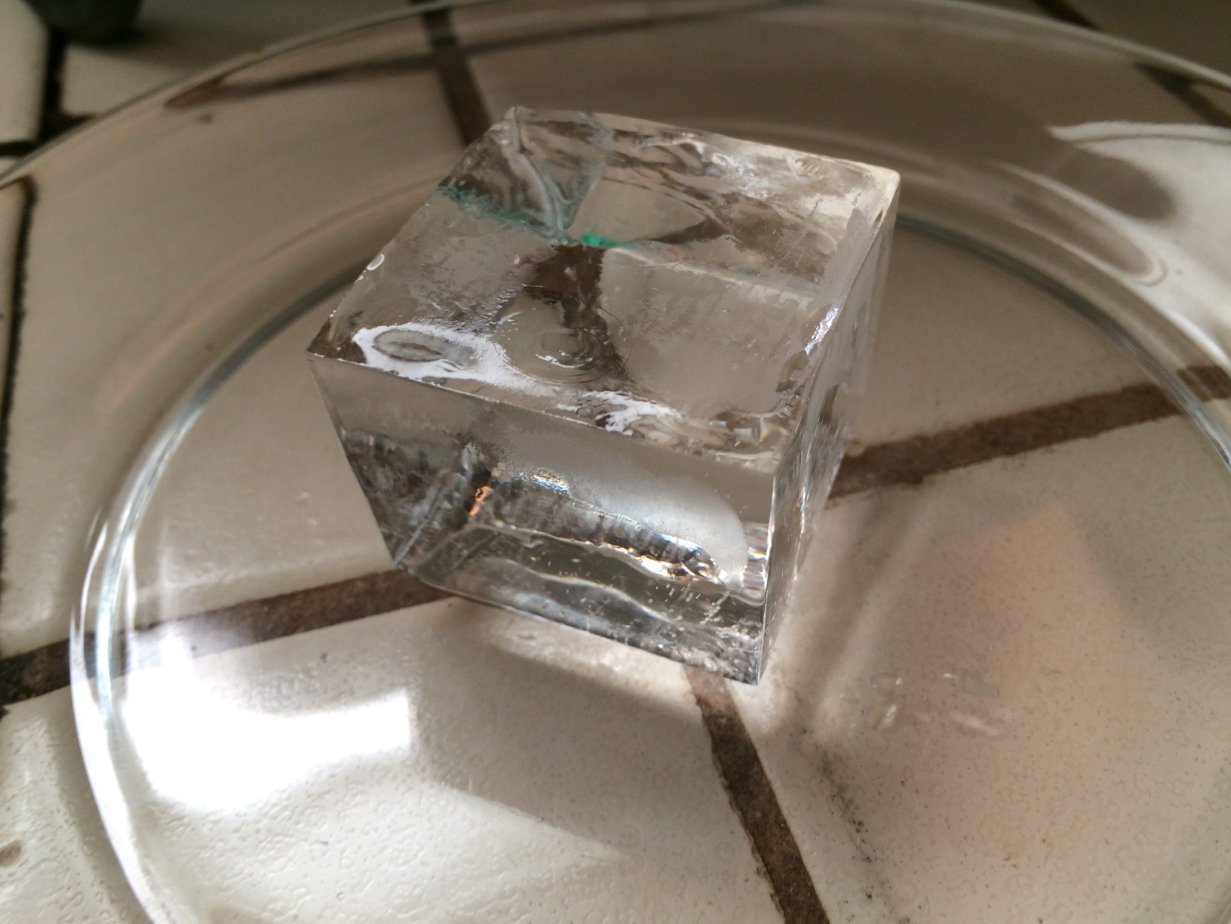
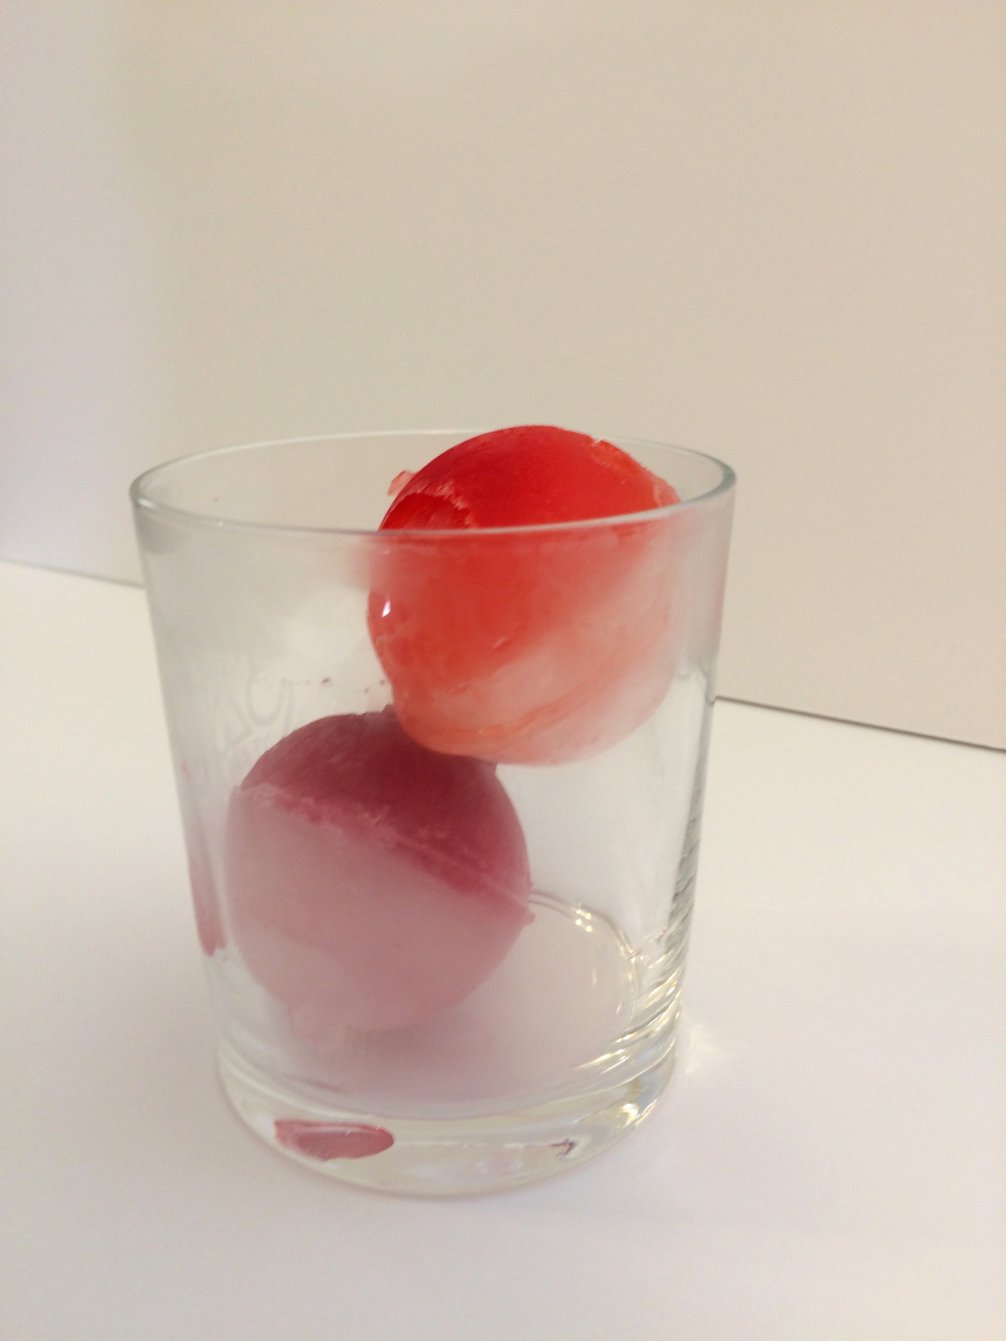
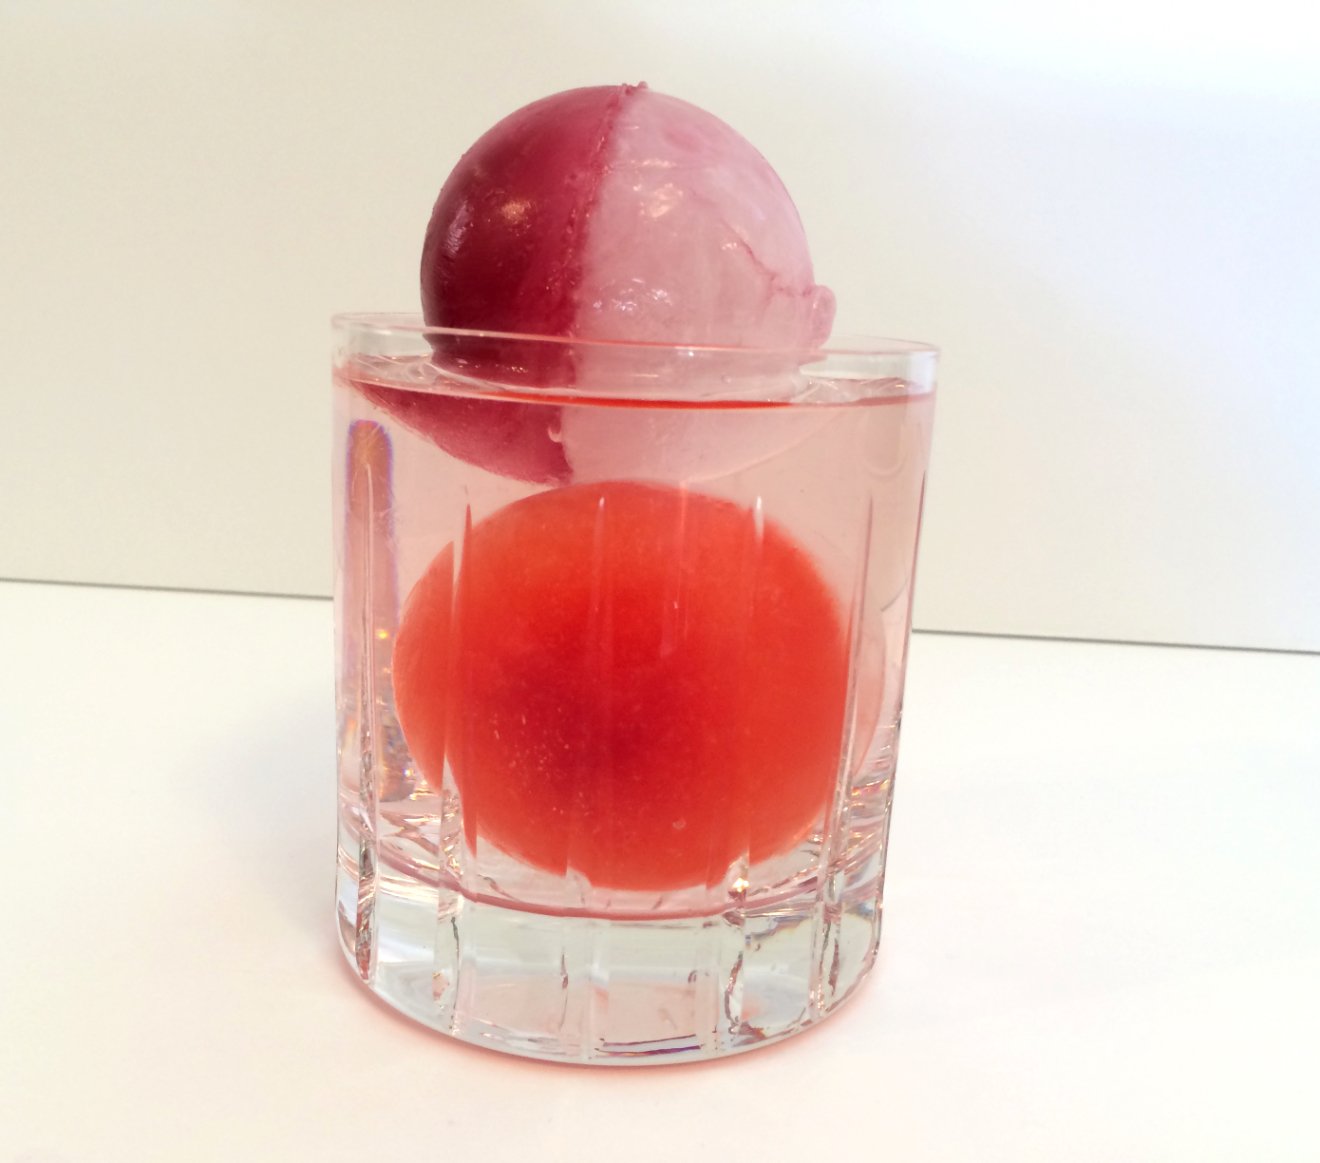
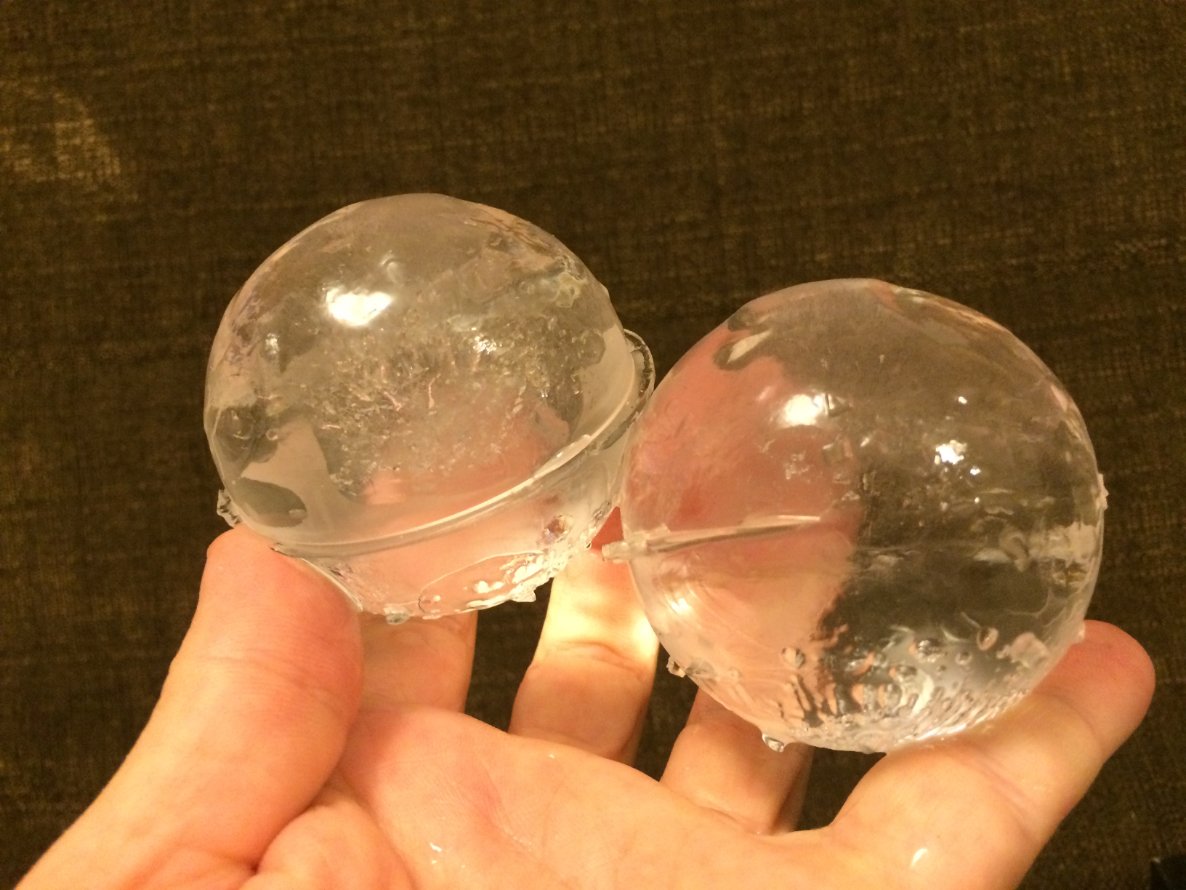
    It is super easy and the spheres are nice when they come out perfectly. It may be more space efficient than the insulated mug method for two spheres, depending on whether your freezer offers more horizontal or vertical space. 

    However, on subsequent uses, I've found the tray can separate during freezing, spilling water out the sides and making incomplete ice balls – only partial spheres because the water has leaked out the sides. So you need to make an effort to get a really good seal on the different parts that fit together. I tried and still failed twice. 

    So far I've used the tray 10 times and 7 of those times it worked and 3 times it failed. (For the record the insulated mug method has never failed me.) If I discover a good way to ensure a seal I'll update this post. 

    The tray is a bit pricey at $55 plus postage, but I spare no expense for ice! You can buy them on the Polar Ice Tray website.


  • Clear Ice Cubes Using a Tray in a Cooler

    Alcademics reader and ice nerd Mike Palmer has come up with an easy if not space-efficient way of making clear ice cubes using a silicone tray and a cooler.

    The short answer is: poke holes in the tray and set it on a riser at the bottom of an insulated cooler.

    The long answer? Palmer wrote it himself below.


    How to easily make perfect clear ice cubes, repeatably, from a tray

    By Mike Palmer

    Image.1.clear.ice.cube

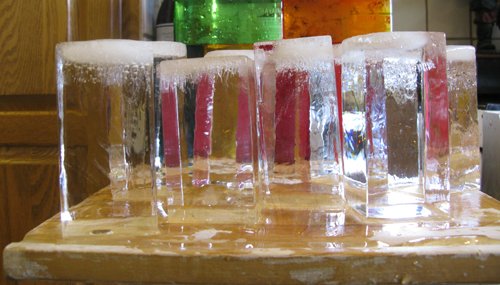
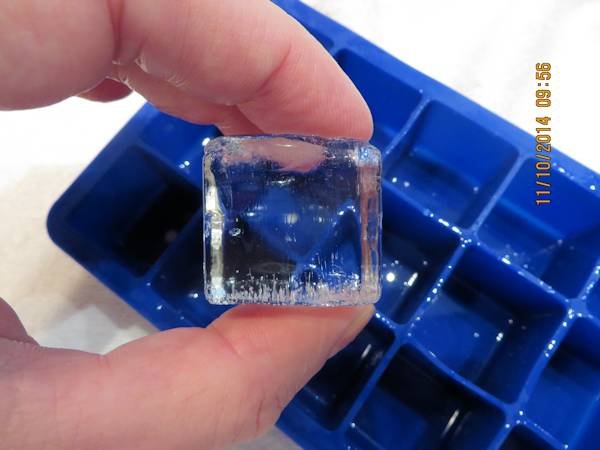
    Here’s an easy way to make clear ice cubes in your freezer using an ice cube tray, obviating the need to carve individual cubes out of a block of clear ice.

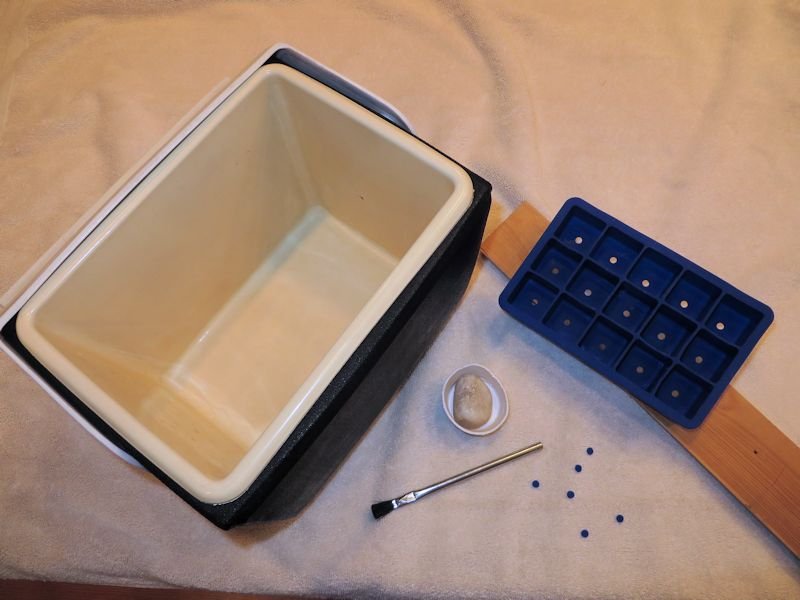
    What you'll need: A small "Igloo" type cooler that fits in your freezer. A flexible, silicon ice cube tray with holes punched through the bottom. Something to make those holes, perhaps along with a piece of soft wood. A paper or Styrofoam cup. A rock. And of course, a freezer.

    Image.2.what.you.ned

    If TLTR, skip down to “How to do it.”

    Background

    I became obsessed with trying to make clear ice cubes at home (and later, clear ice spheres) after watching David Rees' How to Make an Ice Cube in his "Going Deep" series on the National Geographic TV channel. How hard could it be? (Ha!)

    BTW, after finally succeeding at making clear ice cubes, I found that there are tangible benefits from using them in your drinks. (Even if drinking water.) In addition to lasting longer (because they’re pure ice and not ice/air), clear ice cubes also taste better because they’re pure ice. That is, they don’t have yucky tasting freezer air in them. Also, women like the aesthetics of clear ice and they notice—and like—the sound clear ice cubes make clinking in a glass. (Sure to please.) Freezer cubes don’t clink. They clunk. And now you’ll notice every time you hear a sound track in a movie or on TV.

    In Theory

    In David Rees’ TV program, he showed how clear ice forms in nature when a body of water slowly freezes from the top down with a substantial mass of warmer, unfrozen water underneath. (Alcademics readers knew this back in 2009. See https://www.alcademics.com/2009/11/another-clue-to-ice-clarity-slow-freezing-like-a-japanese-pond.html.)

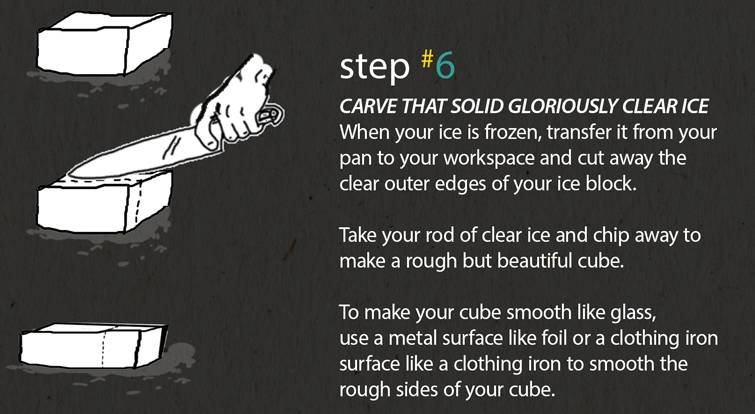
    And he suggested on his website that you could make a block of clear ice by kinda imitating nature, by letting a pan of water cool in a freezer. Although that’s not really imitating nature since the water in the tray freezes from the outside in on all sides.

    So freezing a pan of water does not make a clear block of ice, as even Mr. Rees concedes. Air still gets trapped in the middle, so you have to cut the “outer edges of your ice block” to harvest clear ice.

    Image.3.rees.screen.shot

    And even if the block were totally clear, you would still have to carve away at it to make individual cubes. And then you’d have to smooth six edges of each cube. that’s very time consuming, not to mention dangerous, working with sharp edged instruments on slippery ice.

    Rees’ suggestion for making clear ice works better if you use the slow freezing method, using a dorm style fridge set to 30 degrees, as Mr. Kevin Liu has suggested. https://sciencefare.org/2012/07/12/weird-science-ice-premium-ice-home/

    [note: the above link redirects to spam, try the Internet Archive version instead: https://web.archive.org/web/20150316061948/https://sciencefare.org/2012/07/12/weird-science-ice-premium-ice-home/]

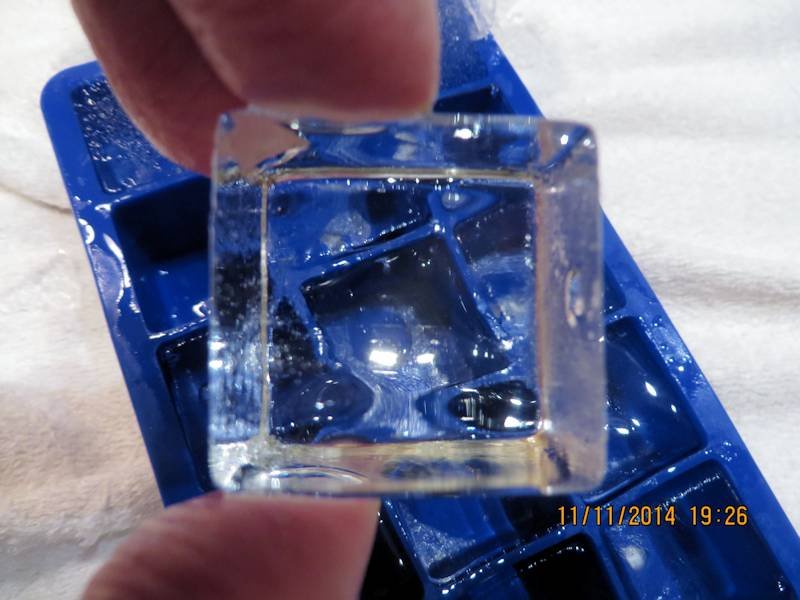
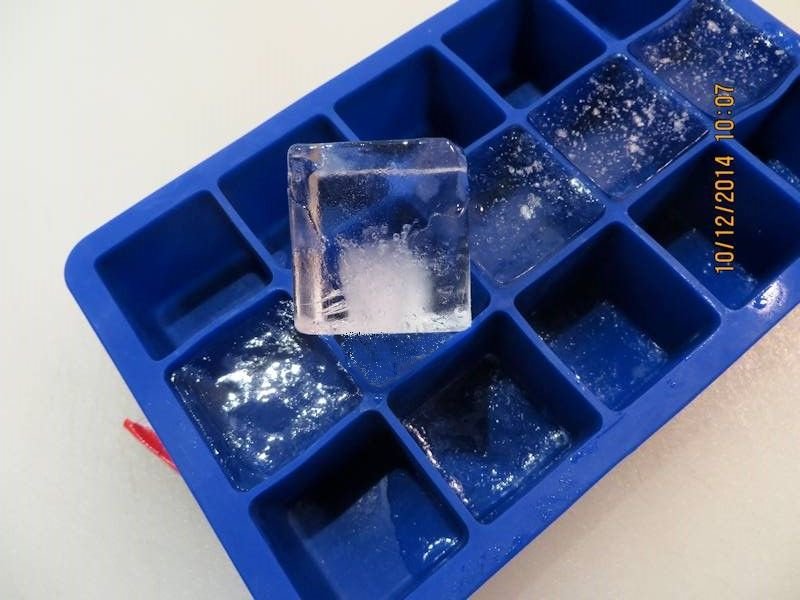
    But you still get air in your cubes that way. Here’s a photo of an ice cube made that way. Air is still trapped in the last part of the cube to freeze. In this experiment, with only the center trays filled, that’s the bottom middle.

    Image.4.air.in.slow.freeze.tray

    (I hypothesize that air is sucked into the cube when the last bit of water expands as it freezes. It lifts the cube up and pulls a vacuum underneath. Interestingly, air gets trapped in different places in the different cubes depending on whether a cube has a sister cube (or cubes) next to it. You can tell what position in the tray the cube had come from based on the distribution of air trapped inside it. In one experiment, I filled the tray in a checkerboard fashion, so that no cube shared a side with another cube. Only their centers were cloudy.)

    In Practice

    What to do? I tried the slow freezing method, which was supposed to do the trick. But it didn’t.

    Fortunately we have the Internet. After searching around on youtube and seeing people consistently recommend “directional freezing,” I found Camper English’s Index of Ice Experiments on Alcademics. Camper was years ahead of everyone else.

    In Camper’s landmark experiment, he found that freezing water in molds in a cooler (that is, from the top down) gave clear ice.

    Image.5.campers.igloo.method

    Except that air got trapped in the very bottom of the ice.

    Image.6.air.in.campers.ice

    Why was that? Although Camper’s technique imitated the directional freezing aspect of nature, there was at least one other aspect missing: the large thermal mass of liquid water underneath the ice.

    So, building on Camper’s experiment, I placed a silicon ice cube tray on top of a large Styrofoam cup (as a stand) in a cooler. I filled the cup and I filled the cooler to the top of the ice cube tray. (That brought the water level halfway up the cooler. More on the optimal water level later.)

    I put the cooler in a high-end prosumer freezer, which was set at 0 degrees F, the government’s recommendation for food safety. (I checked the temperature in two places simultaneously using two digital thermometers in different locations in the freezer.)

    The result of this experiment was much better, but I still got a little bit of air trapped in the bottom of the cubes.

    Image.7.still.air.in.cube

    If you look at a close up Mr. Liu’s ice cube https://craftcocktailsathome.com/wp-content/uploads/2012/07/IMG_6874.jpg, his is not perfectly clear either.

    I hypothesized that there was still one more aspect of nature missing from this experiment, and that was that, unlike a Japanese ice pond, the water in the ice cube tray could not interact with the unfrozen water below it. One needed holes in the bottom of the ice cube tray for trapped air to escape.

    At the same time I came to this “Eureka!” moment, I found that a reader on the Alcademics blog had made the same observation. Furthermore, this idea was consistent with a suggestion on the blog of suspending a spherical ice ball mold upside down, above a pot of water, with the mold’s fill hole in the water to make a clear ice sphere. (Or similarly, the suggestion to put a spherical ice ball mold upside down (hole down) in a mug of water so that the water in the mold could interact with the unfrozen water below in the mug.)

    So here’s what I did.

    How to do it

    Image.8.acid.brush.8nd

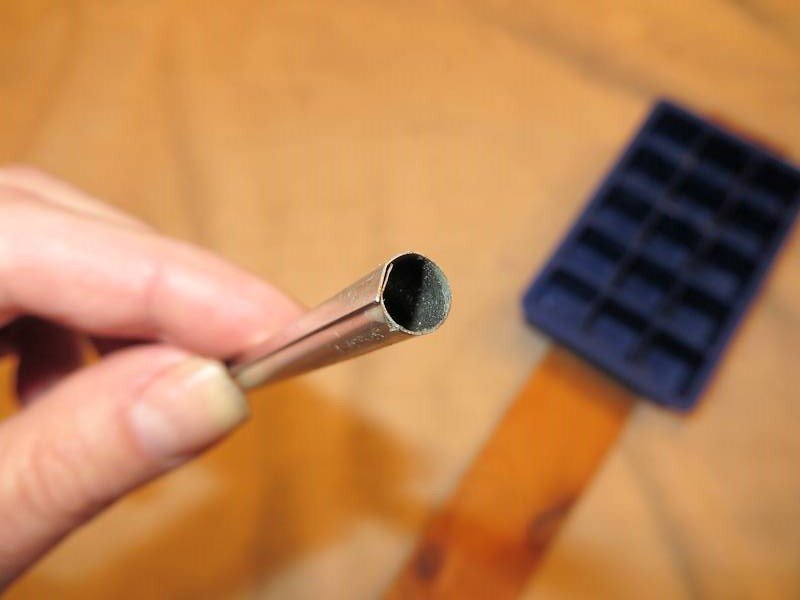
    I took an acid brush and used the tube end as an auger to bore holes in the bottom of a silicon ice cube tray. Any similar tube will work. A 9mm shell casing would probably work too. (A .38 caliber casing is too large but works well on spherical ice molds.)

    I got my trays from Amazon, if you look closely at the photos of the ice cubes on the Amazon product page, you can see air trapped inside them.

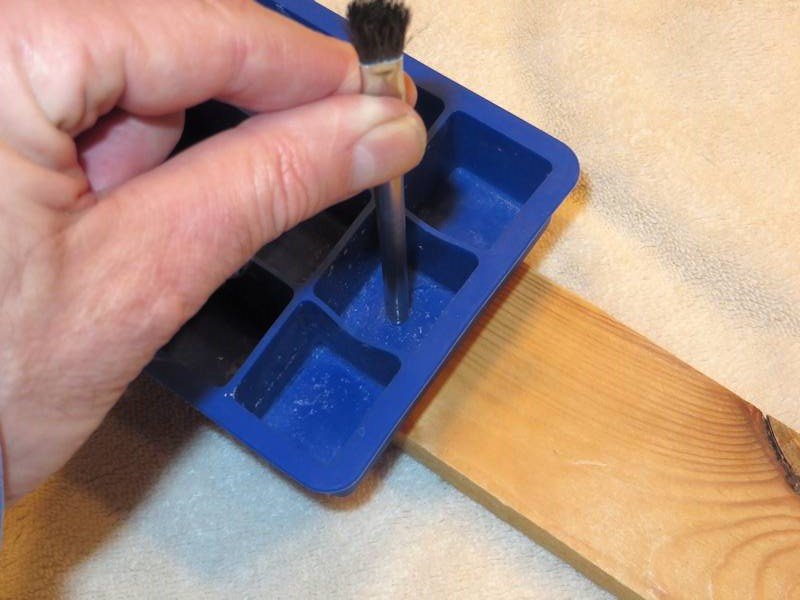
    I used a Dremel tool with a cone-shaped cutter to grind a knife edge on the end of the tube. I put the ice cube tray on a piece of soft wood (to act as backing for the work) and pushed the tube into the bottom of the tray while rotating the tube. (If you use the end of an acid brush, you need to rotate it CCW so that the tube doesn’t unwind and open. If you use a shell casing, you can hammer on the casing (on the soft wood) to punch your holes through.)

    Image.9.auger.in

    Take a Styrofoam cup and cut it down to about an inch as a stand for the ice cube tray. (I started with a full size Styrofoam cup, but you’re just wasting water if you fill the cooler half full of water. And by using a one inch cup, the tray is lower in the cooler, resulting in better directional freezing.)

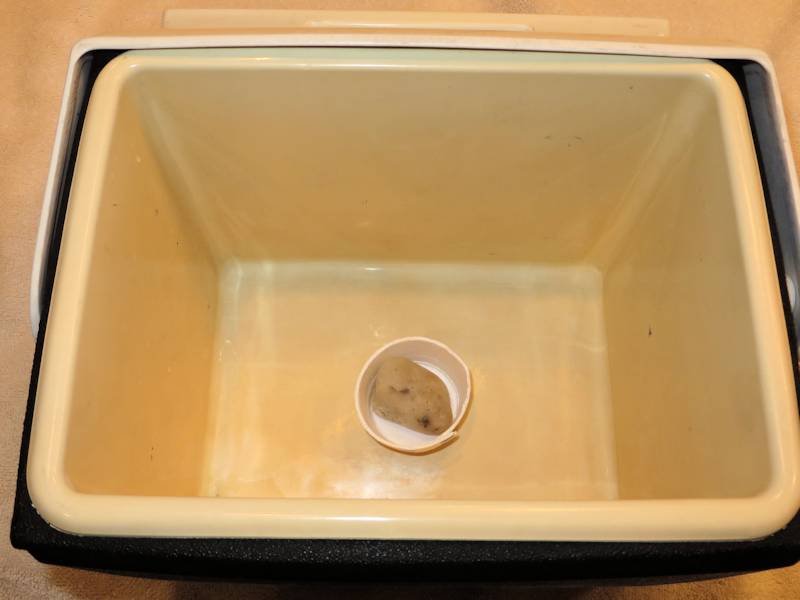
    Put’s a rock in the cup to weigh down the cup. Else, the stand floats off the bottom of the cooler.

    Image.10.rock.and.cup

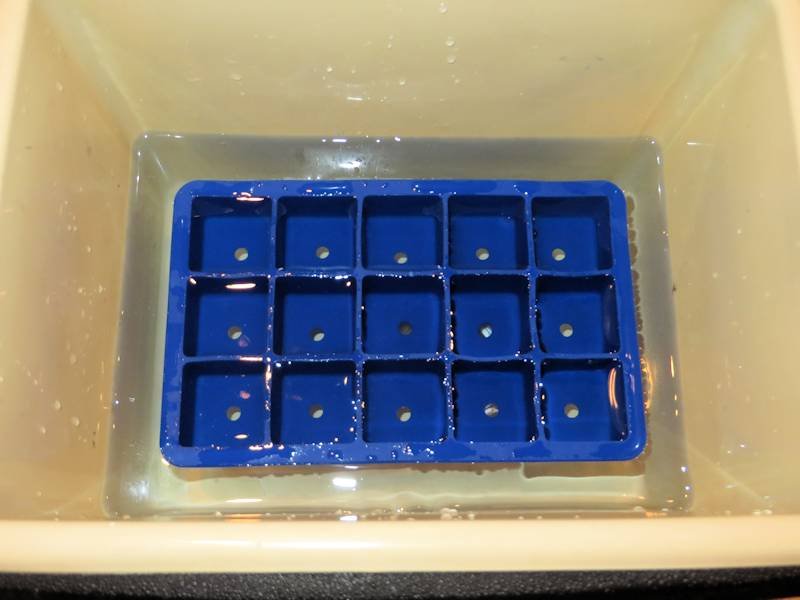
    Put the tray in the cup that had the rock in it and filled the cooler with water to the top of the tray.

    Image.11.tray.in.water

    You might want to jiggle the tray a bit after you put it in the freezer, to knock air bubbles out that might be trapped underneath the tray.

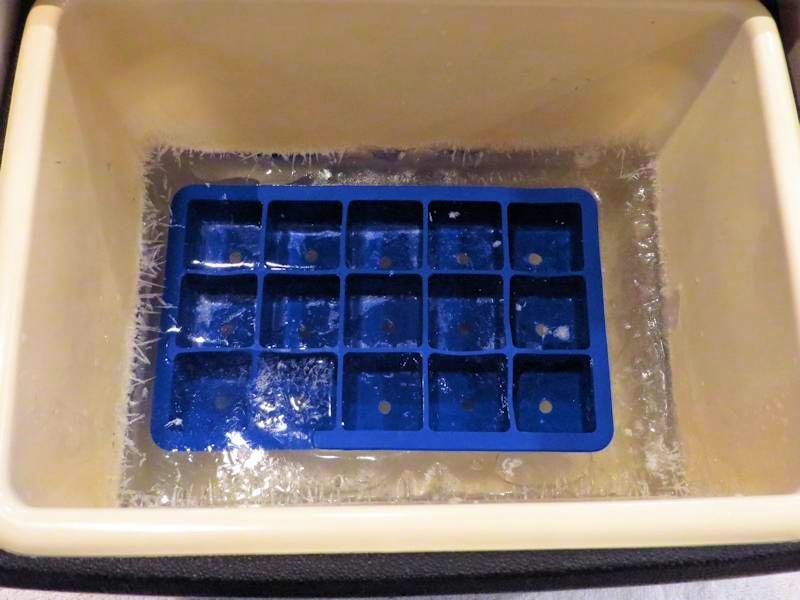
    Wait about 18 hours. Timing is somewhat critical. You want to catch the freezing process just as ice has formed below the tray. If you wait too long, all the water below the tray will have frozen and you might get air in your cubes. Remember, in the Japanese pond, there is always unfrozen water below the clear ice.

    Image.12.its.done

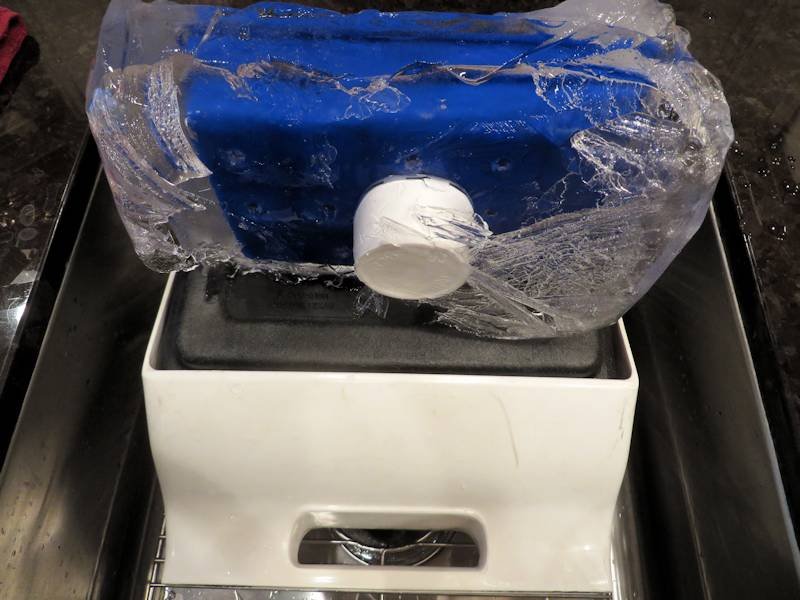
    After the water under the tray has frozen, take the cooler out of the freezer, place it upside down in a sink and set a timer for about 10 to 20 minutes in case you forget to baby sit it. In about 10 or 20 minutes, you will hear a thunk as the ice block releases from inside the cooler. If you timed it right, a lot of water will eventually drain out of the cooler. (A cooler with the drain plug might be interesting. We could use compressed air to blow the ice block out.)

    You will be greeted by a strange formation of ice crystals and a cavern of sorts from where unfrozen water drained. (Apparently the cooler isn’t as well insulated on its bottom as we would like, since ice forms there. Since cold air descends, shouldn’t coolers be twice as thick on their bottoms as they are on their sides? Maybe we should put a cooler in a cooler?)

    Image.13.air.and.crystals

    Break the clumped ice away from the ice cube tray, push the cubes out of the tray from behind, and viola! Perfect, clear ice cubes.

    Allow your cubes to temper for one minute before using them in your drinks to avoid cracking. 

    Now you’re ready to do it all over again and make another batch!

    Image.14.viola


    High Strangeness

    When I first tried these experiments, I started with the minimal amount of water, not knowing what the right amount of water underneath the tray should be.

    I made a spacer that was only a half inch high.

    When I did that, something strange happened. I got an extrusion of cloudy ice during the freezing process!

    Image.15.extrusion

    It has always been a corner cube that extrudes in all my runs. All the other cubes are clear. That’s gotta be telling me something.

    So then I went the other way, putting more water in the mix by using a plastic beverage cup as a stand for the ice cube tray. I let the water freeze almost completely and didn’t get any extrusions. Let’s hear your thoughts about what’s causing the extrusions.

    Image.16.large.cup.stand

    You can see how the water has frozen at the bottom of the cooler, again demonstrating that the bottom of the cooler is not as insulated as it should be. In any event, there’s enough clear ice below the tray to give us clear ice cubes. (Notice some air bubbles just below the tray.)

    Ever being an engineer, I wondered what the “optimal” (minimal) amount of water was for this process. I kept shortening the cup until I got to one inch. Since I knew a half inch was too little, it seems that one inch is optimal. One inch seems to be about the same distance in the photo above too.

    I can now make perfect clear ice cubes repeatably in less than 24 hours without a lot of waste.

    —-

    Thanks Mike! 

    Read about all the ice experients on Alcademics by following this link. 


  • Making a Clear Ice Block from the Bottom Up

    6a00e553b3da2088340120a77d8b26970bNearly five years ago I figured out a method to make clear ice blocks in a picnic cooler in what we now call the Directional Freezing or Cooler Method. It works from the top-down. Now a reader has figured out a moderately easy way to freeze in a cooler from the bottom-up. 

    An index to all of the ice experiments on Alcademics is here.

    In the top-down method, one simply fills an insulated cooler with water and leaves the top off. The water freezes only from the top down, and all the trapped air and impurities are pushed to the bottom, where a cloudy 25% or so will form if you let it freeze that long. 

    Freezing From The Bottom-Up

    Commercial ice machines like the Clinebell freeze blocks of clear ice by freezing from a cold plate on the bottom, while a water pump near the surface keeps water circulating (thus preventing ice from forming on the surface). 

    Reader Nome Park wrote me to tell me about a method he developed that sort of combines these two methods for the home user, producing a mini-Clinebell-type block. 

    The cooler is insulated on all sides except for the bottom, and a small aquarium pump is used to keep water circulating at the top. 


    Noname-2

    The white area on the bottom is the interior of the cooler with the foam/plastic cut off so it's no longer insulated on the bottom.


    Requires:

    • A big freezer, like a horizontal freezer.
    • A larger cooler. He uses a Coleman 20-can Party Stacker cooler, which is taller vertically and thus best for freezing bottom-up
    • A small aquaium pump

    Method:

    1. Cut the cooler bottom outside layers off a few inches up from the bottom. Park did this using a Dremmel tool and a knife. *Important* You only want to cut off the outer plastic and the foam insulation. Do not cut out the interior plastic otherwise it will not hold water. 

    IMG_2657

    2. Insulate the top lid. Park made a 2.5-inch thick piece of foam that fits snuggly inside the cooler (since the lids on these coolers tend not to be insulated. (Pump is just there for scale. It is not attached.)

    Noname-3

    3. Fill the cooler with water up to where the foam will hit it from the top. 

    4. Hang the (unused for your fish tank) aquarium pump from the top, so that it's just beneath the surface of the water. Put the foam piece on top and the lid on that. Park cut a little section out for the pump power cord. 

    Noname-4

    5. Turn the pump on and wait for it to freeze. In Park's freezer, it takes  2 days and 2 hours to freeze (50 hours) into a block that isn't all the way frozen. If it goes too long (t 72 hours or so) the pump will freeze into the block and probably break.

    6. Remove the cooler from the freezer, turn off the cord, turn the cooler upside-down, and wait for the block to slide out. (An hour is about normal). Now you're ready to cut it up. 

    Noname-5


    I asked Park if he tried this without the pump just to see what happens, but he had not tried it, basing his system on the Clinebell. 

    So, for you ambitious sorts with large freezers, this might be a way to make larger blocks than with the small cooler at home. 

    Thank you much to reader Nome Park who not only took the time to perfect this method but also to send me detailed description and pictures. 


  • Fact-Checking the Clear Ice Balls Method

    Recently I posted a method of making perfectly clear ice balls using an insulated mug, which was sent in from Alcademics readers. 

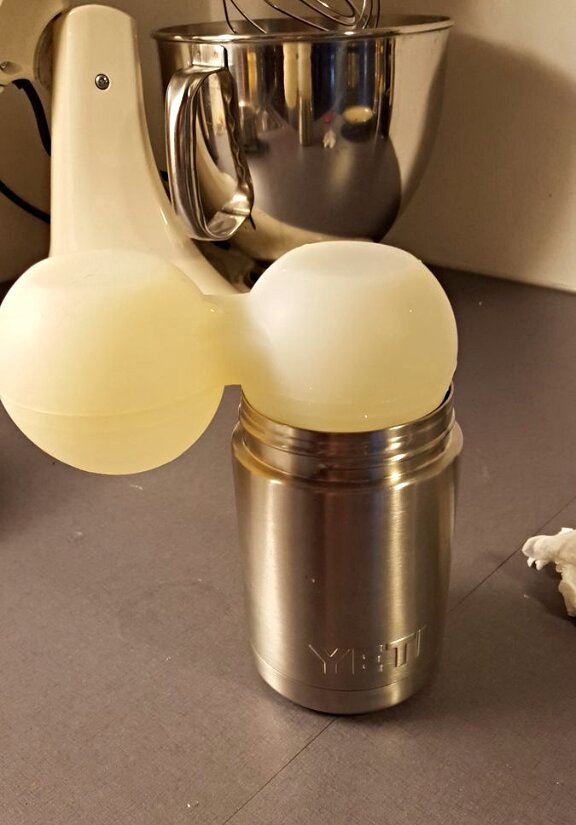
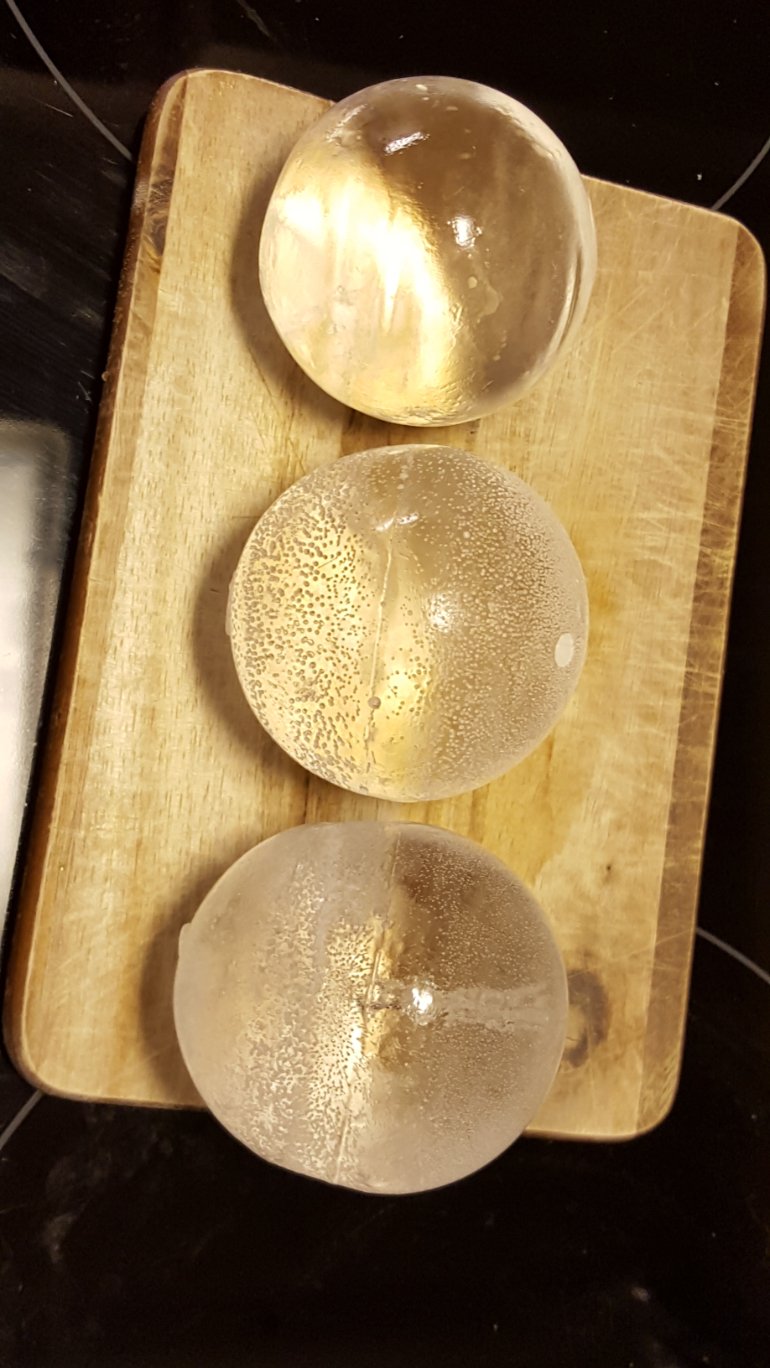
    The physics of the thing made perfect sense but I hadn't actually tried it myself at the time. This post is just to say that I use this method now and make nice round ice. Lots and lots of it.

    IMG_6447

    The ice in the picture above isn't cloudy; just some of it is frosty on the outside. 

    I use this stainless steel tumbler a small ice ball mold that it sits in. Easy. 

    An index of all the ice experiments on Alcademics is here.


  • Make Perfectly Clear Ice Balls Using Insulated Mugs

    You can use the Cooler/Directional Freezing method to make blocks of perfectly clear ice. But those are big blocks and many people want to make clear ice balls. 

    Typical ice ball molds make ice that is cloudy in the middle. One reader developed a method to take advantage of directional freezing but it involves using a big pot of water so it's not space-efficient.

    Photo 5The natural next step was to use directional freezing in a small container with an ice ball mold sitting on top.

    Thus, the water in the ice ball freezes first, then the cloudy parts are pushed into the water in the insulated container below it, which continues to freeze from the top down. All the water in the ice ball should remain clear. 

    I attempted this, ordering insulated mugs and coozies online, but never found one that was the right size. Thankfully, two Alcademics readers were able to find insulated containers that are just right- and send me pictures and answer all my questions. Awesomeness. 


    Stainless Steel Tumbler

    The one that seems easiest was sent in by reader Doug Elder. He found this stainless steel tumbler that a single ice ball mold sits in. 

    Photo 2-2

    He says: 

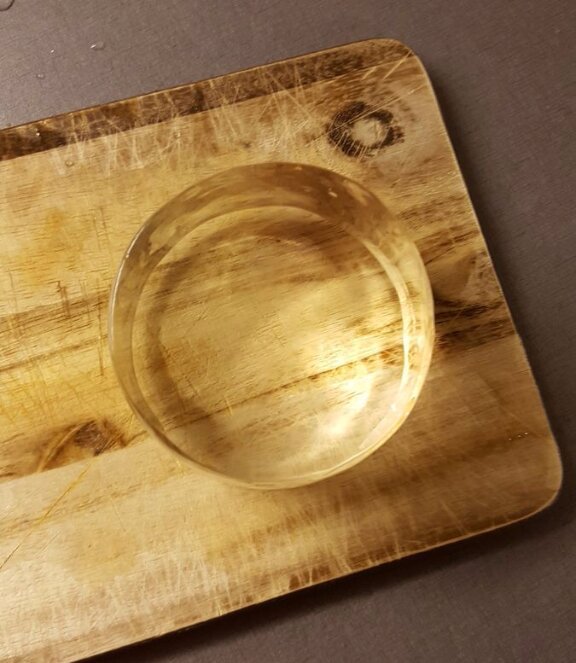
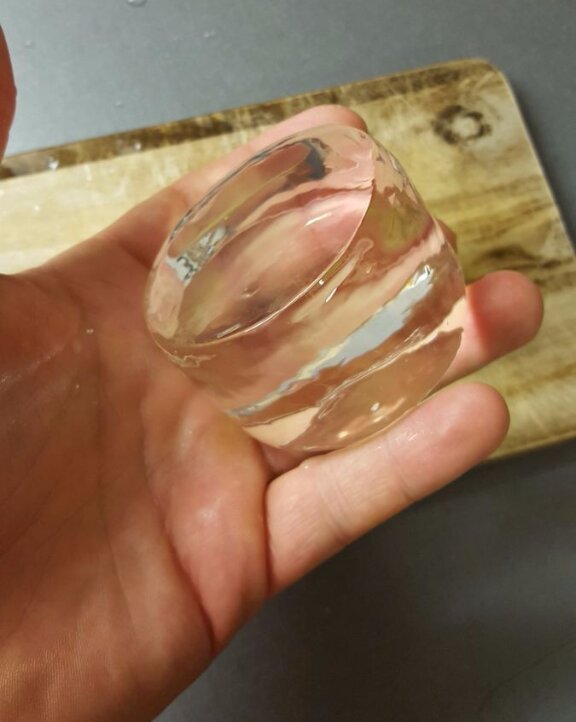
    •  The hole in the mold must be pointed down at an angle. With the hole straight down, you end up with a clear ice "egg" instead.
    •  I fill the cups to the brim and gently wedge the molds into the cup with a finger over the hole until the hole is under the water. Do this over the sink and the overflow runs down the drain. I keep as much water in the cup as possible, so there is water visible around the edge of the mold. 
    • There is no problem getting the mold out of the cup. I usually give it 24 hours to freeze and there will be an inch or two usable puck of clear ice under the mold. I'll run a little tap water on the outside of the cup and around the inside edge to loosen up the belt of ice holding the mold in the cup. This doesn't crack the balls. 
    •  At 12 or 13 hours the sphere is only 80% frozen, but probably more clear than at the 24 hour point. 

     Update: In this post, I attempted and was successful at replicating this method. It works great!

    Balls


    Update: Mike Laine (see in comments below) found a smaller insulated mug to use: the Funtainer. This takes up less space in the freezer than the full-sized mug. He also poked a hole in the bottom of the ice ball mold for easier filling. See his post here.


    Dm


    Plastic Mug with a Stand

    Reader James Carroll found another way that works. He found a plastic coffee mug. The ice ball mold sits on a smaller container inside the mug. 

    He found the plastic, 16-ounce mug at Walmart, but it is also here on the manufacturers website. The smaller container is a small Rubbermaid container that fits inside it. 

    IMG-20140519-00009
    IMG-20140519-00009

    Instructions: 

    • Put container in mug.  Fill mug and container with water up to the brim of mug.
    • Fill silicone sphere mold completely with water. Put your index finger on the fill hole of the mold, turn upside down, and plunge into the mug.  Do this in the sink since the water in the mug will overflow.
    • So now you have the filled sphere mold sitting upside down on the filled container, inside the filled mug. If you freeze it like this, you will wind up with a clear egg.  Because the freezing water around the sides of the mold will squeeze the mold out of shape.
    • To get an ice sphere, use a straw to suck out the water in the mug until the water level in the mug is just below the rim of the container.
    • Takes about 20-24 hours to fully freeze.  You also get a cloudy big ice cube from the container.

    IMG-20140523-00020

    Thank you so much Alcademics readers James Carroll and Doug Elder for being more diligent in solving the clear ice ball problem than I was! 

    An index of all the ice experiments including best successes and many failures is here

  • Here I Am Talking About Ice Again

    Ice story cheersIn the new issue of Cheers Magazine, I was interviewed by writer Kelly Magyarics about ice.

    She covered topics relevant to bartenders, such as machines, molds, making ice in industrial quantities, the Aviary's ice program, etc. 

    You can read the online magazine (page 32) at this link.


  • How to Carve Up an Ice Block, Tools to Use, and Making Clear Ice at Home

    There is a lot of ice awesomeness on one page of Saveur magazine's website. 

    In the June/July Drink insert in the magazine I wrote a story on how to break down an ice block into big cubes, spheres, spears, cobbler, shaved, crushed, and other ice shapes. 

    Feature_Super-Cool_Ice-2_1224x533

    Instructions are on the page, along with a very brief history of the ice trade. 

    To accompany the story, Richard Boccato from Hundredweight Ice in New York went to the Saveur studio and broke down an ice block.

    The pieces of ice he made are shown in the images above (and there are a lot more on the site). Saveur also made a lovely video of the process. Here's a still from the video:

    Ice video

    You can see his techniques and tools in the video, plus it's just pretty. The video is at the bottom of this page


    Then, on another page I suggest some ice tools to buy. The chisel was Boccato's suggestion. I'm getting used to using it still, but it makes sense. 

    Sidebar_ice_tools_936x468


    Finally, I also describe how to make clear ice at home.

    Of course, you've probably already read how to do that here on Alcademics


    Make clear

    So that should satisfy your ice needs for today. 


  • Ice Trends in Drinks International Magazine

    The April issue of Drinks International magazine, which I just received in the mail, contains a series of articles about trends at the World's 50 Best Bars

    I wrote the one about ice, which should come as a surprise to nobody at this point. 


    • Photo 2
    • Photo (2)
    Photo (2)


    Unfortunately the story isn't online yet, so I just wanted to alert subscribers to look for the ice story on page 15 of the insert. 

    If the story appears online, I'll be sure to update this post with the link.